55
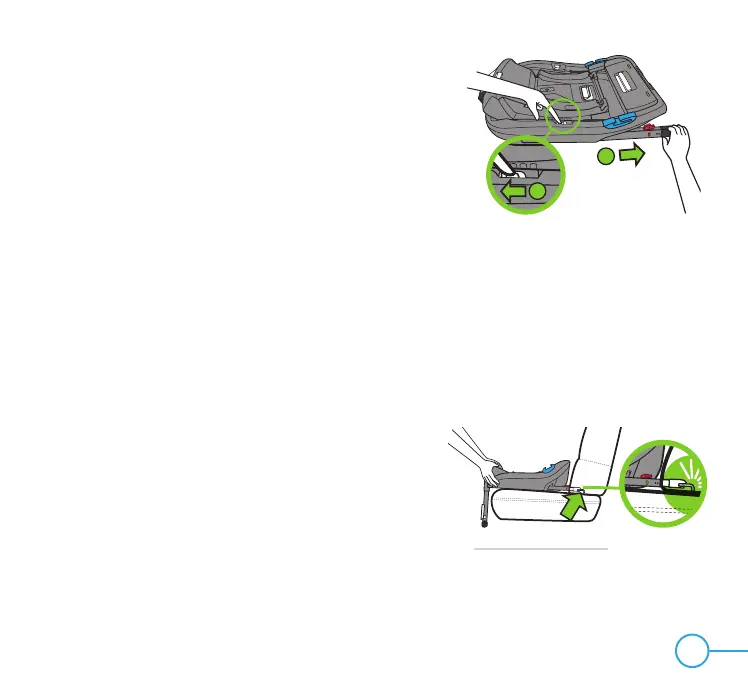
Step 5
Extend LATCH Connectors to the fully extended position
as shown in Figure 42:
• One hand: Press and hold LATCH Adjustment Button (1).
• Other hand: Grasp the end of the LATCH Connector
located on the same side of the Base and pull out
until it stops (2), and then release LATCH Adjustment
Button, to lock into position.
• Repeat on opposite side for other LATCH Connector.
NOTE: If LATCH Connectors are not in their fully
extended and locked position, they will be free to slide
back into the Base during the installation process, and
you will not be able to install the Base properly.
Step 6
Position the Base on the vehicle seat with LATCH
Connectors aligned with the vehicle LATCH lower
anchors, and with the Load Leg positioned towards
the floor, as shown in Figure 43.
Push the Base into the back of the vehicle seat until
both LATCH connectors lock onto the vehicle LATCH
lower anchors, as shown in Figure 43.
Figure 42
1
2
3
4
5
6
7
7
6
5
4
3
2
1
1
2
Figure 43