OPERATING MANUAL
800.749.2761 www.coachcomm.com
12
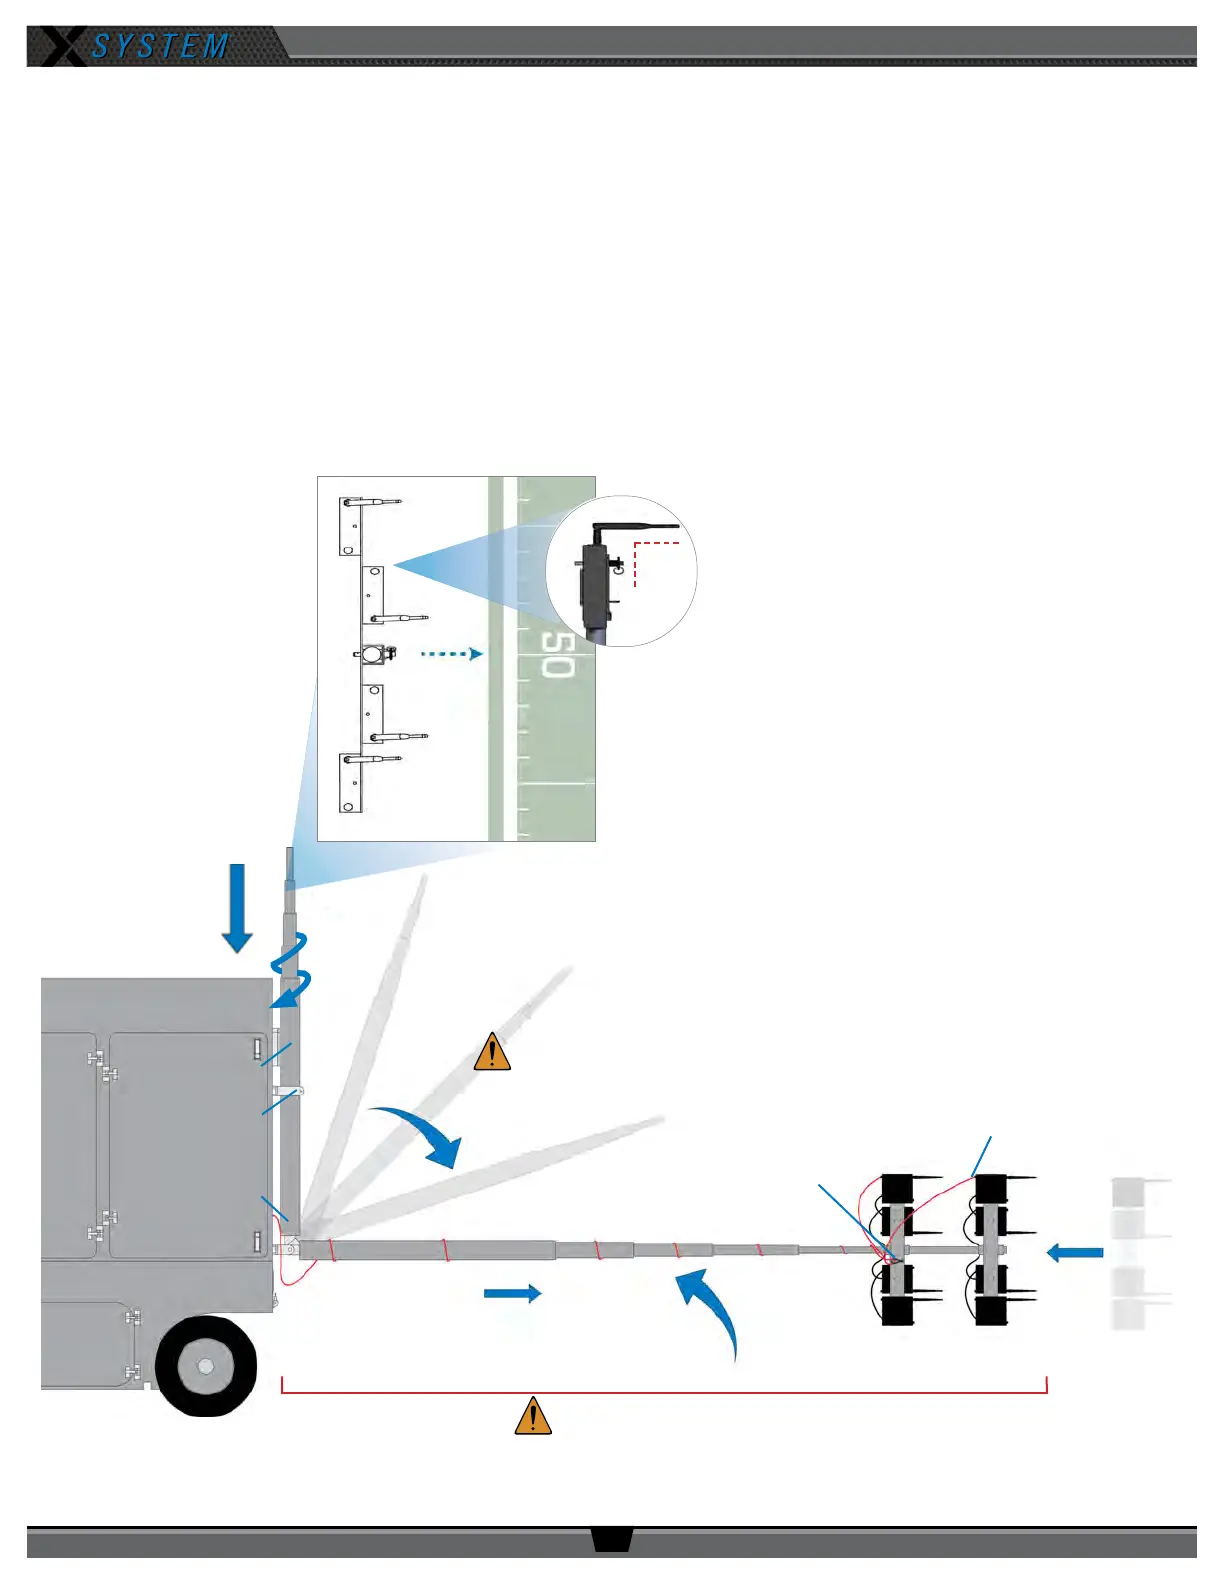
3. Mount RTs and secure mast.
Note: The following steps are referenced in Figure 11 and should be performed with at least two people.
3a. Mount the RT mounting bracket(s) to the top of the mast using the provided pins.
3b. Connect the red RT cable to the rst RT on the top bracket.
Note: If using a second RT bracket, also connect the blue RT cable to the rst RT on that bracket.
3c. Attach the cable’s strain relief to the eye bolt on the mounting bracket.
3d. Bend the antennas so they are parallel to the ground (90° angle between the antenna and the RT) and point their
tips toward the opposing team’s RT mast.
3e. Carefully walk the mast up until the receiving tube is upright and ush with the Cart, then secure it with pins 2
and 3 (previously removed in 2c). (See Figure 90 on page 65 for a detailed drawing of these pin locations.)
(2d.) Extend mast.
(3c.) Attach cable’s
strain relief.
(3e.) Raise
and secure.
Allow at least 20 feet for clearance.
(3a.) Mount the RT
bracket(s).
(3b.) Connect RT cable.
(2c.) Secure tube while
removing Pins 2 & 3.
Lower to ground.
(2b.) Align mast
and secure with
Pin 1 at bottom of
tube.
(2a.) Insert
mast.
Pins 2 & 3
Pin 1
90o
Align mast so RT bracket(s)
will be parallel to eld.
Pin 4
Figure 11: Sideline Cart RT Mast Setup