DVR Menu
4.2.6 Network
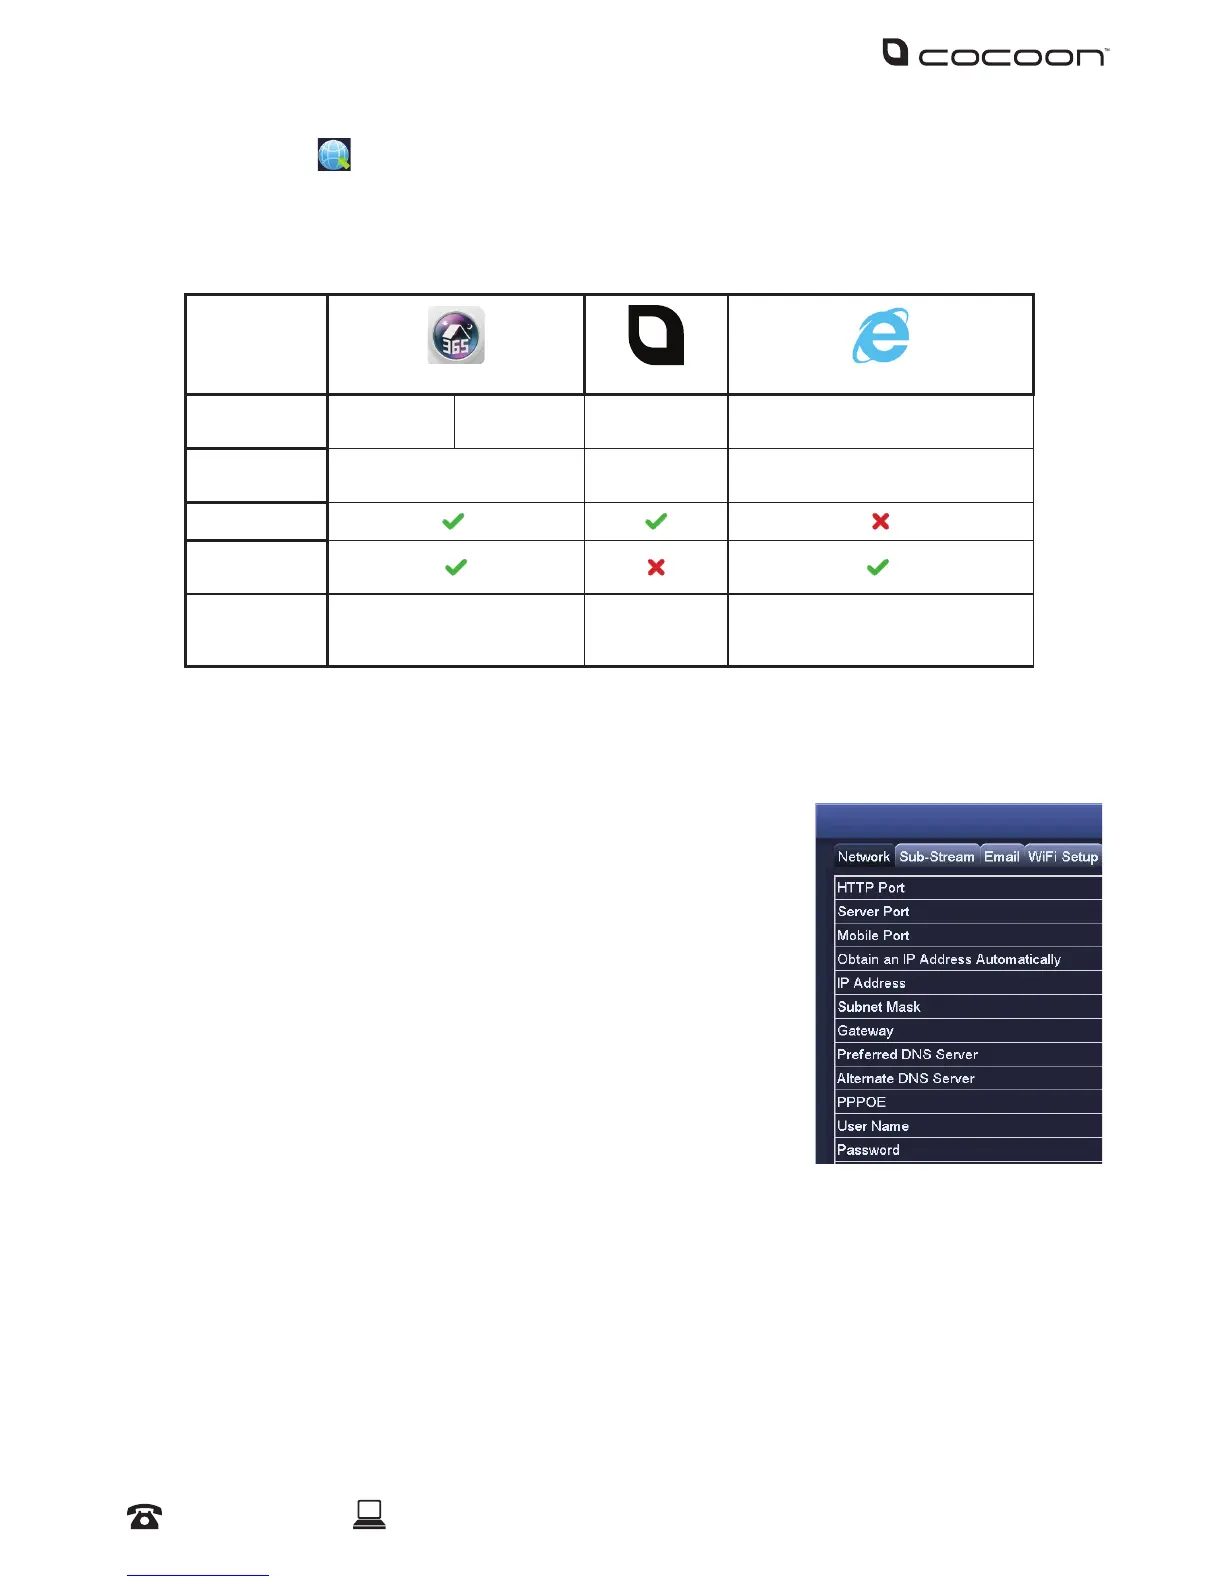
Refer to page 28 for networking steps. With peer to peer (P2P) networking, it’s now even easier to
network your DVR for remote viewing. Below is a table showing available networking methods.
Simply select the most applicable for your needs, and follow the setup procedure.
365 Secu
iVSS
Internet Explorer
OS
Compatibility
Android 2.3+ iOS 6.0+ Windows XP + Windows XP +
Setup
Diculty
Easy Moderate Advanced
P2P Setup
1
Remote
Viewing
2
Setup
Procedure
5. Using 365 Security Mobile
App
6. Using DVR
with iVSS PC
Software
7. Networking for Internet Explorer
1
QR Code allows for even easier setup
2
Advanced networking & port forwarding required
Network:
Congure your network settings here.
• HTTP Port: Default value is 80
• Server Port: Default value is 5000
• Mobile Port: Default value is 5001
• Obtain an IP Address Automatically: To obtain the IP function
automatically
• IP Address: To set the IP address of the device
• Subnet Mask: To set the subnet mask of the device
• Gateway: To set the default gateway of the DVR
• Preferred DNS Server: This address is provided by your network
operator and must be lled in when using mobile monitoring
• Alternate DNS Server: This address is provided by your network
operator
• PPPOE: When enabled, the DVR will automatically establish a network connection in the form
of PPPOE, then the IP address can be seen through Main Menu > View Information > Network
Status
• Username: For PPPOE mode, enter the ISP (Internet Service Provider)
• Password: For PPPOE mode, set password
• Test: Check whether the entered IP address and PPPOE information are valid or not