CR2 User’s Manual Draft_022803_AS - 12
CR2 User’s Manual Draft_022803_AS - 13
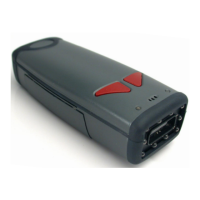
2.2 - Installation Guide - RS-232 Interface
To connect the CR2 to your host computer via RS-232 interface:
1. Make sure the RS-232 cable is sufciently
attached to your CR2 unit (gure 2.4).
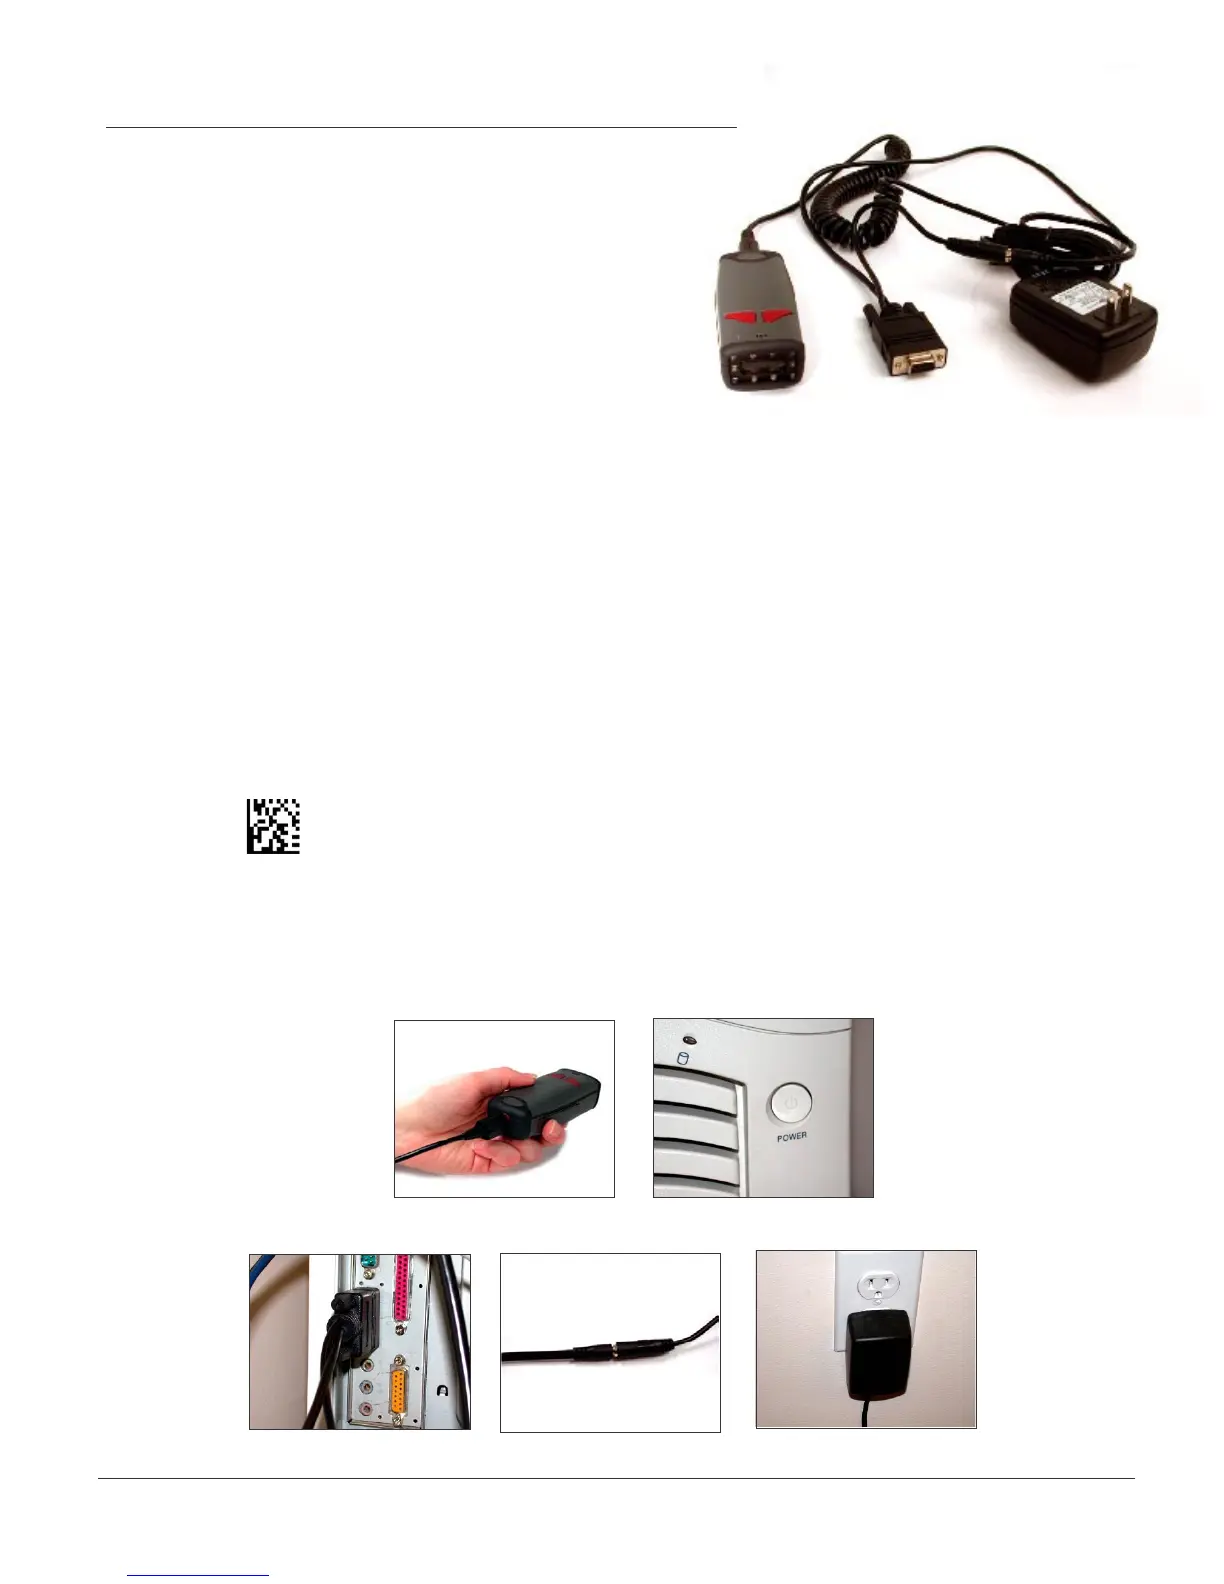
2. Power off your host computer (gure 2.5).
3. Connect the RS-232 interface cable to your
host computer (gure 2.6). If you are unsure
of the proper location to connect the RS-232
cable please consult the manual of your host computer.
4. The RS-232 interface does require additional power. The RS-232 interface should have
come with a power supply. Plug the power supply adapter into the RS-232 interface cable
(gure 2.7) and then plug the power adapter into a wall socket (gure 2.8). If you are using
the 1300 mA or 1800 mA battery for batch mode, the CR2 will recharge the battery
whenever the unit is a attached to a RS-232 cable that is plugged into a wall socket.
5. Power up the host.
6. The CR2 will power on automatically.
7. Scan the following code to set reader into RS-232 / Serial communication mode.
Note: You may also scan the code on page 47 of the CR2 User’s Manual.
8. Your CR2 unit should be ready for use. Open the application you wish to send data
and begin scanning.
Figure 2.6
Figure 2.7
Figure 2.8
Figure 2.4
Figure 2.5