3-1
Chapter 3: Installtion
Chapter 3: Installation
Connecting the Cables
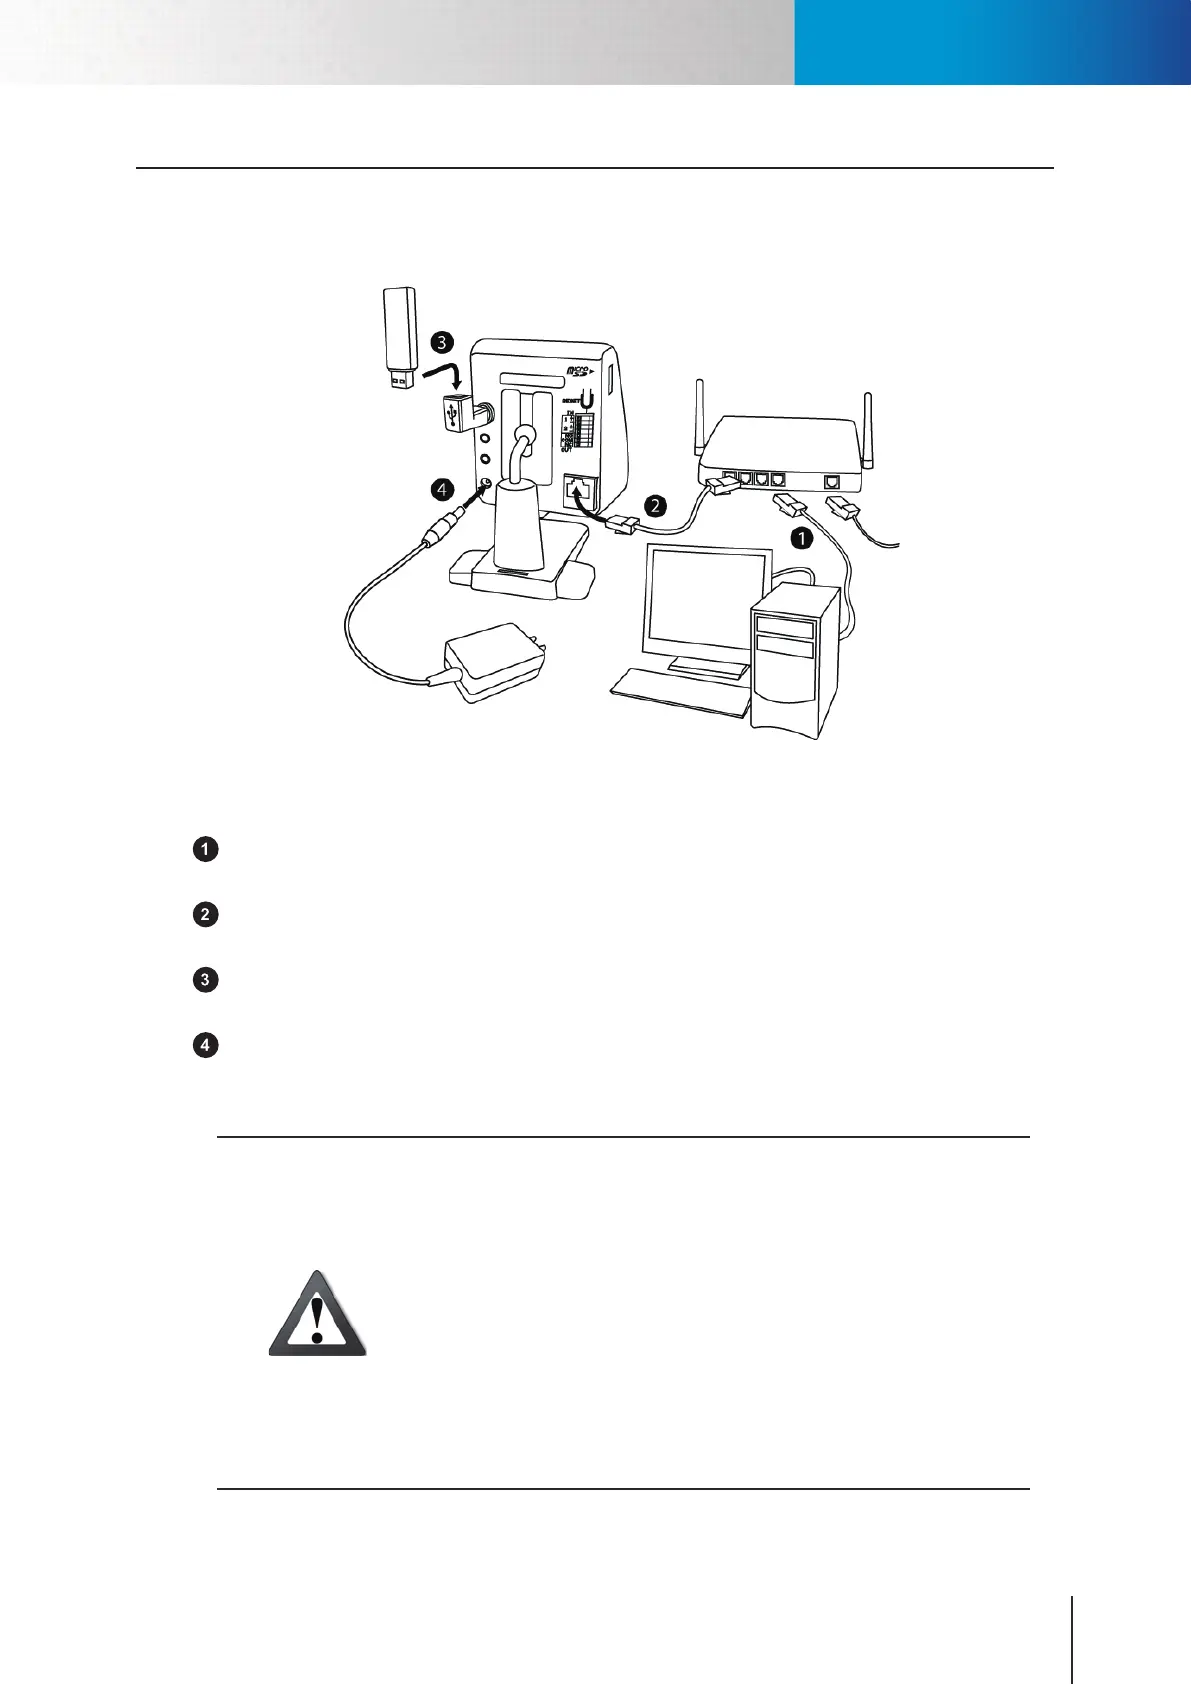
The picture below shows the basic connection of your IP camera.
Figure 3-1. Connection of cables
LAN cable from PC to hub/router: If your LAN cable from PC has been connected to the Cable/ADSL
modem, please re-connect it to the Ethernet port of your hub/router.
Ethernet port on camera: Use the bundled RJ-45 LAN cable to connect the Ethernet port of the IP
camera to the Ethernet port of your hub/router.
Wireless adaptor (Optional accessory): If you have purchased the Compro USB wireless adaptor for
wireless connection, please plug it into the USB port of IP camera for wireless reception.
Power: Attach the power adaptor to the camera’s power connector and connect the power plug to a
power outlet.
Caution!
• ThewirelessconnectionportonlysupportstheComprowirelessadaptors
;pleasedonotuseotherUSBadaptorsonComproIPcamera.Shouldyou
remove the wireless adaptor during camera operation, you need to power
o the camera rst before re-plugging it.
• Whenyouunplugthepowerplugfromthewalloutletwhilethecamerais
still in operation, wait for 4 seconds before plugging the power plug back
in the wall outlet. And avoid too frequent plugging and unplugging of
power cable.
• Ifthepowercableandthenetworkcableconnectedtothecameraarenot
securely fastened, it could lead to unstable connection.
Connecting the Cables