6-14 Recording History & Date Setup & Multi-Camera
Compro IP55 / 60 / 70 Network Camera
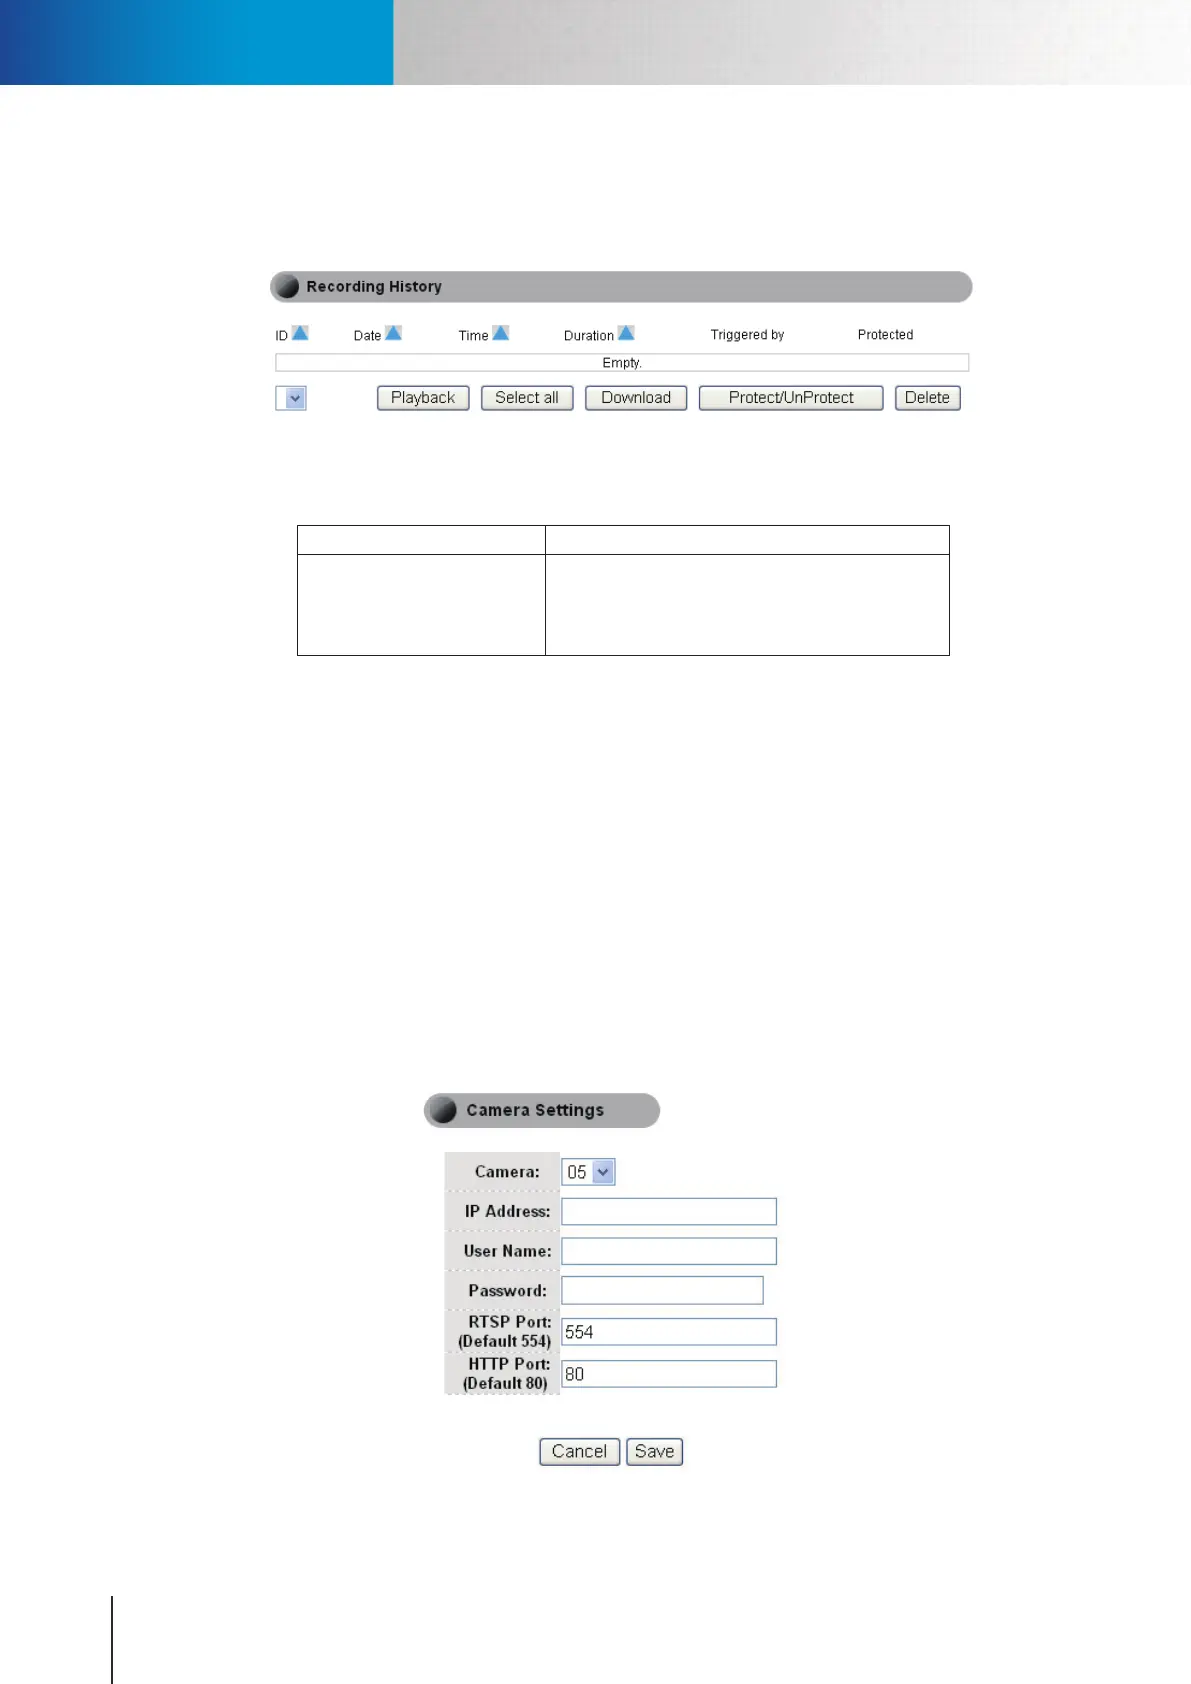
Recording History
Recording History lets you manage the video clips that have been recorded by the camera. You will also see a
playback menu as shown below.
Figure 6-12. Recording history
To play a video clip, rst select a video clip on the list and press [Playback]. (File format: AVI)
Function Key Description
Playback
Download
Protect/Unprotect
Select All / Deselect / Delete
Click to download then playback
Click to download the video clip on your PC
Selected clip(s) will never be erased
File management
Table 6-4. Management of recording history
Date Setup
Here displays the current time information stored in your IP camera, and you can set up the Time Zone for
your current region or country, get time information from NTP server, and synchronize the clock of your
camera system with your PC or manually adjust system clock.
Multi-Camera
Here you can add, modify, or delete additional IP cameras on your camera list, and later switch between
camera channels listed here on LiveView screen. When you add a new IP camera, you need to input the
required information into the IP address, username, and password field (port numbers may be required if
they have been dierent). After pressing the [Save] button, you will see the status of the cameras on the list.
To modify an existing camera, simply choose a camera from the list and click [Modify].
Figure 6-13. Multi-Camera setting