Repairs
Cornelius Deutschland GmbH
Document no. TD0003100
Version 18/03/2019, Index 0
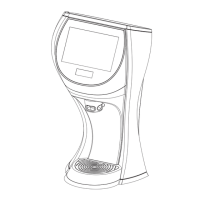
Installation and service manual Tower
Nueva
22
9. Connect the electrical cables (cable no. 220112125) (Fig. 35/2) of the LED strip to the voltage transformer (Fig. 35/1).
Finishing tasks
1. Install the lighting kit; see chapter 7.7.
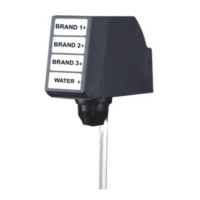
7.9 Replacing the key switch
7.10 Replacing the soda dispenser (optional)
NOTICE!
Multiple soda dispenser variants are available for the unit. Replacing the soda dispenser is identical for all vari-
ants and is described here using an example.
4. Remove the voltage transformer (Fig. 37/2) from the retaining plate (Fig. 37/1).
5. Apply Velcro tape to the new voltage transformer (Fig. 37/2).
6. Position the voltage transformer (Fig. 37/2) on the retaining plate (Fig. 37/1).
7. Press the voltage transformer (Fig. 37/2) into the retaining plate (Fig. 37/1).
8. Apply the new LED strip (Fig. 36/2) to the adhesive area on the retaining plate (Fig. 36/1).
Fig. 37
Prerequisites References
The hood has been removed. see chapter 7.6.
Spare parts ID/reference Qty/
amount
Comment
Key switch with electrical cable 070000005 1
1. Disconnect the electrical cable (Fig. 38/2) of the key switch (Fig. 38/1).
2. Remove the nut (Fig. 38/3).
3. Remove the key switch (Fig. 38/1)
Finishing tasks
1. Install the hood; see chapter 7.6.
Fig. 38
Prerequisites References
The lighting kit has been removed. see chapter 7.7
The dispensing valves have been removed. See dispensing valve documentation
Spare parts ID/reference Qty/
amount
Comment
Soda dispenser 220105610 1 5 dispensing valves
Soda dispenser 220104849 1 6 dispensing valves
Soda dispenser 220105611 1 8 dispensing valves
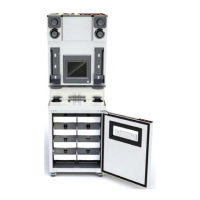
1. Remove the clamps (Fig. 39/1) used to attach the tubes (Fig. 39/4) to the soda dispenser (Fig.
39/2).
2. Lift and remove the soda dispenser (Fig. 39/2) from the dispensing valve support (Fig. 39/3)
and from the unit.
3. Position the new soda dispenser (Fig. 39/2) within the dispensing valve support (Fig. 39/3) and
the unit.
4. Attach the tubes (Fig. 39/4) to the soda dispenser (Fig. 39/2) using the clamps (Fig. 39/1).
Finishing tasks
1. Install the lighting kit; see chapter 7.7.
2. Mount the dispensing valves; see dispensing valve documentation.
Fig. 39