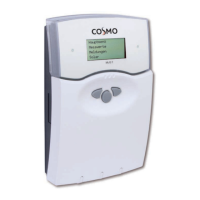
Do you have a question about the Cosmo Multi 2 and is the answer not in the manual?
Guidance on correct product use and adherence to regulations to prevent hazards.
Key safety instructions to avoid danger to people and property.
Details on housing, dimensions, power, switching capacity, and operating parameters.
Information on system compatibility, sensors, relays, and operational capabilities.
Alerts regarding electrostatic discharge and high-voltage components.
Step-by-step guide for physically installing the controller unit.
Critical warnings about electric shock and handling live parts during installation.
Detailed guide to connecting sensors, relays, power, and communication interfaces.
Precautions for preventing electrostatic discharge and electric shock during setup.
Details on connecting actuators like pumps and valves to the controller's relays.
Important notes on connecting high-efficiency pumps and minimum pump speed.
Connecting external modules via the VBus® data transfer interface.
Guide to connecting various sensor types to the controller's input terminals.
Instructions for connecting the controller to the mains power supply safely.
Details on using PWM outputs for adjusting HE pump speed.
Explanation of the controller's buttons for menu navigation and value adjustment.
Meaning of the red/green control lamp signals for operational status.
Description of the controller's menu hierarchy and navigation options.
Explanation of user codes for accessing different function levels.
Detailed breakdown of menu items and their relationships.
Steps for initial setup and configuration of the controller.
Overview of the 7 pre-programmed basic solar systems and their variants.
Illustrations of possible hydraulic variants for systems starting from System 2.
Warning that selecting a new system resets previous adjustments to factory settings.
Details on using function blocks for custom configurations and controlling devices.
Illustrations of how function blocks are applied in specific scenarios.
Configuration for using a heat source with thermostat functions.
Setup for controlling a circulation pump using timer and thermostat functions.
Comprehensive guide for configuring all controller settings and functions.
Detailed sensor and relay assignments for System 1.
Sensor and relay assignments for System 2, Variant 2.
Sensor and relay assignments for System 3, Variant 1.
Sensor and relay assignments for System 3, Variant 2.
Sensor and relay assignments for System 3, Variant 3.
Sensor and relay assignments for System 4, Variant 1.
Sensor and relay assignments for System 4, Variant 2.
Sensor and relay assignments for System 4, Variant 3.
Sensor and relay assignments for System 4, Variant 4.
Sensor and relay assignments for System 5, Variant 1.
Sensor and relay assignments for System 5, Variant 2.
Sensor and relay assignments for System 6, Variant 1.
Sensor and relay assignments for System 6, Variant 2.
Sensor and relay assignments for System 6, Variant 3.
Sensor and relay assignments for System 7, Variant 1.
Sensor and relay assignments for System 7, Variant 2.
Definitions for sensor and relay designations used in allocation tables.
Setting the basic solar system and hydraulic variants.
Option to load pre-programmed solar schemes as an alternative.
Definitions for relay designations used in function and option tables.
Enabling and configuring the bypass function for store loading.
Choosing between valve or pump variants for the bypass system.
Selecting the sensor used for bypass function monitoring.
Configuration for linking loading circuits separated by an external heat exchanger.
Function to compensate for delayed temperature measurement in tube collectors.
Diverting surplus collector energy to prevent overheating.
Cooling the collector via heat transfer to the next free store.
Dissipating energy supplied by collector cooling.
Managing system temperatures and thermal load by reducing surplus energy.
Protecting the loading circuit against freezing or coagulation.
Controlling pump speed based on collector temperature rather than temperature difference.
Activating a relay in parallel with the solar circuit pump.
Operating the collector circuit when irradiation exceeds a set value.
Setting the minimum temperature required for the solar pump to switch on.
Configuring switch-on/off differences and setpoint differences for store loading.
Setting maximum store temperature limits and emergency shutdown conditions.
Managing loading order in multi-store systems based on priority and sequence.
Recording and resetting values like maximum temperatures and operating hours.
Configuring automatic afterheating for legionella control.
Setting switch-on/off levels and reference sensors for store zone afterheating.
Activating and configuring the return mixing station for preheating.
Controlling return preheating based on set temperature difference.
Calculating flow temperature based on outdoor temp and heating curve.
Adjusting time frames for night correction or RMS off operation.
Details on available function blocks (thermostat, timer, differential) for custom configurations.
How function blocks are assigned to relays and how sensors can be allocated.
Setting switch-on/off temperatures and reference sensors for thermostat functions.
Setting switch-on/off temperature differences and reference sensors for AT functions.
Configuring time frames for activating heating circuit functions.
Overview of controlling up to 4 heating circuits, including internal and external modules.
Displaying store temperatures and configuring DHW afterheating.
Adjusting heating circuit set flow temperature for night setback and day correction.
Setting max flow temp and adjusting the heating curve for building load.
Controlling the mixing valve position based on flow and set temperatures.
Switching off the heating circuit when outdoor temperature exceeds a set value.
Determining whether day or night correction is used for set flow temperature.
Allocating the outdoor temperature sensor for heating circuit control.
Setting afterheating types, temperature differentials, and reference sensors.
Selecting reference sensors for heating circuit and store-dependent afterheating.
Using afterheating function to heat the DHW store.
Prioritizing DHW heating over heating circuit afterheating.
Systematically activating afterheating to prevent Legionella spread in DHW stores.
Allowing manual adjustment of the heating curve via remote control.
Time and temperature controlled screed drying in selectable heating circuits.
Activating additional external heating circuit modules for compensated circuits.
Overview of the integrated calorimeter and flowmeter for heat measurement.
Calculating heat quantity using temperature difference and user-entered flow rate.
Calculating heat quantity using temperature difference and flowmeter pulse rate.
Selecting antifreeze type and adjusting concentration for heat transfer fluid.
Configuring system warnings for 'AT too high' and 'Non-ret. valve'.
Detecting swapped flow/return pipes or misplaced collector sensors.
Activating the chimney sweeper function for flue gas measurement.
Adjusting CS-type and applying offsets to sensors for accurate readings.
Setting minimum pump speed for semiconductor relays and selecting signal types.
Graph illustrating PWM signal characteristics for solar pump speed control.
Graph illustrating PWM signal characteristics for heating pump speed control.
Steps for setting up and commissioning a solar high-efficiency pump with PWM speed control.
Setting ATset values based on max speed for multi-store systems.
Choosing the display language for the controller interface.
Troubleshooting sensor defects or broken/short-circuited cables.
Checking power supply and fuses when the controller lamp is off.
Procedure for replacing a defective controller fuse.
Diagnosing and resolving issues with air in the system or blocked collector circuits.
Troubleshooting small temperature differences or incorrect collector sensor positioning.
Addressing issues with large switch-on temperature differences or non-ideal sensor placement.
Diagnosing why stores lose heat overnight, checking insulation and circulation.
Resolving store heat loss due to warm water outflow configuration.
Troubleshooting steps for a solar circuit pump that is not working.
Checking for a stuck pump shaft or a defective pump.
Description of available PT1000 temperature sensors and their types.
Details on the V40 measuring instrument for detecting flow and heat quantity.
| Analog Sticks | 2 |
|---|---|
| Vibration Feedback | Yes |
| Connectivity | Bluetooth |
| Compatibility | PC, Android, iOS |
| Weight | 220g |