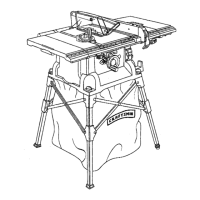
TO INSTALL DUST BAG
See Figure 12.
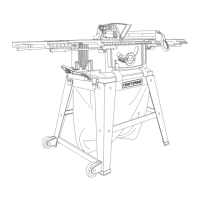
This dust bag hangs under the saw base. Hang the bag
by hook(ng the bag onto the hangers on the inside of the
spider leg stand.
NOTE: For efficient operation, empty the dust bag before
(tis half full This will permit better air flow through the
bag.
DUSTBAG
TO CHECK SAW BLADE INSTALLATION
See Figure 13.
Fig. 12
CAUTION." To work properly,' the saw blade teeth
must point down toward the front of the saw. Failure
to do so could cause damage to the saw blade, the
saw, or the workpiese.
• Lower the saw blade and remove the throat plate.
• Make sure the bevel locking lever is securely pushed
to the left. Raisethe saw blade to its full height by
turning the height/bevel adjusting handwheel oIock-
wise.
To loosen the blade:
• Using the smaller blade wrench, place the flat open
end on the flats on the arbor shaft.
• Insert the closed end of the larger blade wrench over
the hex nut. Holding both wrenches firmly, pull the
larger wrench forward to the front of the machine.
To tighten the blade:
• Using the smaller blade wrench, place the flat open
end into the flats on the arborshaft.
• Insert the closed end of the larger blade wrench over
the hex nut. Holding both wrenches firmly, push the
larger wrench to the back of the machine. Make sure
the blade nut is securely tightened. Do not overtighten,
NOTE: Arbor shaft has right hand threads.
• Reinstall the throat plate,
Check all clearances for free blade rotation. In cutting
operations, the scale will be set to the side of the blade
where the out will be measured and made.
SMALLBLADE
WRENCH
LARGE
BLADEWRENCH
Fig, 13
TO INSTALL BLADE GUARD ASSEMBLY
See Figures 14 - 15.
Proper installation of the blade guard assembly means
that the saw blade and spreader are in alignment-
ALWAYSalign the spreader to the saw blade pdor to turn-
ing on the table saw.
• Lower the blade,
• Remove the wing screw and washer from beneath the
mount(ng bracket in the back of the saw.
• Align the slots in the blade guard assembly base with
the wing screw ho]e underneath the mounting bracket.
• Secure the blade guard assembly in place ue(ng the
washer and wing screw. Tighten securely.
NOTE: Blade alignment with the spreader can be adjusted
for different blade widths. Refer to; To Check, and Align
the Spreader, Saw Blade, and Blade Guard Assembly.
Check the blade guard assembly for clearances and free
movement.
SLOTS
MOUNTING
WINGSCREW
17
Fig, 14
 Loading...
