31
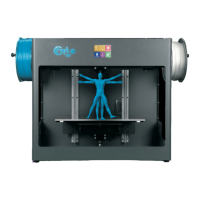
CraftBot 3
9. CLEANING AND MAINTENANCE
IMPORTANT!
Cleaning and lubrication should only be conducted while the extruder and built plate are cold. Please
allow the CraftBot 3D printer to cool down at least 30 minutes before cleaning or maintenance. It is
necessary to clean the printer after every 1000 hour. After every 1000 hour we need to replace any worn
the used parts on the printer. The printer will automatically send a warning to the user with a message
like the one in the picture.
CLEANING
Clean the metal housing of the CraftBot by wiping with a damp cloth.
Cleaning the build plate Remove the build plate by unscrewing the 2 white screws located in the front of
the plate. Clean the plate with window cleaner/ Acetone. Wipe clean with a dry cloth or paper towel.
LUBRICATING
The CraftBot printer should be lubricated at least once after every 50 hours of use or every 6 months.
depending on the working hours. Problems can occur and print quality can be lost if maintenance is
ignored.
Tools needed for lubrication:
• PTFE based spray lubricant or white lithium grease. make sure to have a thin straw on the
spray tin to reduce overspray, and spraying directly onto the desired parts.
• 2 separate lint-free rags or thicker stronger paper towels
• Personal protection such as gloves and safety glasses/goggles
• lighting to see the interior of the CraftBot correctly (lamp)
1. Move the build plate and the extruder to the „Home” position.
2. Once the extruder and bed are in the home position, turn the CraftBot printer o and unplug it
from the electrical outlet.
3. If you look beneath the build plate you will see three rods that run vertically in which the build
platform moves up and down on. The two outside rods are smooth and the center rod is
threaded. These three rods are known as the “Z-axis rods”.
4. Place a folded paper towel or a lint-free rag behind the center rod. This rag is used to protect
other areas of the printer from any overspray that may occur.
5. LUBRICATE ONLY THE PARTS RECOMMENDED IN THIS MANUAL!
6. Spray the threaded Z-axis rod at a relatively close distance to reduce overspray. Make sure the
lubricant reaches the inside of every thread (if using grease, spread with hand wearing gloves).
7. Make sure not to over lubricate, spray only the minimum required amount from top to bottom!
8. Do not spray the other two rods directly! Spray the Paper towels rst and wipe it onto the rods.