9
CraftBot 3
4. FIRST STEPS
4.1. SWITCHING ON THE APPLIANCE
• Switch on CraftBot by the ON/OFF button located
on the back part of the appliance.
• The LCD panel on the front will light up.
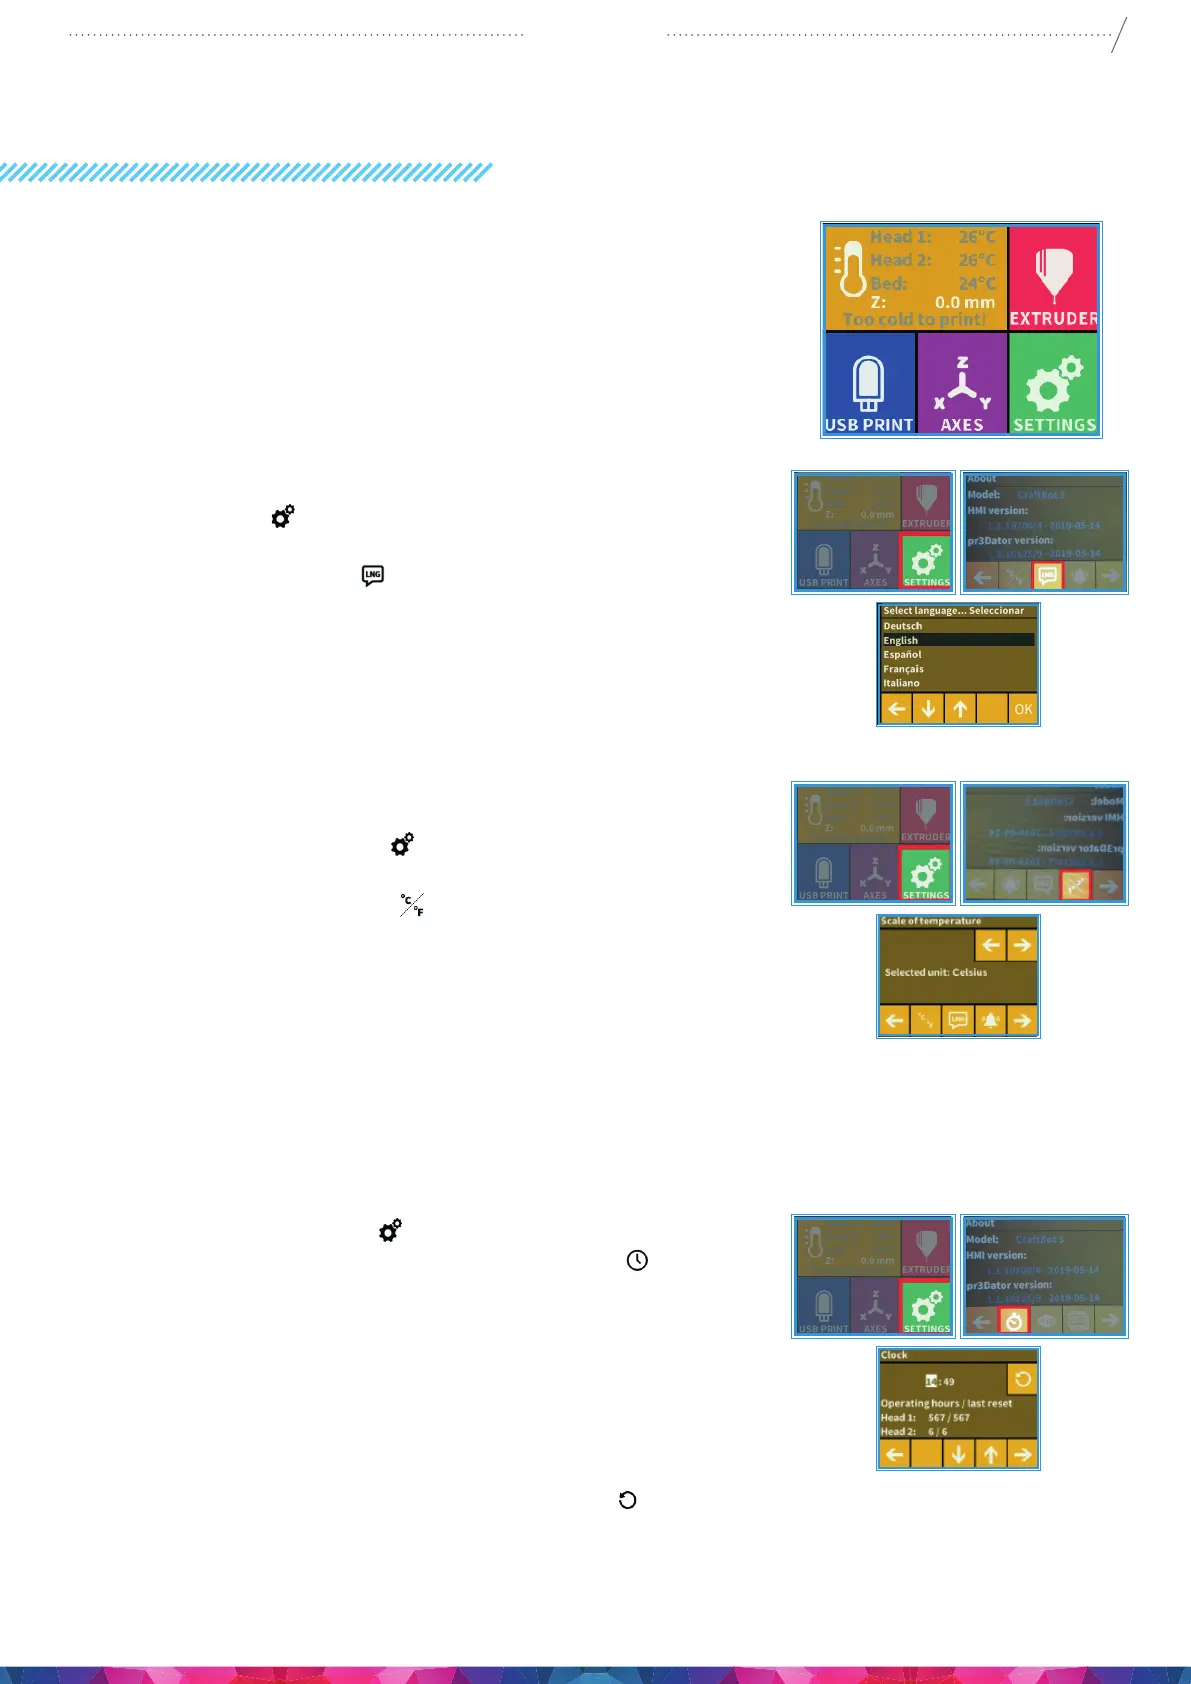
4.2. SETTING THE LANGUAGE
• Go to „Settings” on the LCD screen and go to page 2 using
the right arrow icon.
• Select the language icon .
• Select by scrolling to the desired language.
• Conrm your selection by using the OK icon.
• Use the left arrow at the bottom of the screen to get back
to the main menu.
4.3. SELECT THE HEAT MEASURE
Temperature can be displayed in Celsius or Fahrenheit.
• Select the Settings menu on the LCD screen and go
to page 2 using the right arrow icon.
• Select the temperature icon
• The unit can be changed by pressing the right or the left
arrows at the top of the screen.
• Use the left arrow at the bottom of the screen to get back
to the main menu.
4.4. SETTING THE CLOCK
You can set the time and reset the operating hour counter. This
function helps to track printing time between maintenance
sessions.
• Select the Settings menu on the LCD screen and go to
page 3. using the Right Arrow. Select the clock icon
• Set the time by using the Up and Down Arrows. To switch
between Minute and Hours just push pushing the Right
Arrow.
• Total operating hours are measured and cannot be reset
back to 0.
• The individual head counters at the bottom has 2 counters,
total working hours and / time between each maintenance
period, you can reset this by using the reset icon
button,
Top Right of the screen.