OPERATOR’S MANUAL
10
SECTION 1
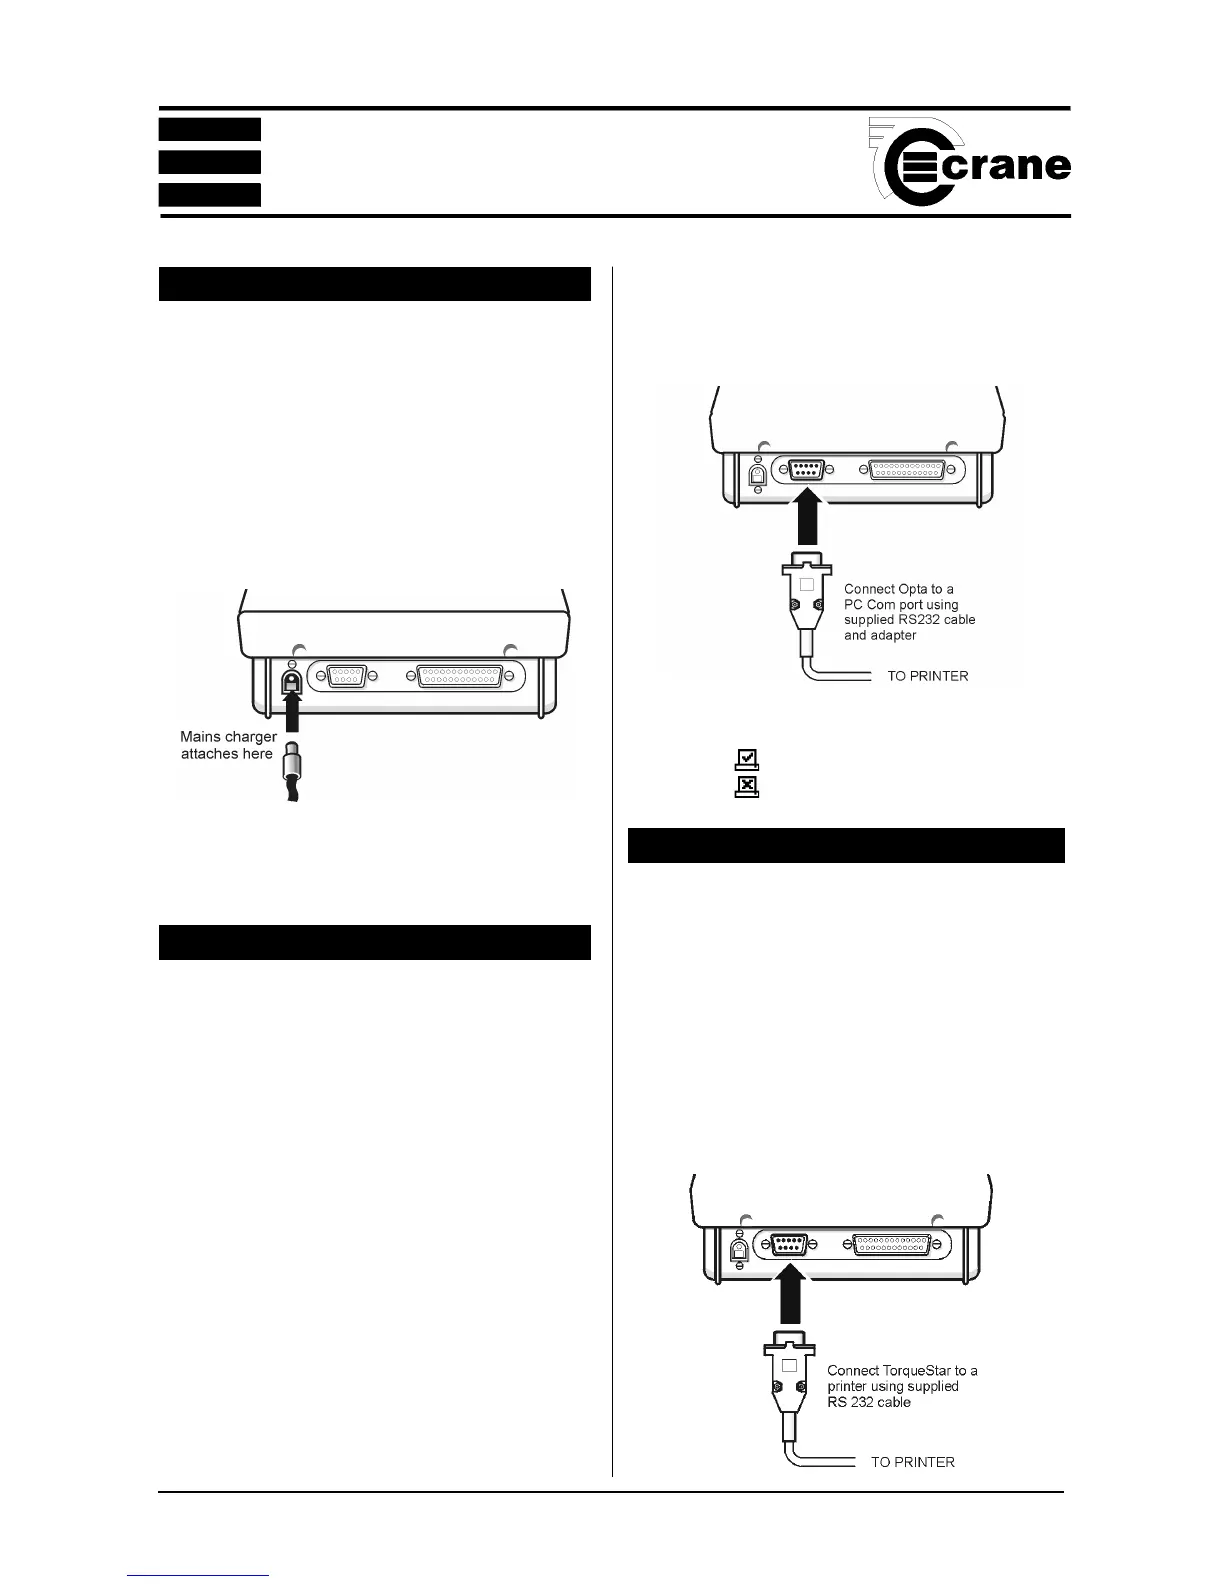
BATTERY CHARGING
The batteries in the TorqueStar unit are shipped fully
charged. In normal use with a transducer connected the
batteries have a life of at least 8 hours.
Connect the lead from the Mains adaptor/Charger to the
mains connector at the back of the TorqueStar Opta (see
below), and connect the mains adaptor to an AC mains
supply. The adaptor can be used for direct power from the
mains or to charge the internal battery. It has an automatic
cut-off to prevent overcharging.
With the unit switched off from a 10% charge state, the
batteries will fully discharge in 25-50 days. To prevent the
loss of all setup data, the unit has additional battery backup
for the internal memory.
ATTACHING A PC OR PRINTER
A PC may be connected to the Torquestar Opta using the
optional PC connection cable CBL-757-0-0-0-0. Attach one
end of the cable to the Torquestar Opta 9 way connector
as shown. The other end of the cable connects to the RS
232 COM Port on the PC or the 9 way end of a USB to
Serial convertor if one is being used. Do not connect a
USB to Serial convertor directly to the Torquestar Opta 9
way connector.
A Serial Printer may be connected to the Torquestar
Opta using the optional PC connection cable CBL-757-
0-0-0-0 and Serial Printer Adapter CBL-758-01CR-0-0.
Attach one end of the cable to the Torquestar Opta 9
way connector as shown. The 25 way end of the Serial
Printer Adapter connects to the 25 way Serial connector
on the Printer. The printer should be configured to the
following settings:-
Baud Rate = 9600
8 Data Bits
Stop Bit 1
No Parity
Flow Control = None
These are usually factory set as the default settings for
the printer. Note: If the printer has an X on/X off feature
this will need to be set to ON (usually set via DIP
switches on the printer). For further information please
refer to the manual which came with your printer.
To toggle between Autoprint ON or OFF, select the
Autoprint Icon.
Autoprint ON
Autoprint OFF
RS 232 TERMINAL EMULATOR
The TorqueStar Opta can be set to automatically send its
readout data to a suitable RS 232 Terminal Emulator. To do
this, first connect the Opta to the PC Com Port of a Windows
Based PC using the PC to TorqueStar Cable, first ensuring
that the PC is set-up as per the printer settings opposite.
The RS 232 Terminal Emulator will allow date and time
stamped torque readings to be displayed or allow the capture
of data to a text file for export to other software applications.
To toggle between sending readings to RS232 Terminal
Emulator, or not, select the autoprint Icon as above.