10. Mach3 program configuration
After software installation, you should configure all to match the settings and the controlled machine with
all its electrical system.
Elements to configuration:
• Scale-up of each axis (e.g., how many pulses per millimeter/inch).
• Speed and acceleration settings for each axis.
• Assignment of in/out signals:
o Signals of homing sensors – HOME
o Signals of axis limits – LIMIT
o Signal of emergency stop – ESTOP
o Signal of tool measurement probe/ homing etc.
o Additional inputs signals e.g. desktop buttons etc.
o Alarm signals of servo drives – FAULT
o Drives reset – DRV_RESET
o Switching voltage on the drives – HV_ENABLE
o Outputs that control the activation of the spindle, cooling etc.
• Slave axis configuration (if it is used).
• VisualBasic® scripts configuration.
• Axis range settings for the SoftLimit function (software limits).
• Homing speed settings
• Customize the program design.
Configuration is an individual matter for each machine; anyway in the next sections you find the general
rules.
10.1 Configuration profile
If during the installation you did not create the configuration profile (Chapter 9), it is worth to create it
now. In this profile, all the settings will be saved.
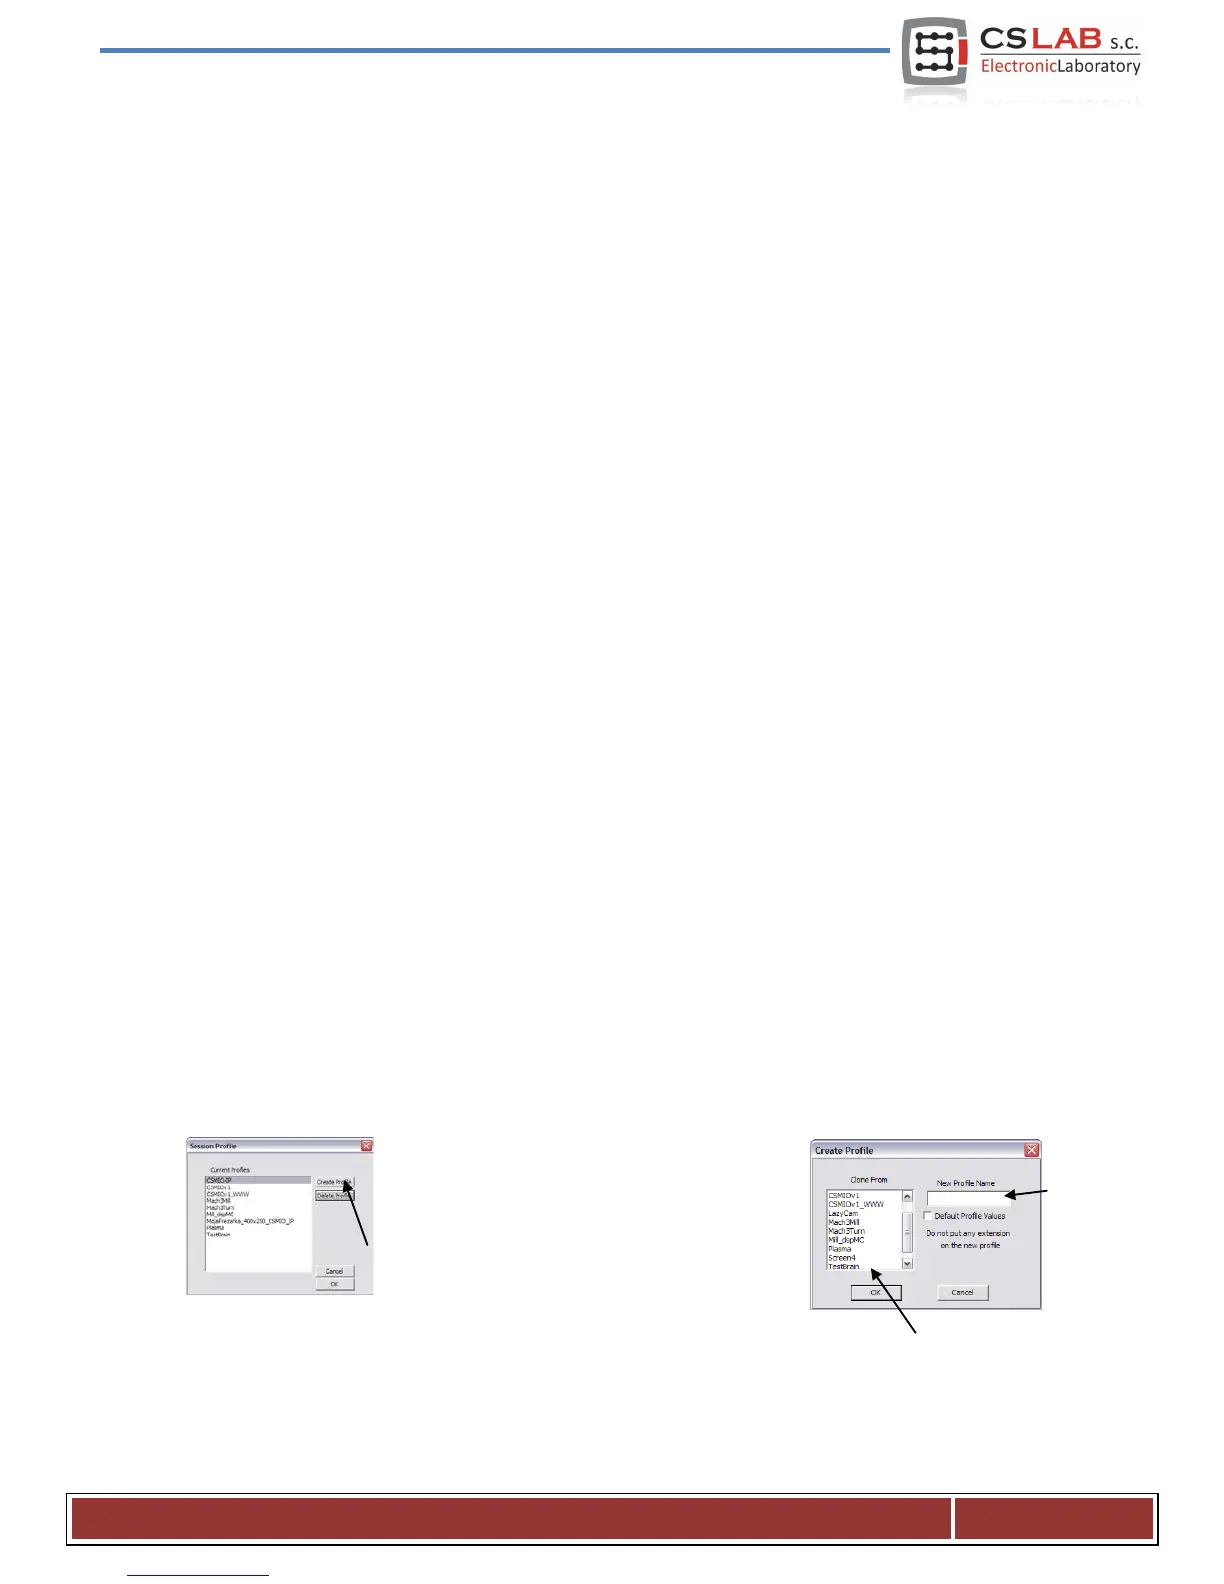
After Mach3 program installation, on the desktop you should see new icons, also the „Mach3 Loader” icon
- launch the program clicking on it. The „Session
Profile” window will appear. To create the profile
click on the „Create Profile” button.
In the next window, enter the profile name e.g.
„MyMillingMachine_400x250_CSMIO_IP. Avoid
spaces and special signs (an underscore is
allowed). On the „Clone from” list select:
• Mach3Mill, if you are creating milling machine profile.
• Mach3Turn, if you are creating lathe profile.
• Plasma, if you are creating plasma or gas cutter profile.
CS- Lab s.c. – CNC CSMIO/IP- M controller
Page 35