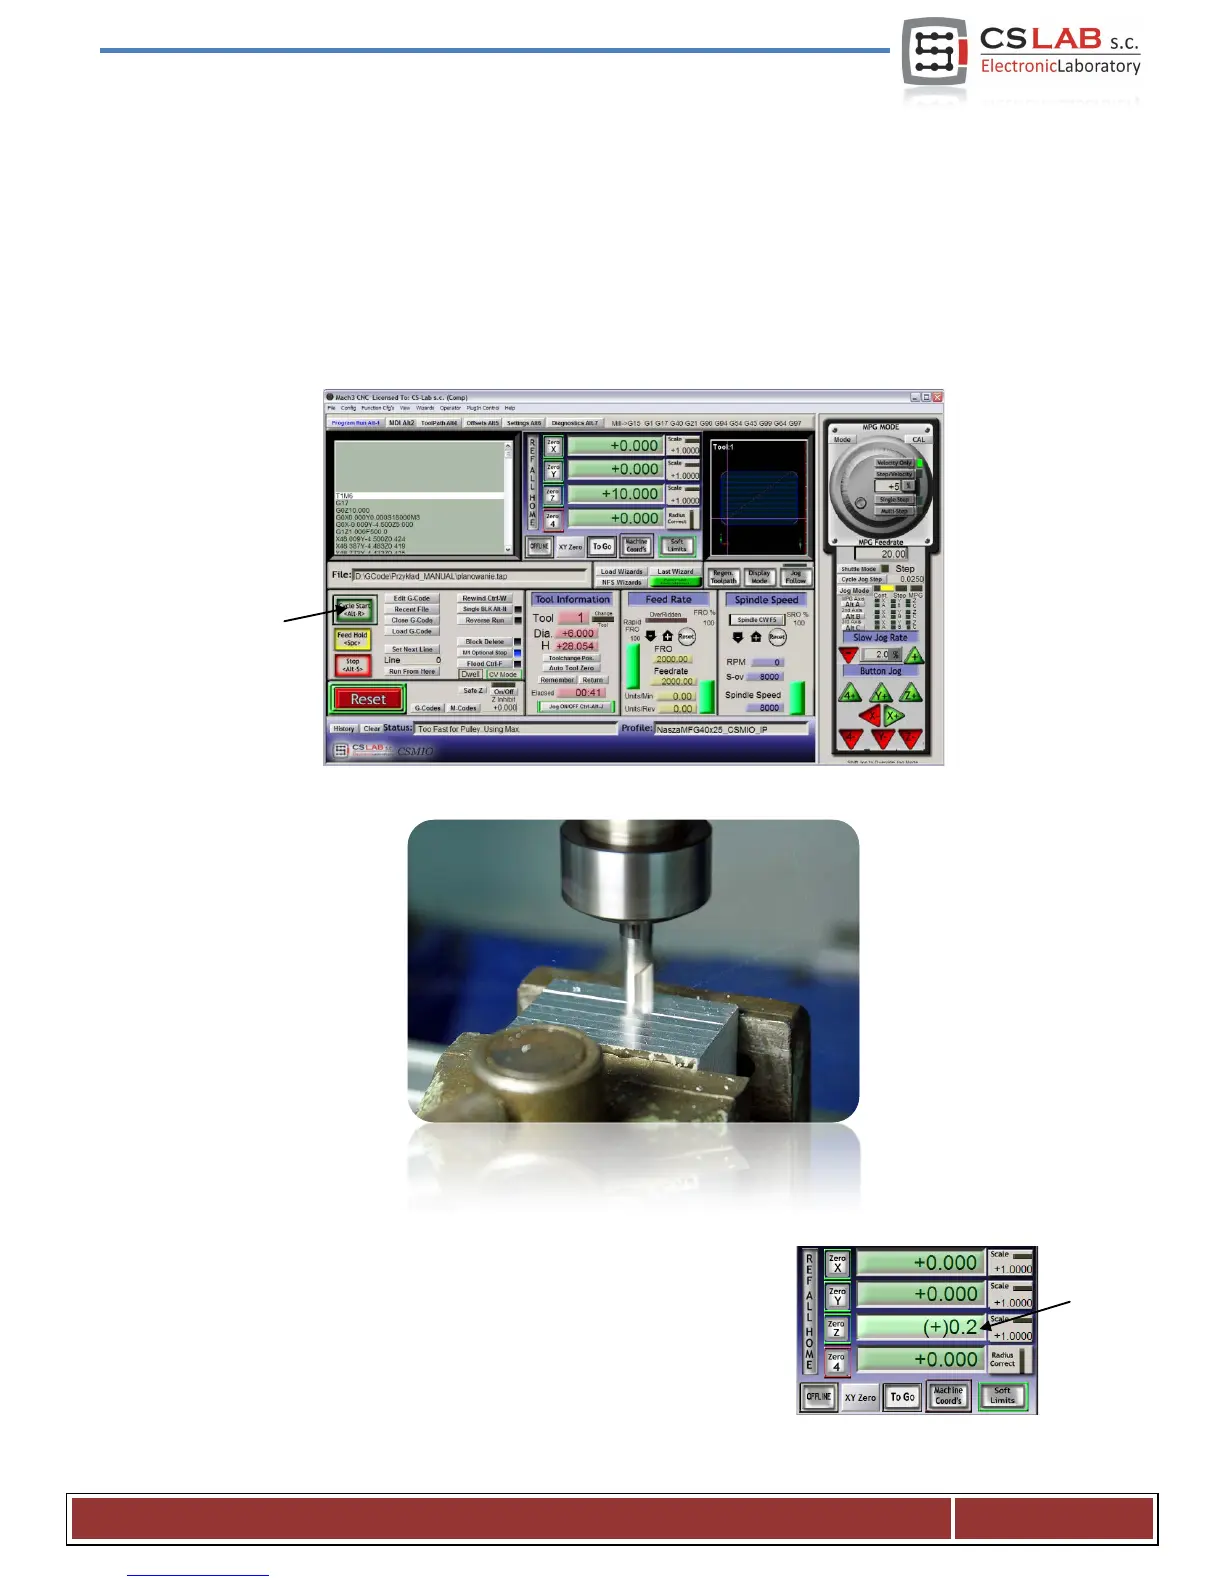
12.3 We begin the work
In Mach program, we select „File/Load G-Code” menu position or click the „Load G-Code” button on the
main screen. Select a created earlier file: „planing.tap”. When the file is loaded, we can initially set the
machine over the material and enter on the MDI screen.
• G0G53 Z0 <enter>
• G0 X0 Y0 <enter>
The firs command causes the Z axis rises maximum high, the second one is to set the machines tool XY
axes in the earlier defined zero point of the material.
Go to the main screen again and click the „Cycle Start” button – starting the work.
Below photo taken during the work:
You can change the tool for an engraving cutter and load the previously
generated a second trajectory. Before processing, there is one important
detail. While planning the surface we lowered its level, the engraving logo
would be 0.1mm depth, and not 0.3mm like the one we had assumed.
“This can be easily remedied by reducing the zero point level about
0.2mm (planned depth). Click on the text box that displays the current Z
position and type on your keyboard "0.2 <enter>.
CS- Lab s.c. – CNC CSMIO/IP- M controller
Page 61
 Loading...