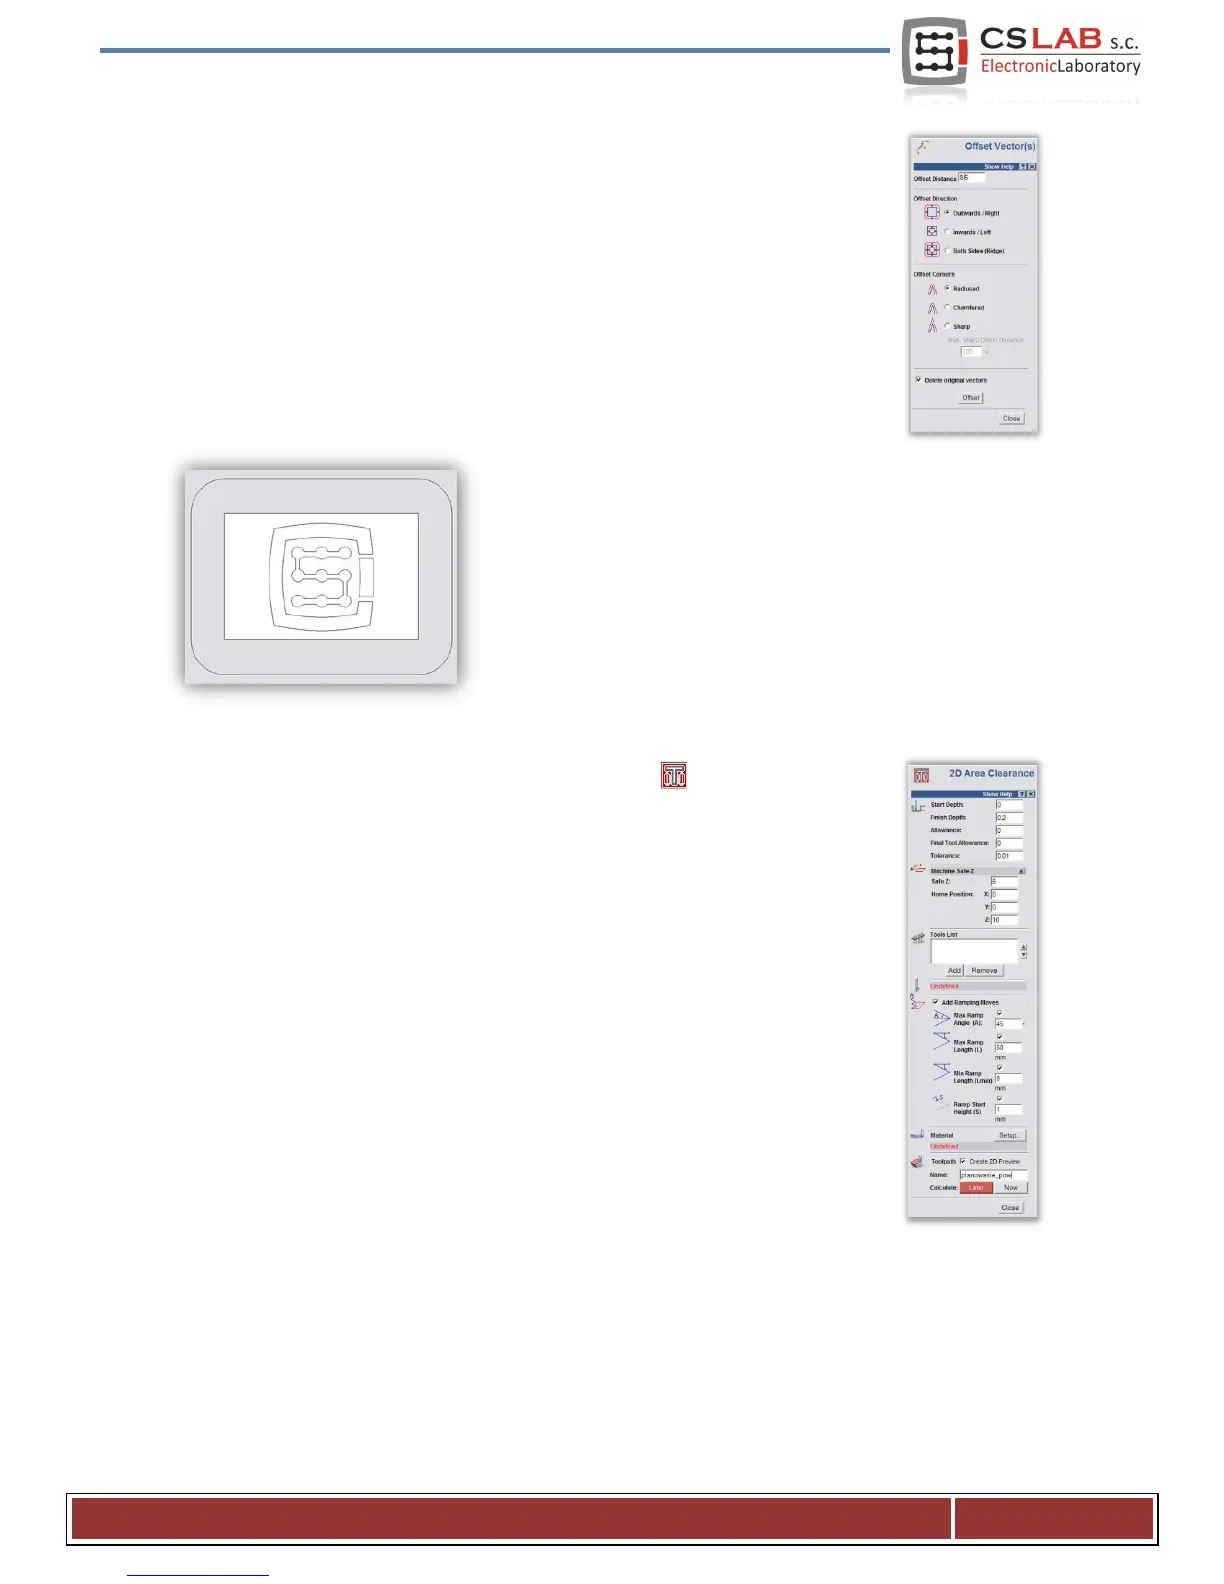
The newly created object coincides exactly on the position and size with the working
area. Now you should add the mentioned additional enlargement, so that the milling
cutter will go with its whole diameter out of the material – thus we get a better surface.
We click on our object and select the „Vectors/Offset” menu position. The milling cutter
diameter is 8mm - we should give it a little supply by entering as an Offset Distance the
8.5mm value. We are giving the Offset Direction as Outwards – that is on the outside.
Offset corners – irrelevant here. Select - Delete original vectors, because we do not
need to save the original object.
At this stage, our project looks like this:
You can now generate the trajectories for the tools.
First, the tool path for planning the surface.
Select the object we create and select the Area Clearance icon from the Toolpath
tab.
In the Finish Depth box, enter the treatment depth, 0.2mm this case. In toleration area,
enter 0,01mm. As practice shows, it is not worth to overdo with the toleration value. Of
course, if you have a high-class mechanics, granite construction, all is thermally
stabilized, and you execute precise jobs – you can set the toleration more detailed.
The Safe Z parameter you can set at 5mm, Home Position at [0, 0, 10]. You can also
select the „Add Ramping Moves” on default parameters, the result is smoother entry
into the material.
CS- Lab s.c. – CNC CSMIO/IP- M controller
Page 56
 Loading...