Next, generate the tool trajectory for the logo.
Go back to 2D preview, and in the Toolpaths tab panel, next to the last
generated path – uncheck the Show In 2D|3D. Previous trajectory disappears
so it will not disrupt our view.
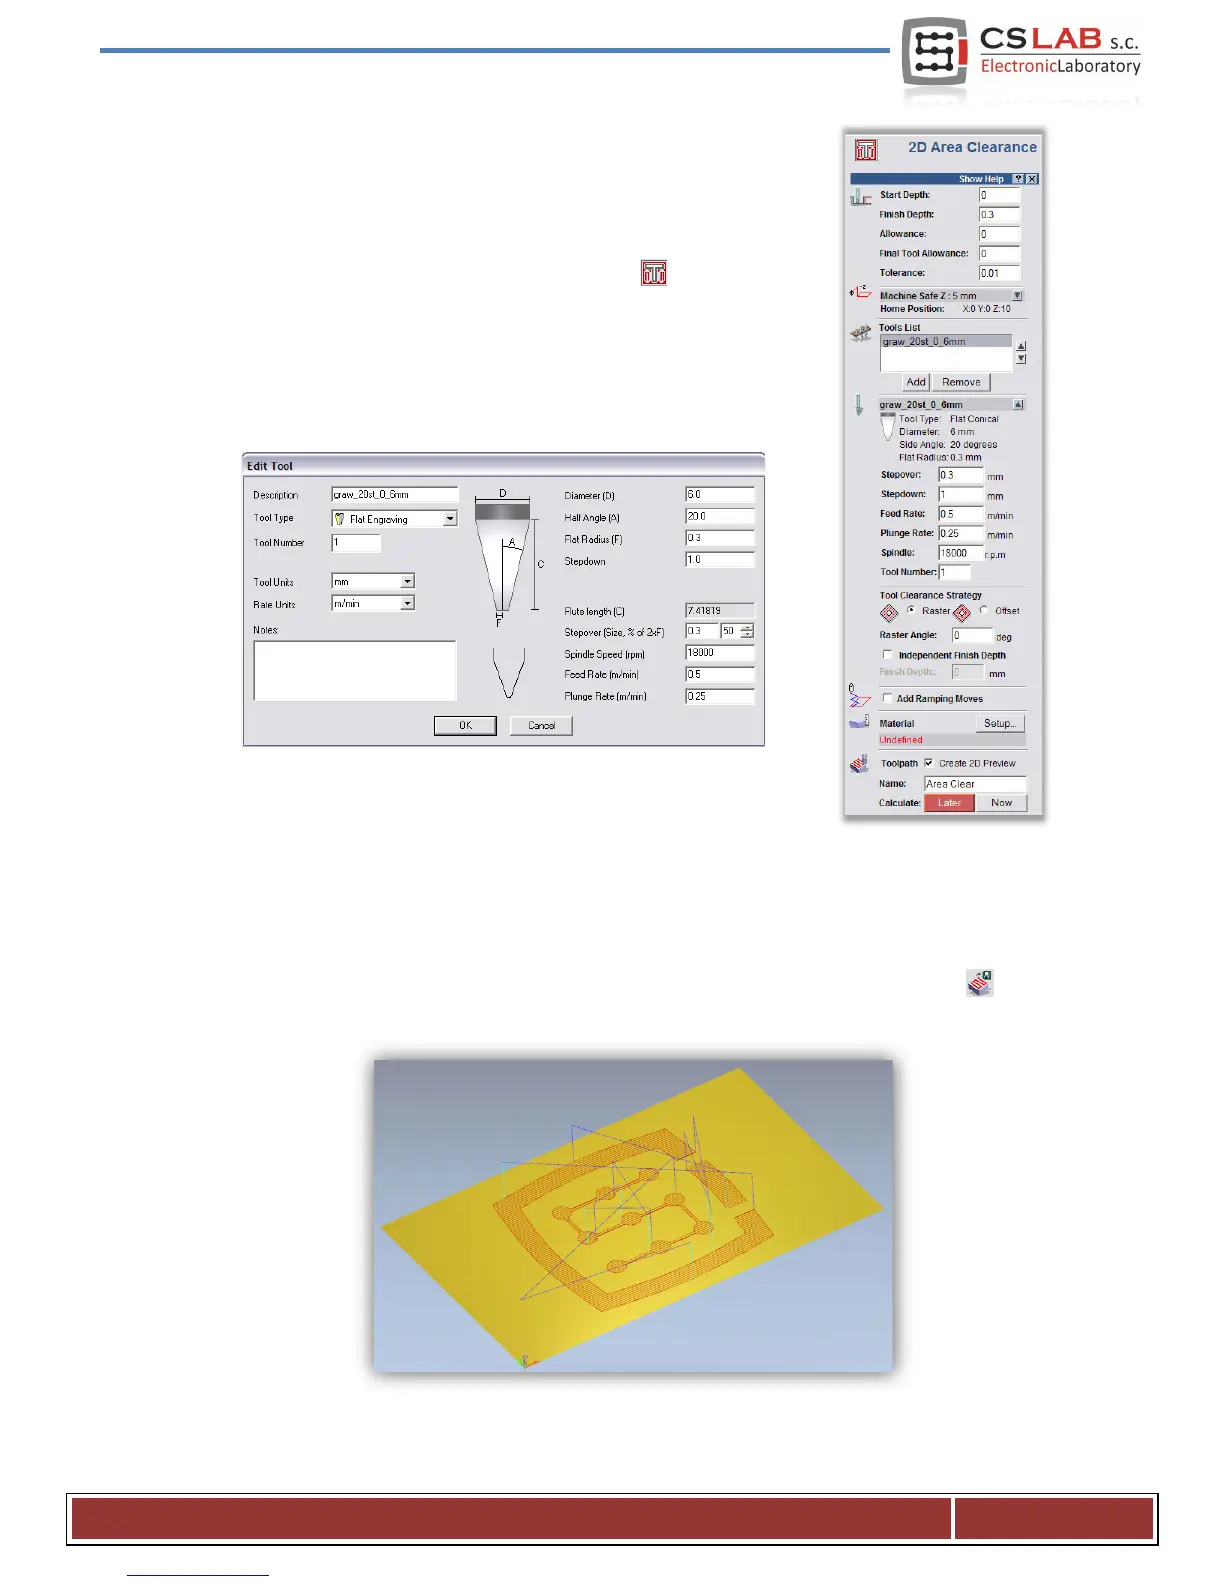
Now select our logo and again click the Area Clearance icon. We enter the
parameters almost the same like before, only the depth is 0.3mm and also
uncheck the „Add Ramping Moves” – won’t be needed in this case, we must
also define other tool. We proceed like before. Press the Add - below the tool
list - and Add Tool in the tool base window. The parameters in this case look
like this.
You should note that, in the ArtCam program the handle size is its diameter,
and the dimension of the tip of the tool (F) is its radius. Speed values in here
are quite low but it is only example, and not “high performance ride”, which makes sense only when we do
the production orders for a larger number of units. With so simple, single works it takes more time to
prepare the project, place the material and set the machine than the treatment.
When our tool is entered, you can click Calculate: Now and record the path by clicking on the icon.
Postprocessor should stay the same. Name it e.g. „graw_logo.tap”. 3D preview should look like this:
CS- Lab s.c. – CNC CSMIO/IP- M controller
Page 58
 Loading...