Chapter 6 - Hydraulic Brakes
189
Pedal Linkage
The pedal pivots on a pair of thin-wall split plastic bush-
ings. A dry graphite or PTFE-based spray lube may
extend the life of the bushings.
To replace the bushings:
1. Remove the left front fender, as described in the
To Replace a Master Cylinder section of this
chapter.
2. Remove the hairpin clip and clevis pin that con-
nect the brake yoke to the brake pedal arm.
See Figure 6.40.
3. Remove the shoulder bolt that supports the
brake pedal arm using 3/4” and 9/16” wrenches.
4. With the bolt removed, the pedal can be pulled
out of the bracket that it mounts to.
See Figure 6.41.
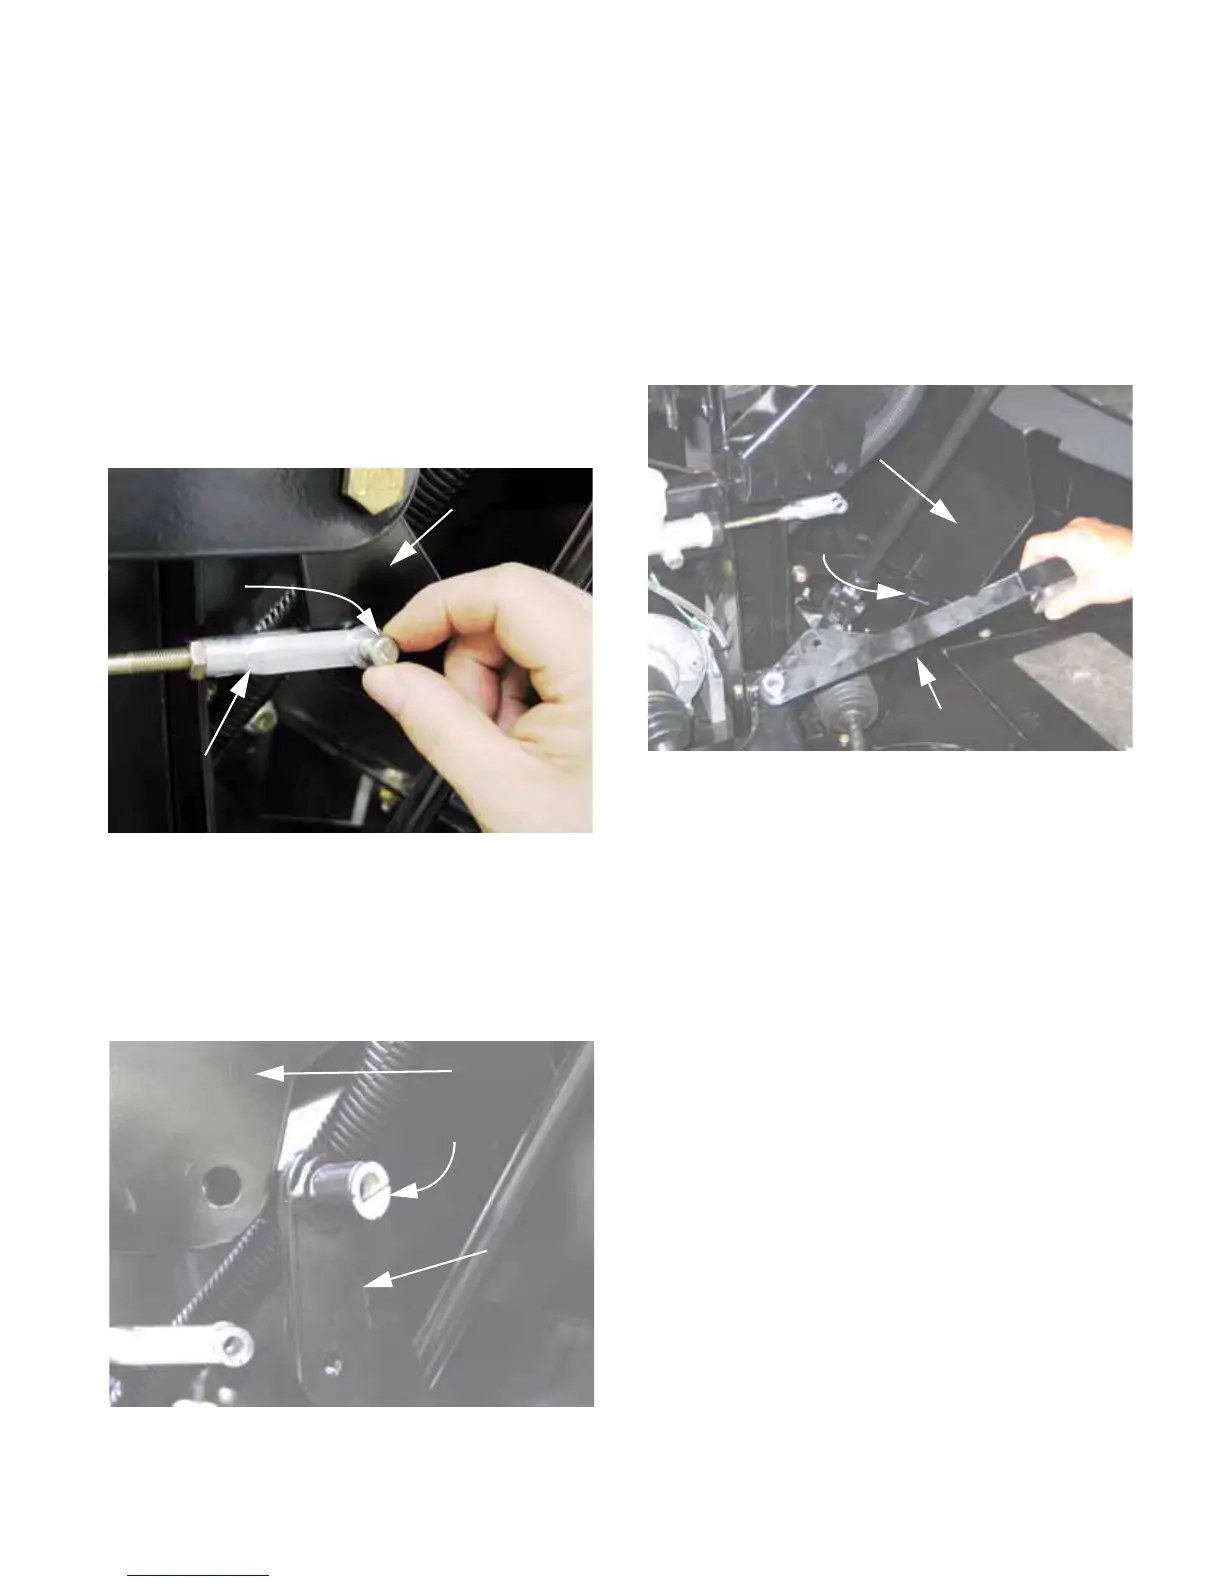
Figure 6.40
Brake yoke
Brake
pedal arm
Clevis pin
Figure 6.41
Bracket
Bushing
Brake pedal arm
5. Once the brake pedal is loose, the bushings can
be easily pried-out and replaced.
6. To remove the brake pedal arm from the vehicle:
See Figure 6.42.
6a. Unbolt the kick panel from the under-dash
support using a pair of 1/2” wrenches.
6b. Loosen the screws that connect the kick
panel to the floor using a 3/8” wrench.
7. Install the brake pedal arm by reversing the
removal process.
8. Test-run the vehicle in a safe area before return-
ing it to service.
Figure 6.42
Under-dash support
Kick panel
Unbolted here
 Loading...