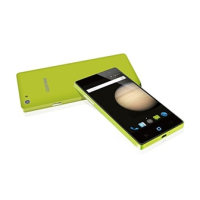
6 CONTACTS
The contacts on your phone are synced with your account contacts
stored on the Web.
To view the contacts on your phone, touch and select
Contacts.
Contacts belonging to a specic group (you can choose which
group) are listed in the Contacts tab. Only those contacts you
star as “favorites” are listed in the Favorites tab. Browse through
your contacts by sliding your ngertip up and down on the screen.
Another way to nd a contact quickly is to use “SEARCH” but-
ton, input the rst letter of the name you’re looking for and touch
search icon, the matching contacts are appeared on the screen.
From the Contacts tab, you can:
1. Go to Contact details: Select the contact’s name to open
the Contact details screen, where all screen the information
you’ve saved for this contact is displayed.
2. Take action on a contact: On the Contact details screen, you
can view call the contact’s number, send a text message,
add or remove a star or edit the contact details.
3. On the Contact details screen, press MENU to open the
context menu. From the menu you can select to share,
place on home screen, or print the contact.
Add a contact
1. On the Home screen, then touch and select Contacts.
Your contact list appears.
2. Touch the ‘+ ’icon on the right-down of the screen to add
new contact.
3. Add all the information you want to store for this contact in
the appropriate elds. You must add some information to
save a contact. To change a default label, select the label
name to open the label menu. Select a different label or
create a custom label. To add more elds, select ‘Add
another eld’.
4. You can assign a Caller ID icon to your contact by touching
Caller ID icon. The Pictures application opens. Navigate to
a picture and select it, size the cropper with your ngertips.
85