(Menu Button) → EasyBend
The EasyBend page is used for individual bends, for example when an external worker needs
to interrupt production just to make a single bend (usually with the same tools).
The program currently being used for production is only temporarily interrupted
(no need to save it) when switching to the EasyBend page, and then resumed again
when returning to the program page (Menu Button → Current program).
See Basic Page Description for more information on the different controls on the EasyBend
page.
SETTING INSTRUCTIONS:
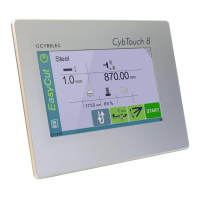
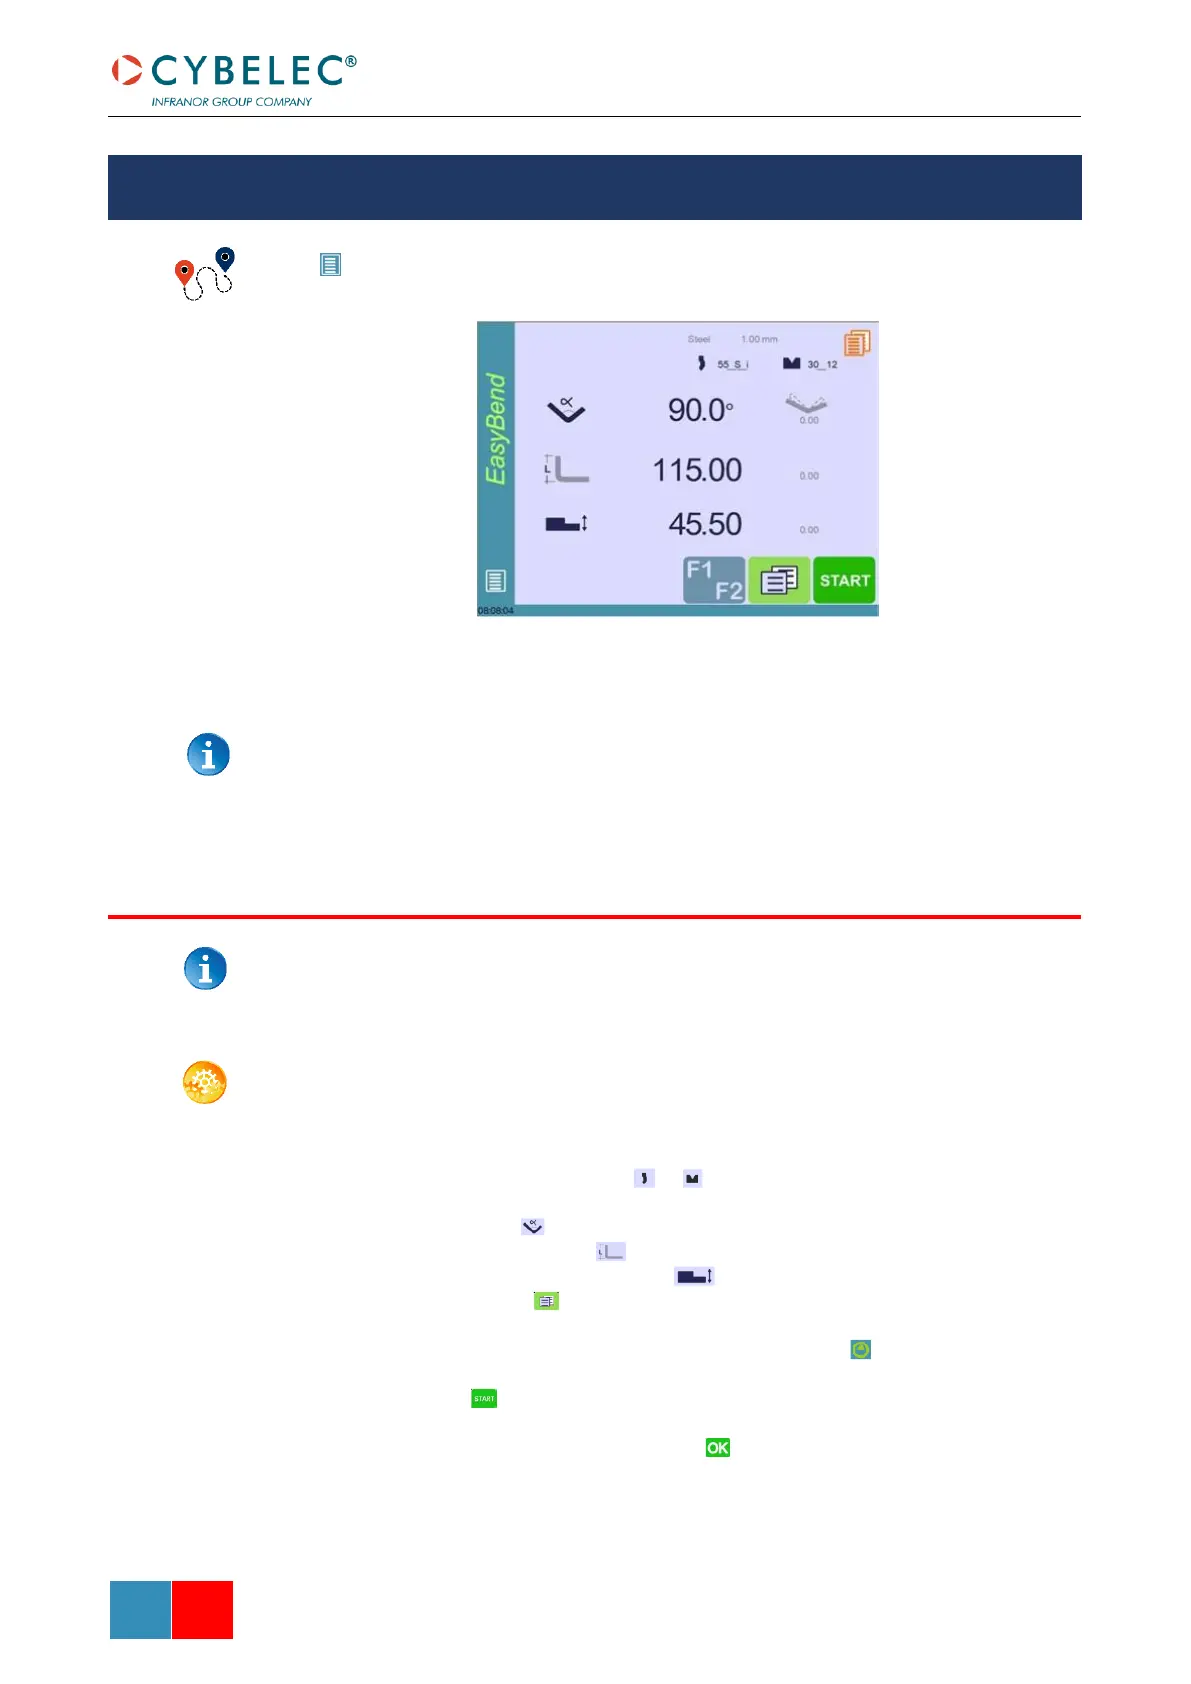
1. Touch the material’s name (here Steel). There are displayed. Select the Material
used, enter the Material thickness and the Bending length.
2. Touch one of the tool’s icon ( or ) to select a punch or die. To learn how to
configure tools, please refer to section Tools Management.
3. Enter the angle for the bend you wish to create (here 90°).
4. Enter the flange’s length (here 115.00 mm).
5. Enter the back-gauge height value (here 45.50 mm)
6. Press this button to go to the Extra Bending Parameters and enter the
eventually required extra data for the bend.
7. Start the hydraulic pump motor (by pressing this button if available. It turns red
when the motor is running).
8. Press the button to position the machine according to the data that were just
entered.
9. When the machine is ready to bend, a button is displayed.
10. Press the foot switch to execute the bend.
 Loading...