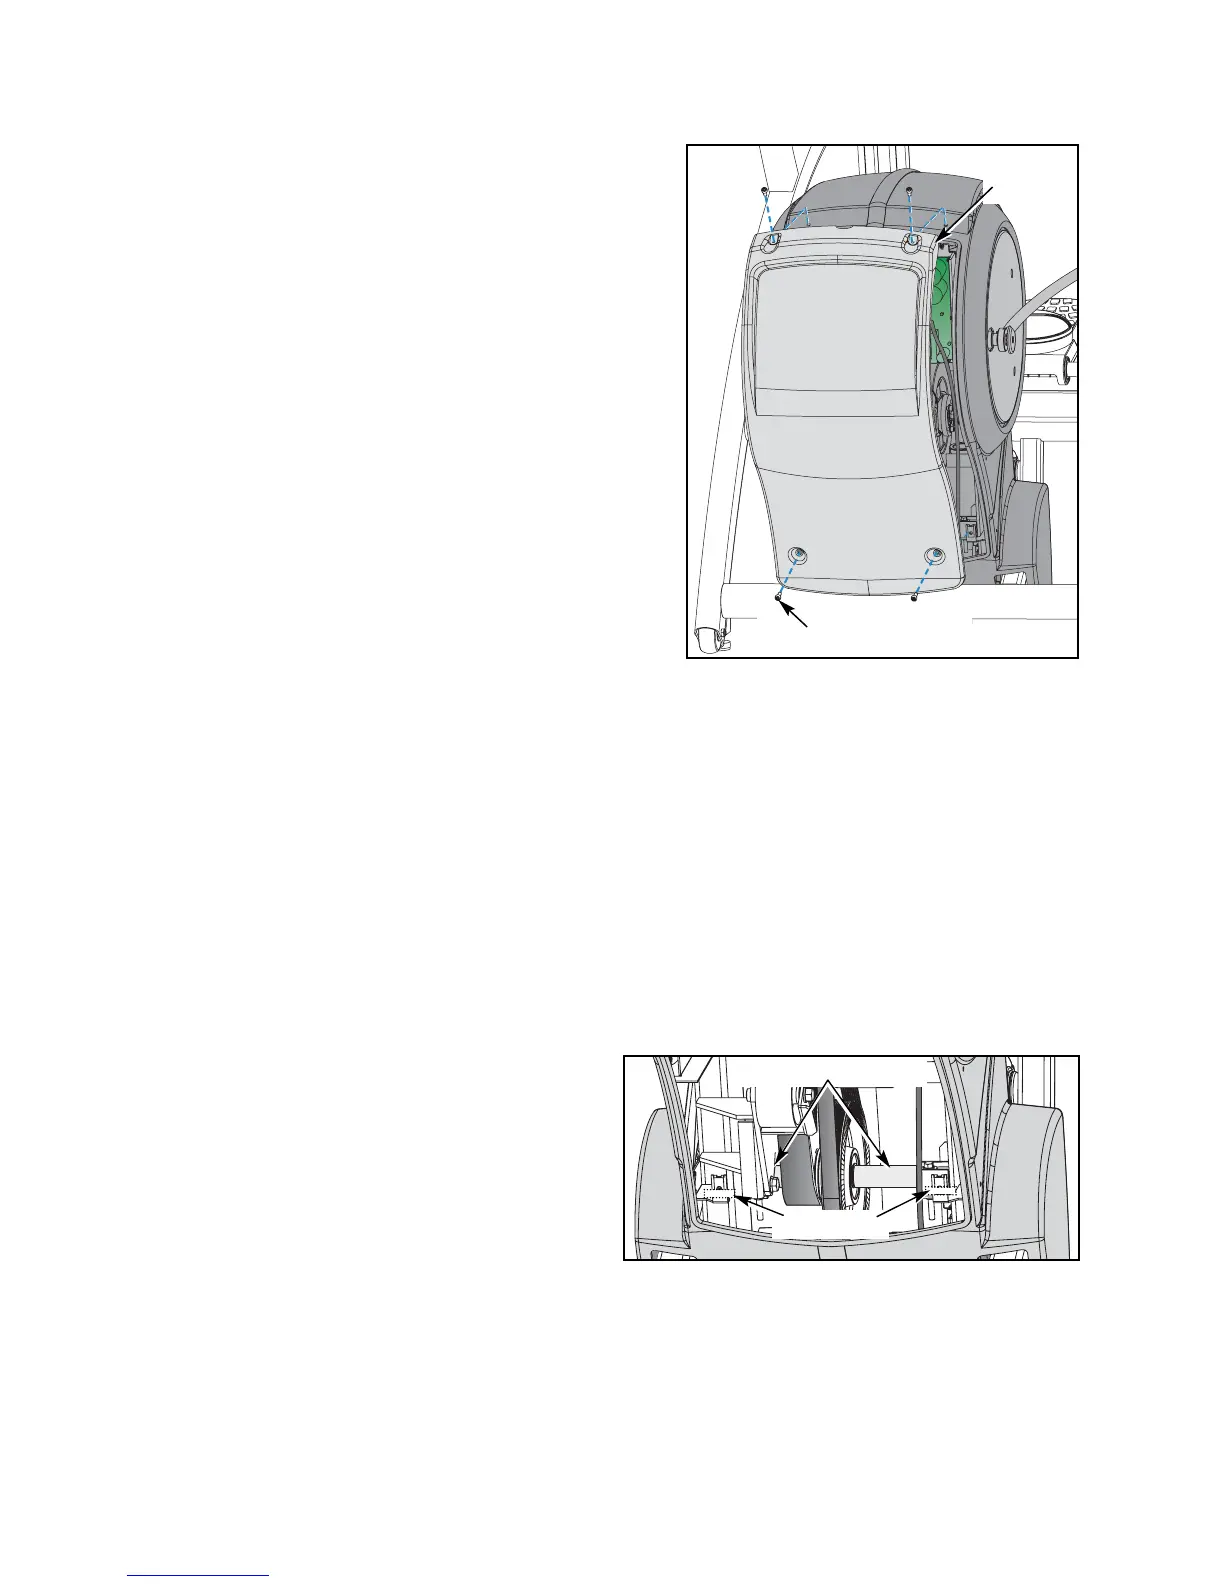
3. Remove the access cover.
A. Using a Phillips head screwdriver, remove the
four screws securing the access cover in
place. See Figure 2.
B. Remove the access cover.
! WARNING: The flywheel may be hot. Wait until
it cools before servicing.
3. Check the condition of each belt.
A. Roll each belt by pulling down on it. Examine
the condition of each belt. If a belt has cracks
or appears worn it should be replaced.
NOTE: The part numbers are BD-16671 for
the primary drive belt and BD-17021 for the
secondary drive belt. To remove and replace
the belts a qualified service technician should
follow the Drive Belts procedure in the
Service chapter.
4. Check the tension of the primary belt.
A. Press on the primary belt with your hand. You should not feel any “give” in the primary
belt. If the belt “gives”, a qualified service technician should follow the Drive Belts
procedure in the Service chapter.
5. Check the tension of the secondary belt.
A. Press on the secondary belt with your hand. The belt should “give” about 1/4” (0.6 cm).
If the belt has too much “give”, a qualified service technician should follow the Drive
Belts procedure in the Service chapter.
B. Locate the spacers under the lower pivot shaft. Visually check that the spacers are in
place and in good condition. If the
spacers are visibly cracked or missing,
a qualified service technician should
follow the Drive Belts procedure in the
Service chapter. See Figure 3.
Cybex Arc Trainer Owner’s & Service Manual
Page 4-4
Figure 2
Screw (4)
Access
Cover
Figure 3
Lower Pivot Shaft
Spacers