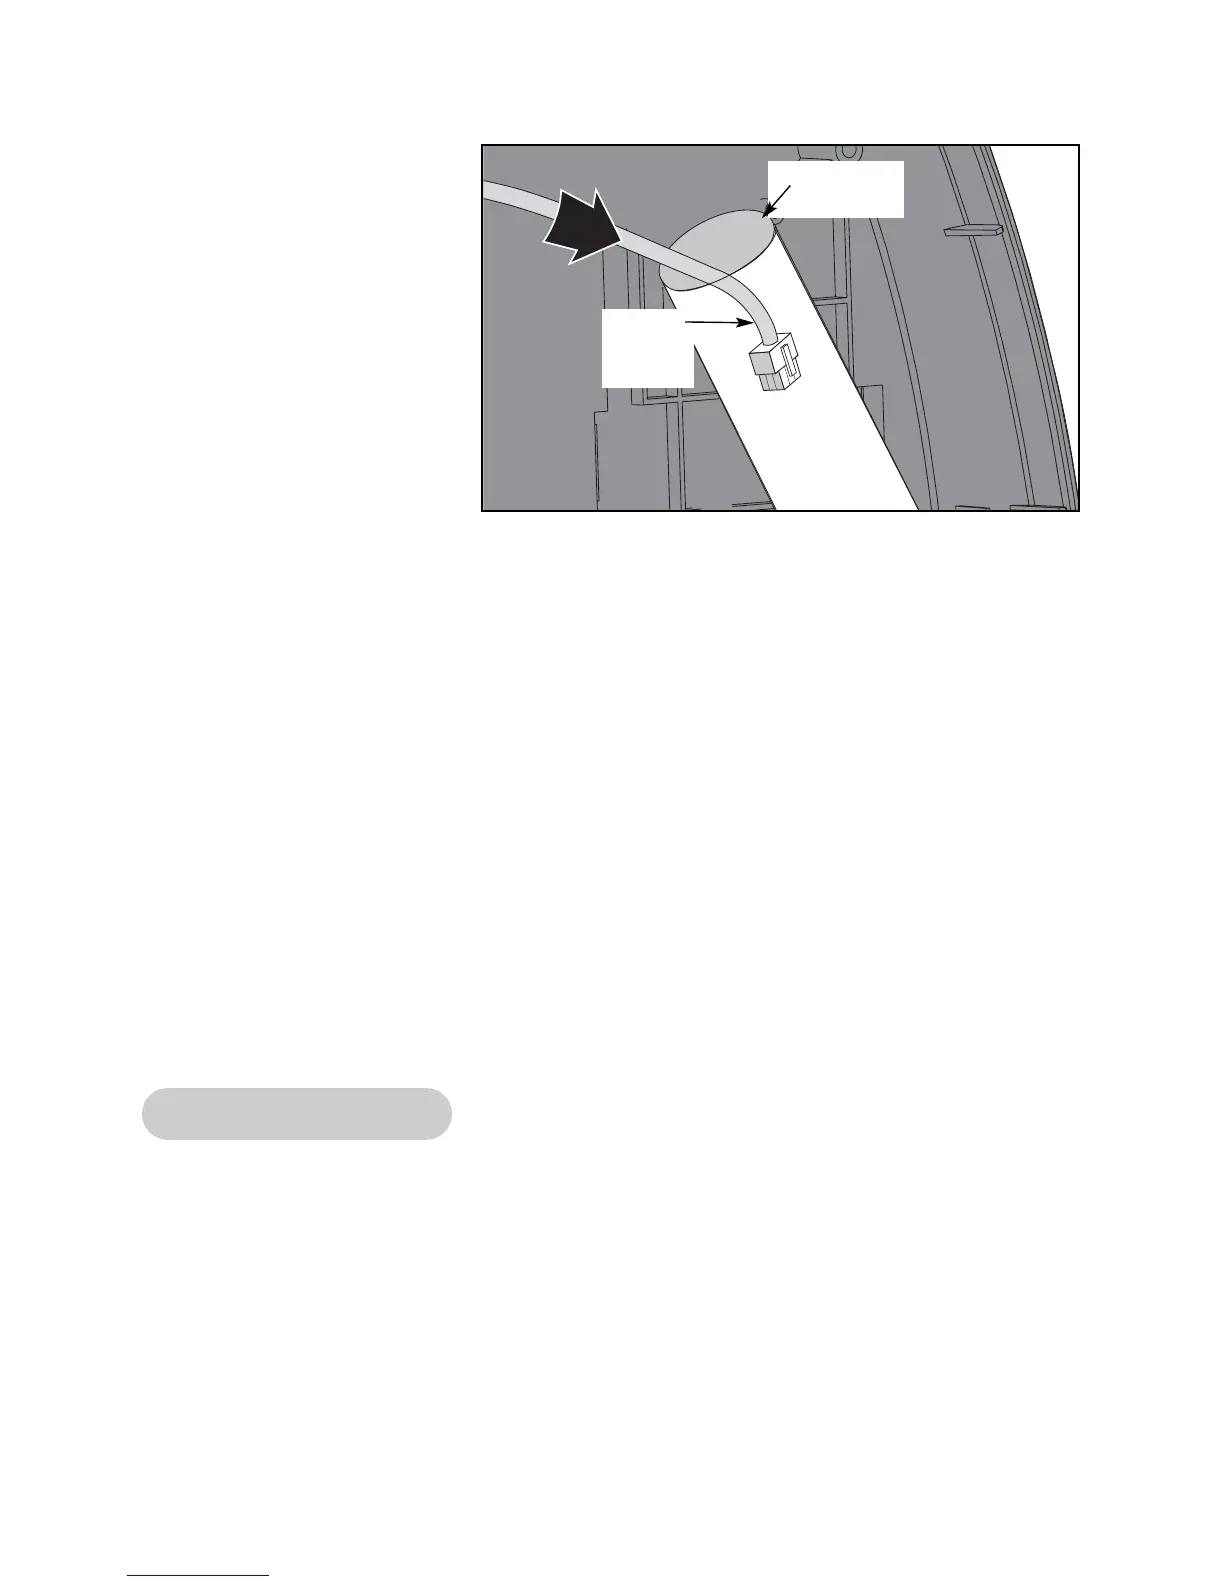
B. Push the single
connector down into the
top handrail hole. See
Figure 31.
C. Push the display cable
down through the
handrail and out the
handrail’s bottom hole.
NOTE: Twisting the
cable as you push will
help it go through.
D. Connect the upper
display cable to the
lower display cable.
NOTE: If you are
changing the lower display cable disregard this step.
6. Secure the cable.
A. Using a Phillips head screwdriver, open the clip described in step 4A and secure the
cable in the clip. See Figure 26.
B. Check to see that all of the connectors are connected firmly in their proper place.
7. Attach the console.
A. Place the console handrails on top of the gaskets. See Figure 26.
B. Using a hex key, attach the four screws and four lock washers securing the handrail in
place.
8. Secure the console back.
A. While being sure not to pinch any cables, attach the top console back to the console
front with the five Phillips head screws.
Lower Display Cable
NOTE: Display cables have a revision number label so that you can verify the part number
and latest revision of the cable. The lower display cable part number is AW-17008.
Tools Required
• Phillips head screwdriver
• 9/16” Open-end wrench or socket wrench
• Tape
• 3/16” Hex key
Cybex Arc Trainer Owner’s & Service Manual
Page 7-38
Figure 31
Upper
Display
Cable
Handrail
Opening