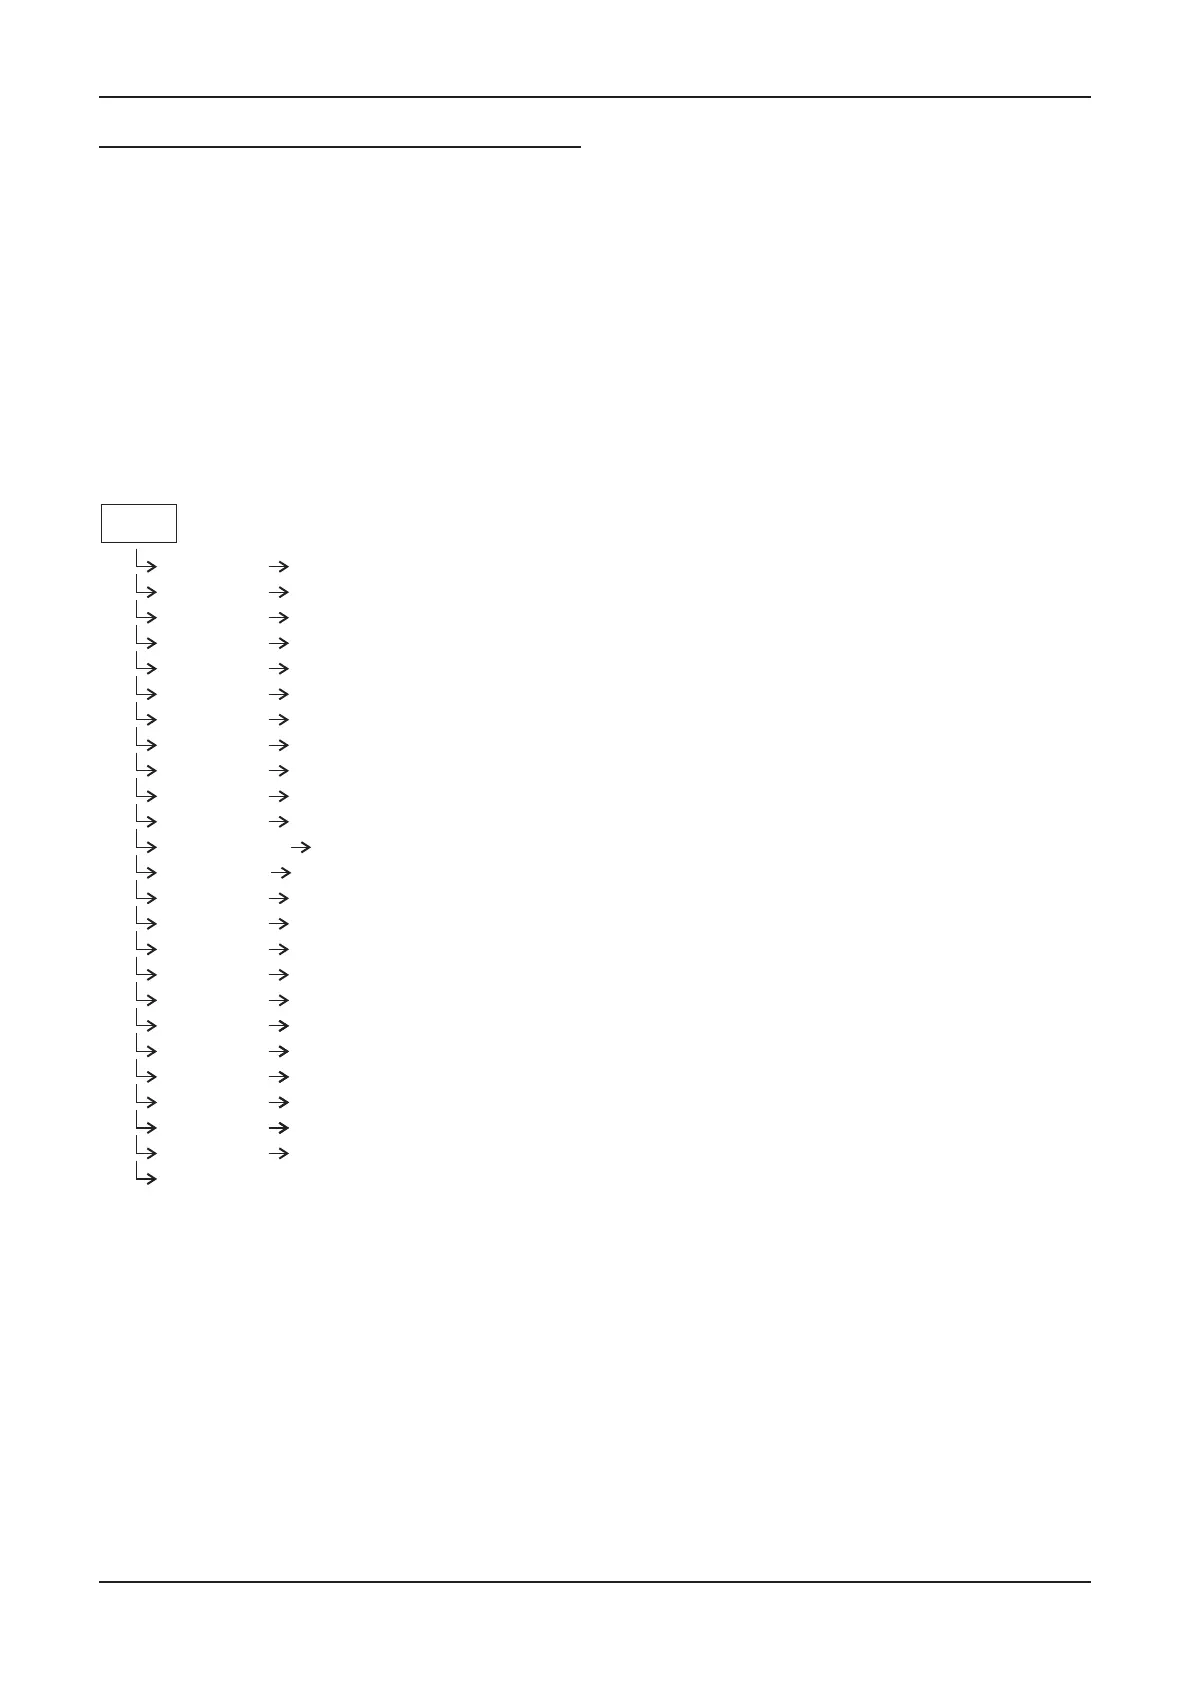
Cyrus Pre
2
DAC User Instrucons
11
CONFIGURATION
Through the setup menu you can customise your amplier
to best match your system.
To enter the menu system, press the front panel SETUP key
f. Turn the Rotary control e to scroll through the opons
available on the display. Press the Rotary control e to select
the opon displayed. During the setup sequence, you can
move to the next or previous step by pressing the Input up
or down buons.
Press the SETUP f key to exit setup and save any changed
sengs. Note that the setup sequence will exit, saving any
changed sengs aer 10 seconds of inacvity or aer the
last opon ‘Trim input 11’ has been completed.
The setup menu opons are shown here –
Input names
When your amplier le the factory, the input names are
set as shown below
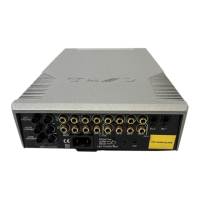
Input 1 – CD Input 5 – Input 5 Input 9 – Input 9
Input 2 – Tuner Input 6 – Tape Input 10 – Input 10
Input 3 – Cyrus AV Input 7 – Input 7 Input 11 – Input 11
Input 4 – Input 4 Input 8 – Input 8
The name of any input may be changed to a choice from the
following list. Each name may be used once -
CD, DAB, Cyrus AV*, Phono, Tape 3-Head, Tape, Satellite,
Cable, iPod, MP3, DVD, Blu-ray, CD 1, CD 2, SACD, CD-R,
Linkserver, Jukebox, LaserDisc, Tuner, AV Direct*, TV, TV
1, AV, USB, Satellite 1, Cable 1, Video, VCR, PVR, Cassee,
DAT, MiniDisc, Games, Games 1, PC, Laptop, Mac, Special,
Keyboard, Aux, Stream X.
Before changing the names of the inputs, we recommend
making a list of each input number with your preferred
name from the choices above before seng the names. Each
name may only be used once. When a name is assigned to
an input it will be removed from the list for other inputs.
NOTE:- There are two special funcon input names marked *.
‘Cyrus AV’ is reserved for the connecon of Cyrus surround
sound decoders to one of the analogue Inputs 1-6 and
should only be used for this purpose.
‘AV Direct’ is reserved for the connecon of non-Cyrus
surround decoders to an analogue input. This input name
must only be used for this purpose as the volume level
will lock to a very high seng (-6dB) when AV Direct is
selected.
Choose ‘No source’ from the list to name inputs which have
no source connected to them. When named ‘No Source’,
an input number will not appear in the input selector scroll
sequence or in the Zone 2 select sequence.
In addion, the name ‘Tape 3-Head’ will appear as an extra
opon in the naming list for Input 6, and the name ‘USB’ will
appear in the list for Input 11.
Input 11 auto-hide
The USB input has a special ‘auto-hide’ feature. If this feature
is switched on, the USB input will only appear in the input
selector scroll sequence when a valid source is connected to
the USB input. If no source is connected or if the source is
switched o, Input 11 will not appear in the sequence.
Name Input 1 Choose a name for input 1 from the name list
Choose a name for input 2 from the name list
Choose a name for input 3 from the name list
Choose a name for input 4 from the name list
Choose a name for input 5 from the name list
Choose a name for input 6 from the name list
Choose a name for input 7 from the name list
Choose a name for input 8 from the name list
Choose a name for input 9 from the name list
Choose a name for input 10 from the name list
Choose a name for input 11 from the name list
Choose on or off (default is off)
Set the sensitivity offset for input 1
Set the sensitivity offset for input 2
Set the sensitivity offset for input 3
Set the sensitivity offset for input 4
Set the sensitivity offset for input 5
Set the sensitivity offset for input 6
Set the sensitivity offset for input 7
Set the sensitivity offset for input 8
Set the sensitivity offset for input 9
Set the sensitivity offset for input 10
Set the sensitivity offset for input 11
Name Input 2
Name Input 3
Name Input 4
Name Input 5
Name Input 6
Name Input 7*
Name Input 8*
Name Input 9*
Name Input 10*
Name Input 11*
Input 11 auto-hide*
Trim Input 1
Trim input 2
Trim input 3
Trim input 4
Trim input 5
Trim input 6
Trim input 7*
Trim input 8*
Trim input 9*
Trim input 10*
Trim input 11*
The display will show ‘Storing Settings’, then exit setup.
Setup
Display Mode
Select large input, small input or large volume