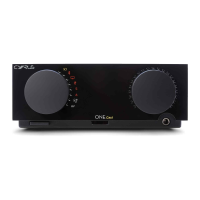
Cyrus Pre
2
DAC User Instrucons
6
Important – read before making any audio
connecons
To avoid possible damage to your amplier, it is essenal to
disconnect all system components from the mains supply
before connecng or disconnecng audio interconnects.
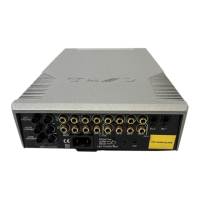
Connecng Analogue Audio Sources
Analogue Inputs 1-6 are available for the connecon of
stereo analogue audio sources including -
• Analogue output from CD/DVD Players
• Analogue output from DAB or FM Radio tuners
• Phono pre-amplier for a turntable
• Televisions
• Analogue Satellite Receivers
• Analogue Tape/Disc recorders
• Cyrus surround decoder
The factory set input names for some of the inputs are pre-
set as follows:
Input 1 – CD
Input 2 – Tuner
Input 3 – Cyrus AV (for a Cyrus AV surround processor)
Input 6 – Tape
All inputs may be re-named, but for convenience you may
prefer to connect these sources to the pre-named inputs.
Analogue Input 6 is recommended for connecon of Tape
Recorders. This input is not selectable for recording purposes
to avoid howl-round with Tape Recorders, nor is it available
to play in a Zone 2 system.
To connect an Analogue Audio source to your amplier,
connect a stereo audio interconnect cable between each
component and the sockets as marked on the rear panel.
Ensure le and right channels are correctly connected.
Make a note of the input number used for each source as
the inputs can be re-named at the set-up stage.
Connecng a Turntable
To play a turntable through your unit an external phono pre-
amplier is required. This may then be connected to one of
the Analogue inputs.
Digital Audio Inputs
Connecng digital audio sources
The digital audio inputs are compable with a number of
dierent digital audio sources. These include-
• PC or MAC computer via a USB cable
• Digital Audio output from a CD player
• Digital Radio
• DVD players (for replay of 2 channel PCM programs
only)
• Digital Satellite receivers (for replay of 2 channel PCM
programs only)
• Digital tape/disc recorders
Using a suitable Toslink opcal or Digital phono interconnect,
connect each digital audio source to one of the inputs 7-10.
Make a note of the input number used for each source as
the inputs can be re-named at the set-up stage.
Connecng USB audio sources
The USB audio input 11 may be used to connect the audio
feed from a computer. Using a suitable USB cable, connect
the USB output from the computer to the USB input 1@.
NOTE: The USB Audio input is congured for USB slave
operaon and is not suitable for connecon of USB drives or
other ash media.