DES-3028 DES-3028P DES-3028G DES-3052 DES-3052P Layer 2 Fast Ethernet Managed Switch
NOTE: If you want to configure Host-based 802.1X please select
MAC-based 802.1X instead.
Auth Protocol The 802.1X authentication protocol on the Switch is set to RADIUS Eap and cannot be
altered.
Syslog Status
Enables or disables Syslog State; default is Disabled.
Port Security Trap Log Toggle this setting to enable or disable the port security trap log feature. The default is
Disabled.
ARP Aging Time (0-
65535)
The user may globally set the maximum amount of time, in minutes, an Address Resolution
Protocol (ARP) entry can remain in the Switch’s ARP table, without being accessed, before it
is dropped from the table. The value may be set in the range of 0 to 65535 minutes with a
default setting of 20 minutes.
GVRP
Use this pull-down menu to Enable or Disable GVRP on the Switch.
VLAN Trunk
Use this pull-down menu to Enable or Disable VLAN Trunk on the Switch.
Multicast VLAN
Use this pull-down menu to Enable or Disable Multicast VLAN on the Switch.
Asymmetric VLAN
Use this pull-down menu to Enable or Disable Asymmetric VLAN on the Switch.
Password Encryption
Use this pull-down menu to Enable or Disable Password Encryption on the Switch.
Password encryption allows the user to encrypt a password for additional security. Select
enable to change the password into encrypted form. When password encryption is disabled,
the user can specify that the password be in plain text form or in encrypted form. If the
password has been converted to encrypted form, the password will stay in encrypted form and
cannot be reverted back to plaintext form.
DoS Attack Prevention
Trap Log
Use this pull-down menu to Enable or Disable DoS Attack Prevention Trap Log on the Switch.
Click Apply to implement changes made.
IP Address
The IP address may initially be set using the console interface prior to connecting to it through the Ethernet. If the Switch IP
address has not yet been changed, read the introduction of the DES-3028/28P/28G/52/52P CLI Manual or return to Section 4 of
this manual for more information. To change IP settings using the web manager click Administration > IP Address the
following window will be displayed.
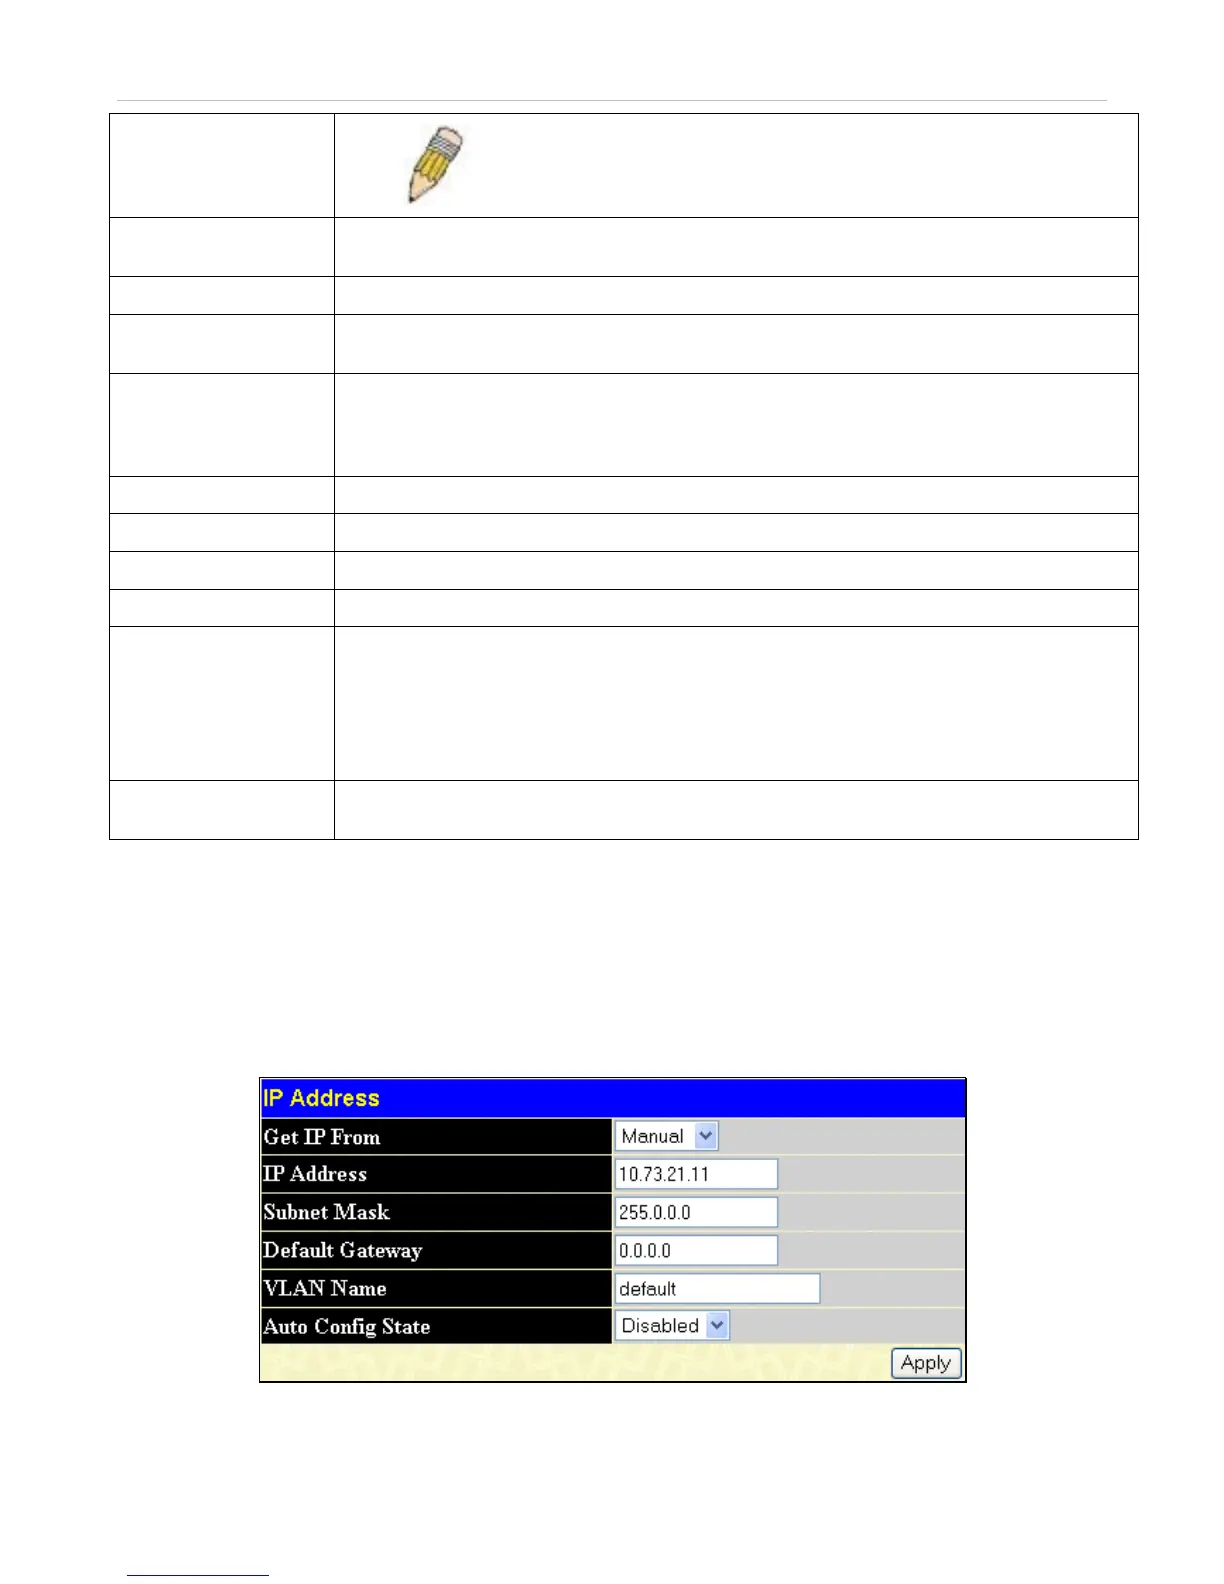
To configure the Switch's IP address:
Figure 6- 2. IP Address Settings window
To manually assign the Switch's IP address, subnet mask, and default gateway address:
28
1. Select Manual from the Get IP From drop-down menu.