Operation Manual
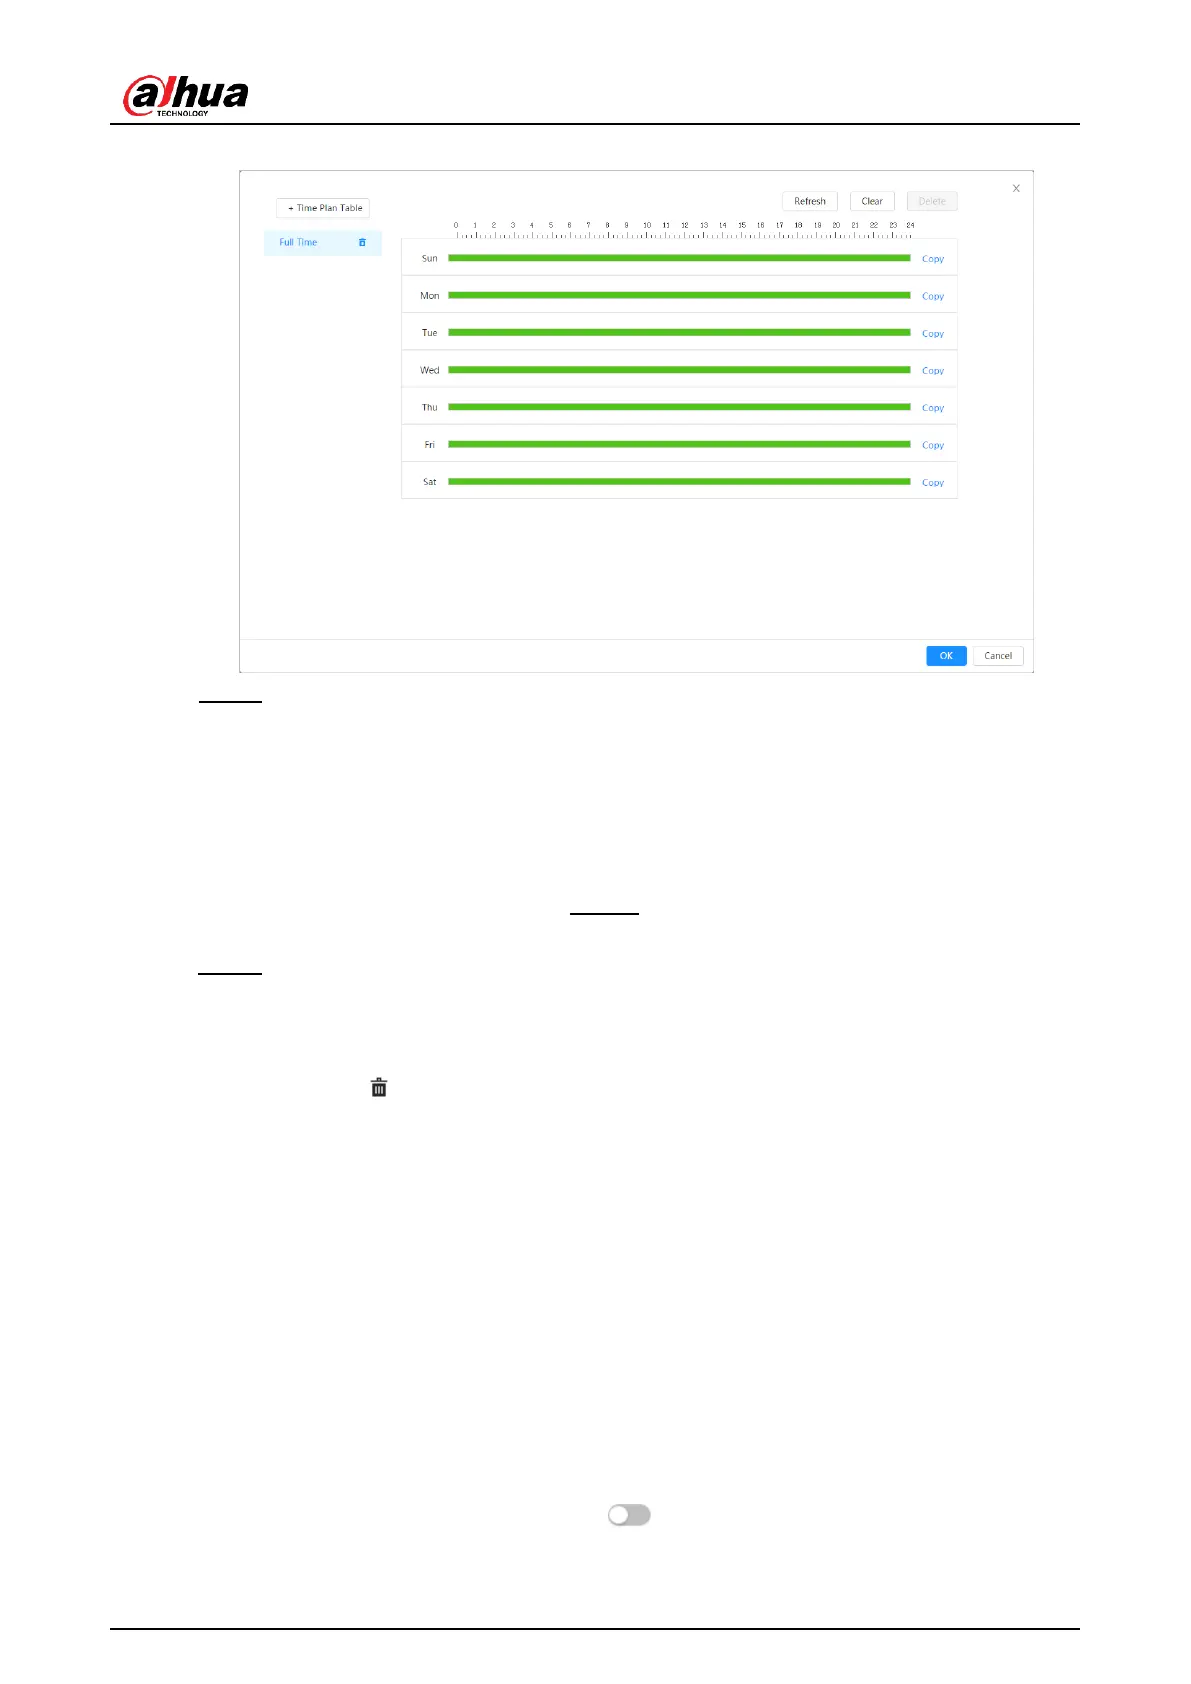
Figure 5:8 programming
Step 2: Click and drag the left mouse button on the timeline to set arming periods. Alarms will
go off at the time period in green on the timeline.
● Click onCopy(Copy) next to a day, and select the days you want to copy in the request
interface; you can copy the settings to the selected days. Select the check boxSelect all(
Select All) to select all days to copy the settings.
● You can set 6 time periods per day. Step 3: click
onApply(apply).
Step 4: (Optional) Clicktime plan table(Time Plan Table) to add a
new time plan table.
Can:
● Double click on the table name to edit it.
● Click to delete the history as required.
5.2.2.2Record linkage
The system can link the recording channel when an alarm event occurs. After the alarm, the
system stops recording after a long period of time according to the settingpost recording(
Post Record).
Previous requirements
● Once the corresponding type of alarm is enabled (Normal,Movement(Motion) or
Alarm(Alarm)), the recording channel links the recording.
● Enable auto record mode, record linkage will be applied.
Set recording linkage
In the interface ofAlarm(Alarm), click
select the channel as needed and setpost recording(Post-Record) for
to enable recording linkage,
24
 Loading...