2 Components
Service manual
20
ATXP20~35L2V1B + FTXP20~71L2V1B + ARXP20~35L2V1B +
RXP20~71L2V1B
Split Comfora R32
ESIE18-01 – 2019.02
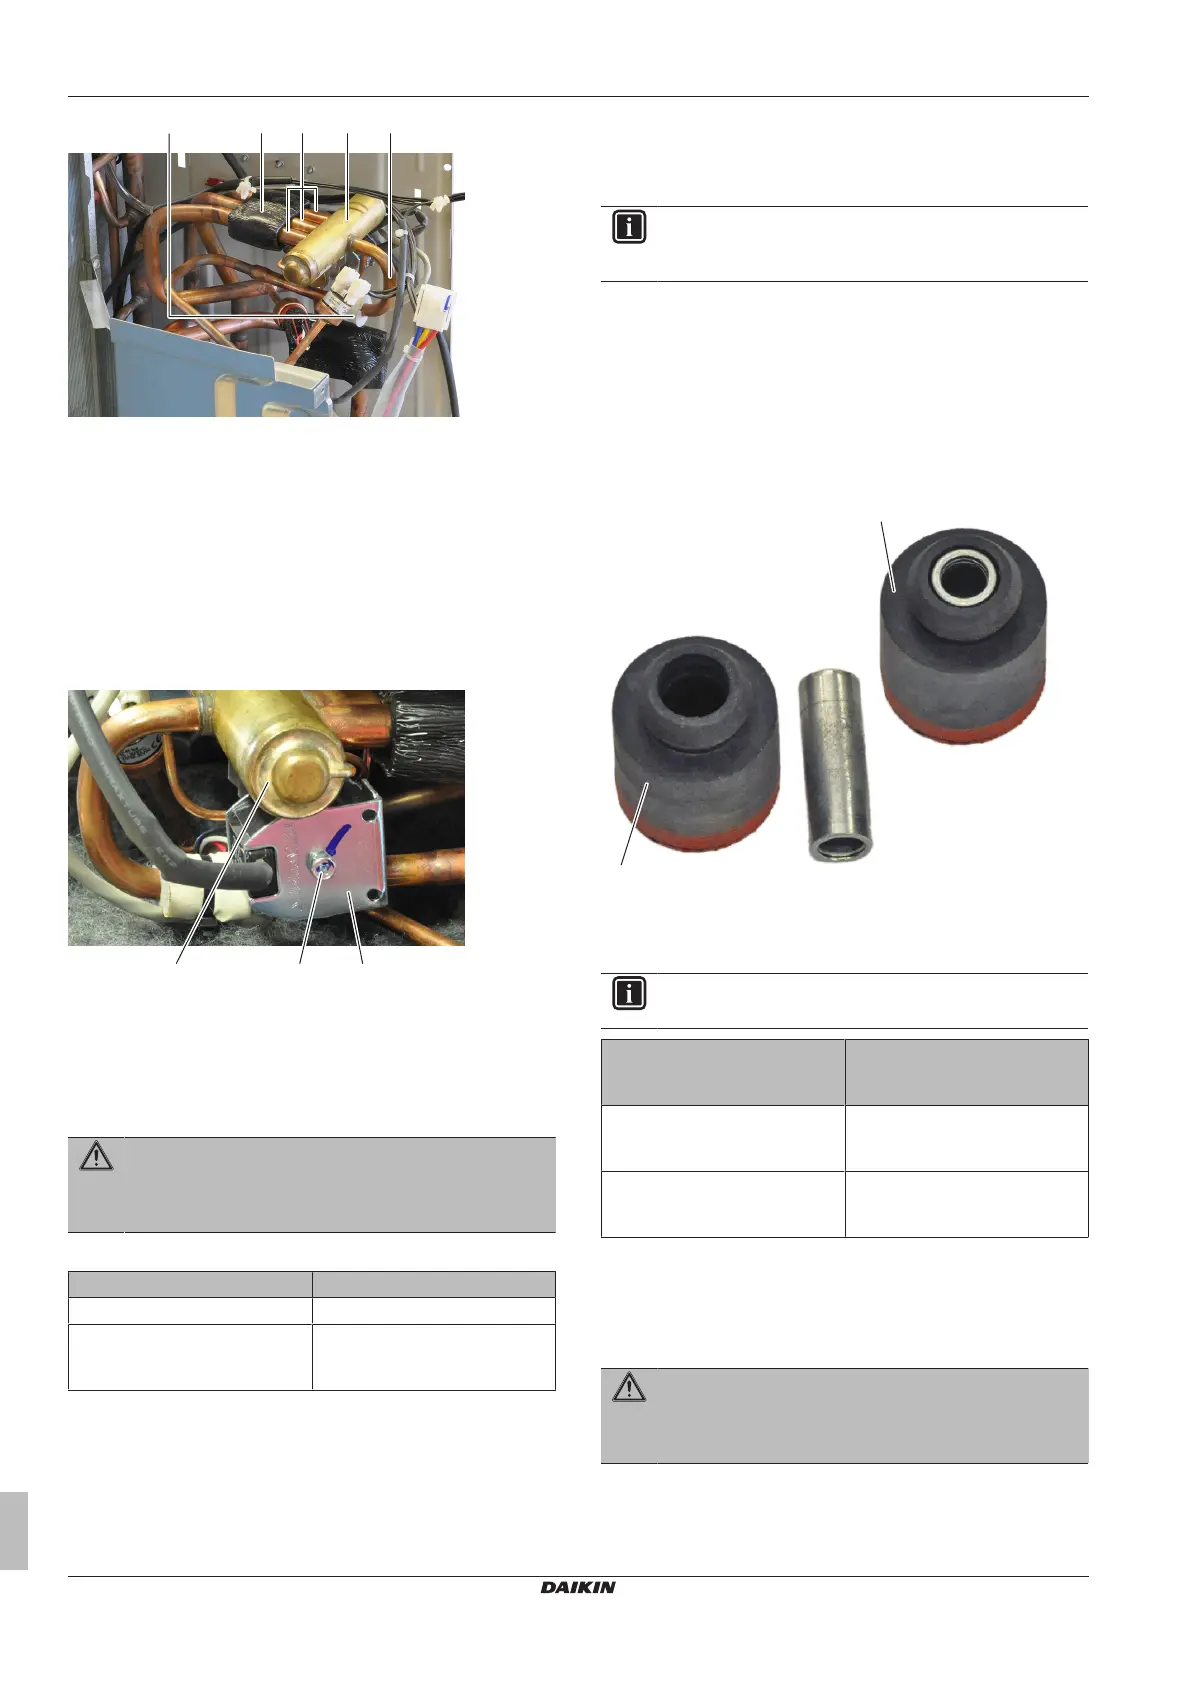
a 4‑way valve pipe
b 4‑way valve
c Putty
d Insulation
3 Install the putty and the insulation in their original location.
4 Install the 4‑way valve coil on the 4‑way valve body, see
"2.1.2Repair procedures"on page19.
5 Add refrigerant to the refrigerant circuit, see "3.2.2 Repair
procedures"on page46.
To install the 4-way valve coil
1 Install the 4‑way valve coil on the 4‑way valve body.
a Screw
b 4‑way valve coil
c 4‑way valve body
2 Install and tighten the screw to fix the 4‑way valve coil.
3 Route the 4‑way valve coil harness towards the main PCB.
4 Connect the 4‑way valve coil connector to the main PCB.
WARNING
When reconnecting a connector to the PCB, do NOT apply
force, as this may damage the connector or connector pins
of the PCB.
5 Fix the 4‑way valve coil harness using new tie straps.
Is the problem solved? Action
Yes No further actions required.
No Return to the troubleshooting of
the specific error and continue
with the next procedure.
2.2 Compressor
2.2.1 Checking procedures
INFORMATION
It is recommended to perform the checks in the listed
order.
To perform a mechanical check of the compressor
Prerequisite: Turn OFF the unit via the user interface.
Prerequisite: Turn OFF the respective circuit breaker.
Prerequisite: Remove the required plate work, see "2.10 Plate
work"on page35.
1 Open the compressor insulation.
2 Check the compressor dampers and piping for any damage.
a Damper
INFORMATION
The compressor dampers may look different.
Compressor dampers and
piping are in a good
condition?
Action
Yes Perform an electrical check of the
compressor, see "2.2.1Checking
procedures"on page20.
No Replace the compressor, see
"2.2.2Repair procedures"on
page22.
To perform an electrical check of the compressor
1 First perform a mechanical check of the compressor, see
"2.2.1Checking procedures"on page20.
2 Open the compressor insulation.
WARNING
The smoothing capacitor MUST discharge below 10VDC
before disconnecting the Faston connectors from the
compressor wiring terminals. Risk of electrocution.
3 Remove the cover of the compressor wire terminals.
 Loading...