2 Components
Service manual
24
ATXP20~35L2V1B + FTXP20~71L2V1B + ARXP20~35L2V1B +
RXP20~71L2V1B
Split Comfora R32
ESIE18-01 – 2019.02
To perform an electrical check of the expansion
valve
Prerequisite: First perform a mechanical check of the expansion
valve, see "2.3.1Checking procedures"on page23.
1 Make sure that the electrical connector of the expansion valve
motor is correctly connected to the main PCB.
2 Disconnect the electrical connector of the expansion valve
motor from the main PCB and measure the continuity between
the following pins (windings) using a multi meter. All
measurements MUST be approximately the same.
▪ Connector pin 1‑6,
▪ Connector pin 2‑6,
▪ Connector pin 3‑6,
▪ Connector pin 4‑6.
a Connector S20
1 or more windings have no
continuity?
Action
Yes Replace the expansion valve
motor, "2.3.2Repair
procedures"on page24.
No Component is OK. Return to the
troubleshooting of the specific
error and continue with the next
step.
Problem solved?
After all checking procedures listed above have been performed:
Is the problem solved? Action
Yes No further actions required.
No Return to the troubleshooting of
the specific error and continue
with the next procedure.
2.3.2 Repair procedures
To remove the expansion valve motor
Prerequisite: Turn OFF the unit via the user interface.
Prerequisite: Turn OFF the respective circuit breaker.
Prerequisite: Remove the required plate work, see "2.10 Plate
work"on page35.
Prerequisite: If needed, remove any parts to create more space for
the removal.
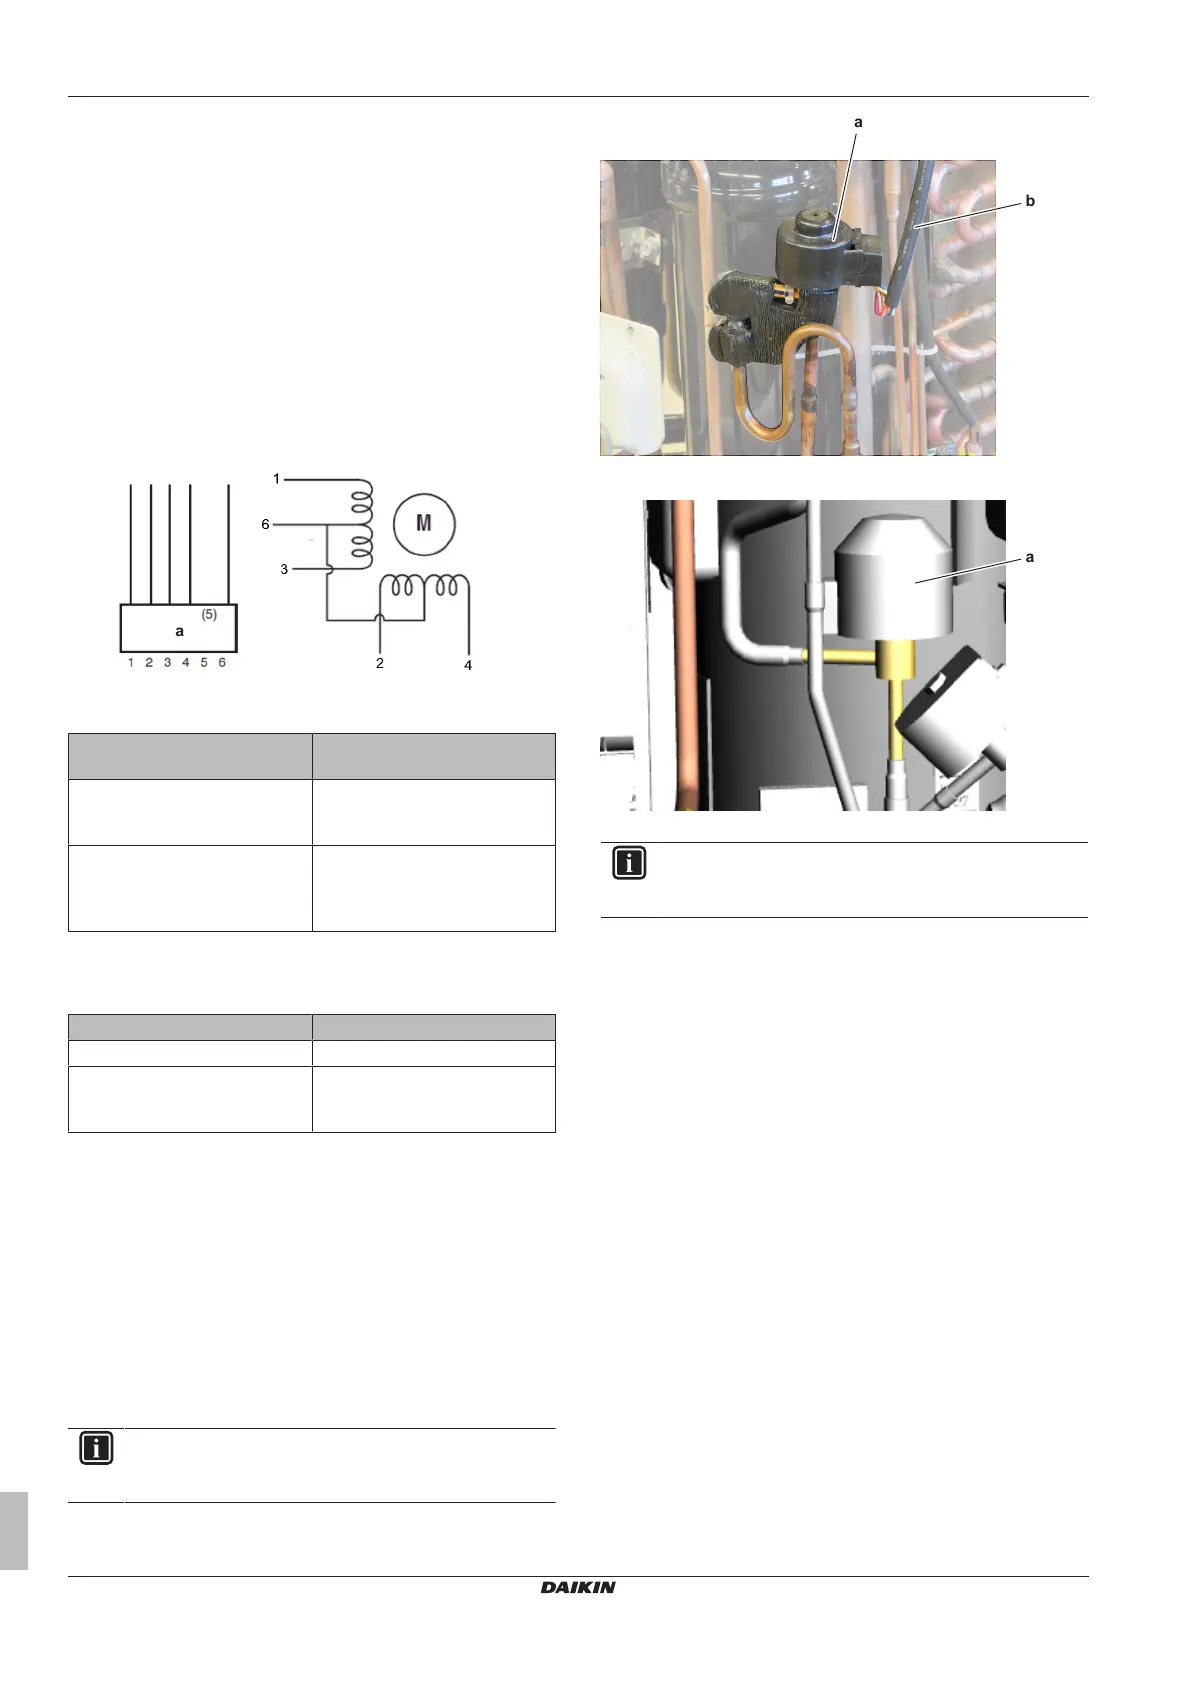
1 Pull up the expansion valve motor to remove it from the
expansion valve body.
INFORMATION
It may be needed to turn the expansion valve motor 1/8
turn counter clockwise to unlock it.
a Expansion valve motor
b Expansion valve motor harness
a Expansion valve motor
INFORMATION
The expansion valve and motor can have a different
configuration / layout.
2 Cut all tie straps that fix the expansion valve motor harness.
3 Disconnect the expansion valve motor connector from the main
PCB.
4 To install the expansion valve motor, see "2.3.2 Repair
procedures"on page24.
To remove the expansion valve body
Prerequisite: Recuperate the refrigerant from the refrigerant circuit,
see "3.2.2Repair procedures"on page46.
Prerequisite: If needed, remove any parts to create more space for
the removal.
1 Remove the expansion valve motor, see "2.3.2 Repair
procedures"on page24.
2 Remove the putty. Keep for re-use.
 Loading...