2 Components
Service manual
25
ATXP20~35L2V1B + FTXP20~71L2V1B + ARXP20~35L2V1B +
RXP20~71L2V1B
Split Comfora R32
ESIE18-01 – 2019.02
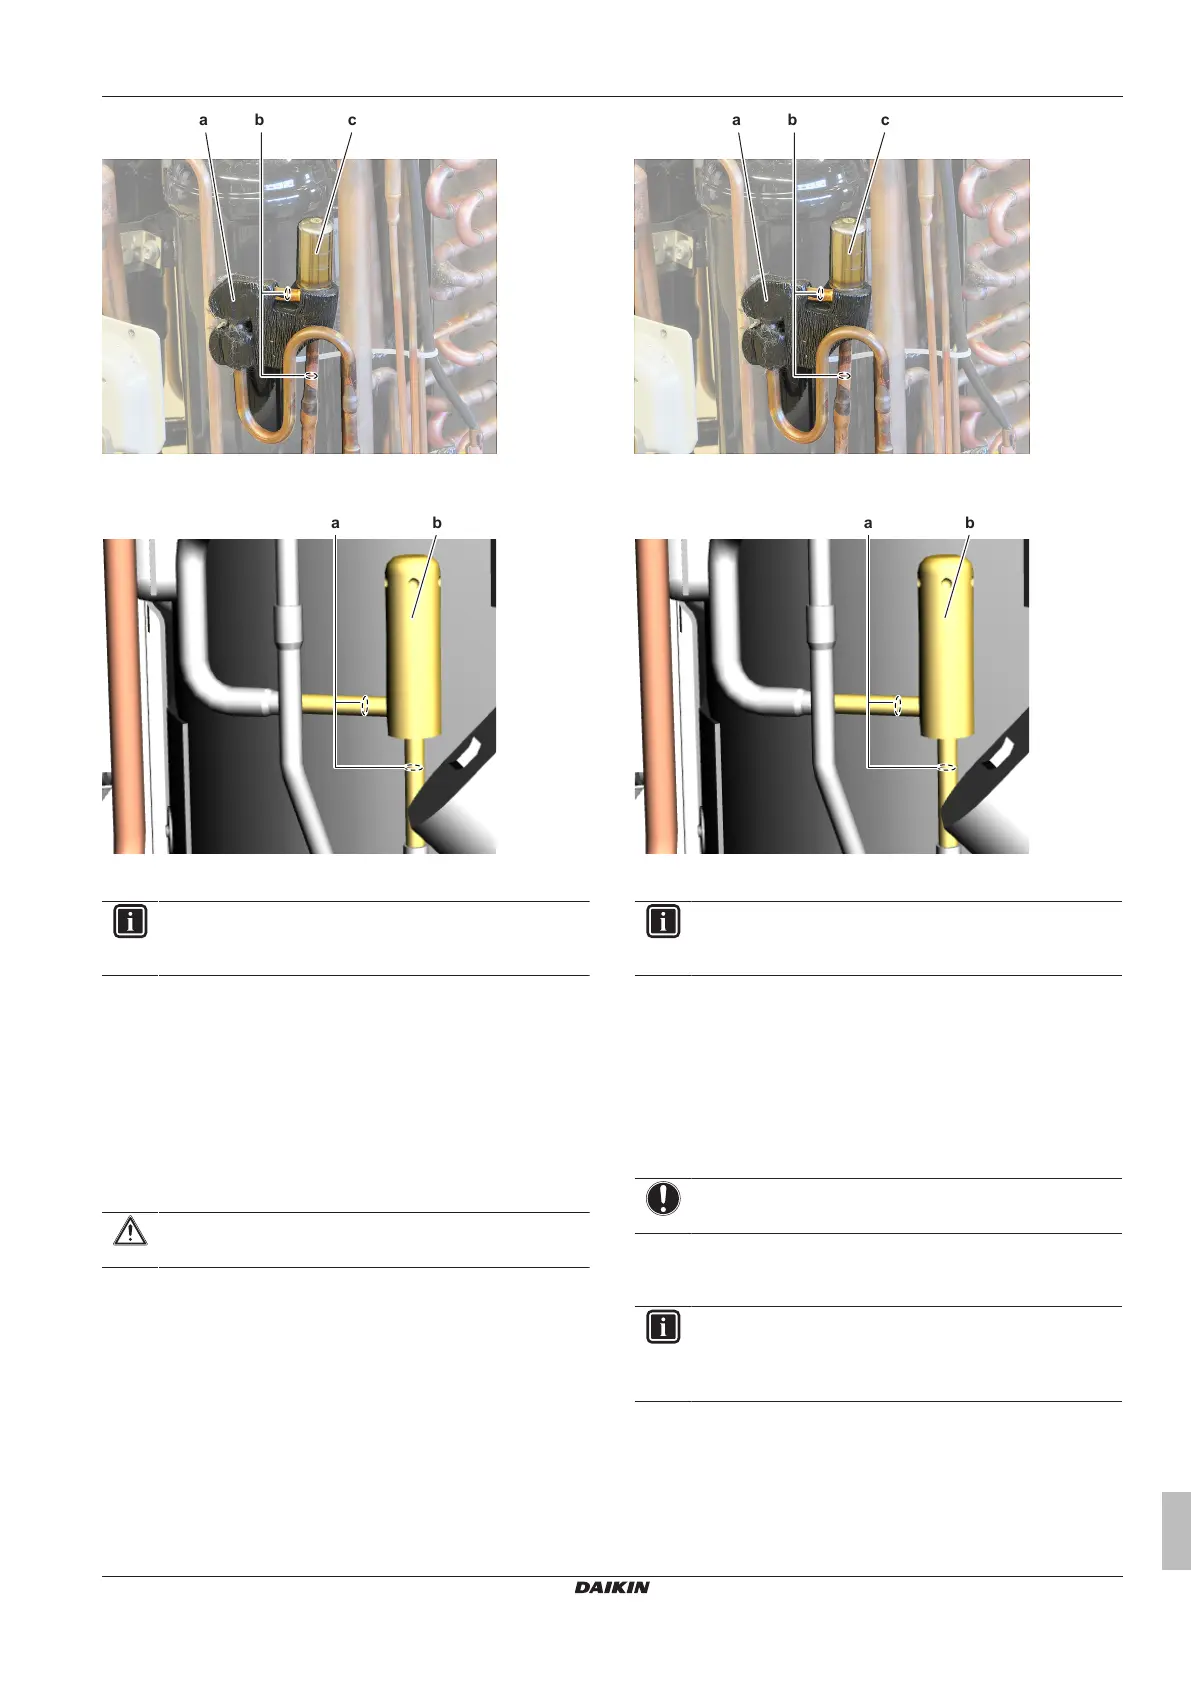
a Putty
b Expansion valve pipe
c Expansion valve body
a Expansion valve pipe
b Expansion valve body
INFORMATION
The expansion valve and motor can have a different
configuration / layout.
3 Cut the expansion valve pipes using a pipe cutter.
4 Remove the expansion valve body.
5 To install the expansion valve body, see "2.3.2 Repair
procedures"on page24.
To install the expansion valve body
1 Install the expansion valve body in the correct location.
2 Wrap a wet rag around the expansion valve body and solder
the refrigerant pipes to the expansion valve body.
CAUTION
Overheating the valve will damage or destroy it.
a Putty
b Expansion valve pipe
c Expansion valve body
a Expansion valve pipe
b Expansion valve body
INFORMATION
The expansion valve and motor can have a different
configuration / layout.
3 Reinstall the putty.
4 To install the expansion valve motor, see "2.3.2 Repair
procedures"on page24.
5 Add refrigerant to the refrigerant circuit, see "3.2.2 Repair
procedures"on page46.
About the installation of the expansion valve
motor
NOTICE
Select the correct type.
To install the expansion valve motor with clip
1 Install the expansion valve motor on the expansion valve body.
INFORMATION
The expansion valve motor is equipped with a pipe
retention clip. Install the pipe retention clip over the pipe to
lock the expansion valve motor.
 Loading...