6
Views of S3225QS monitor
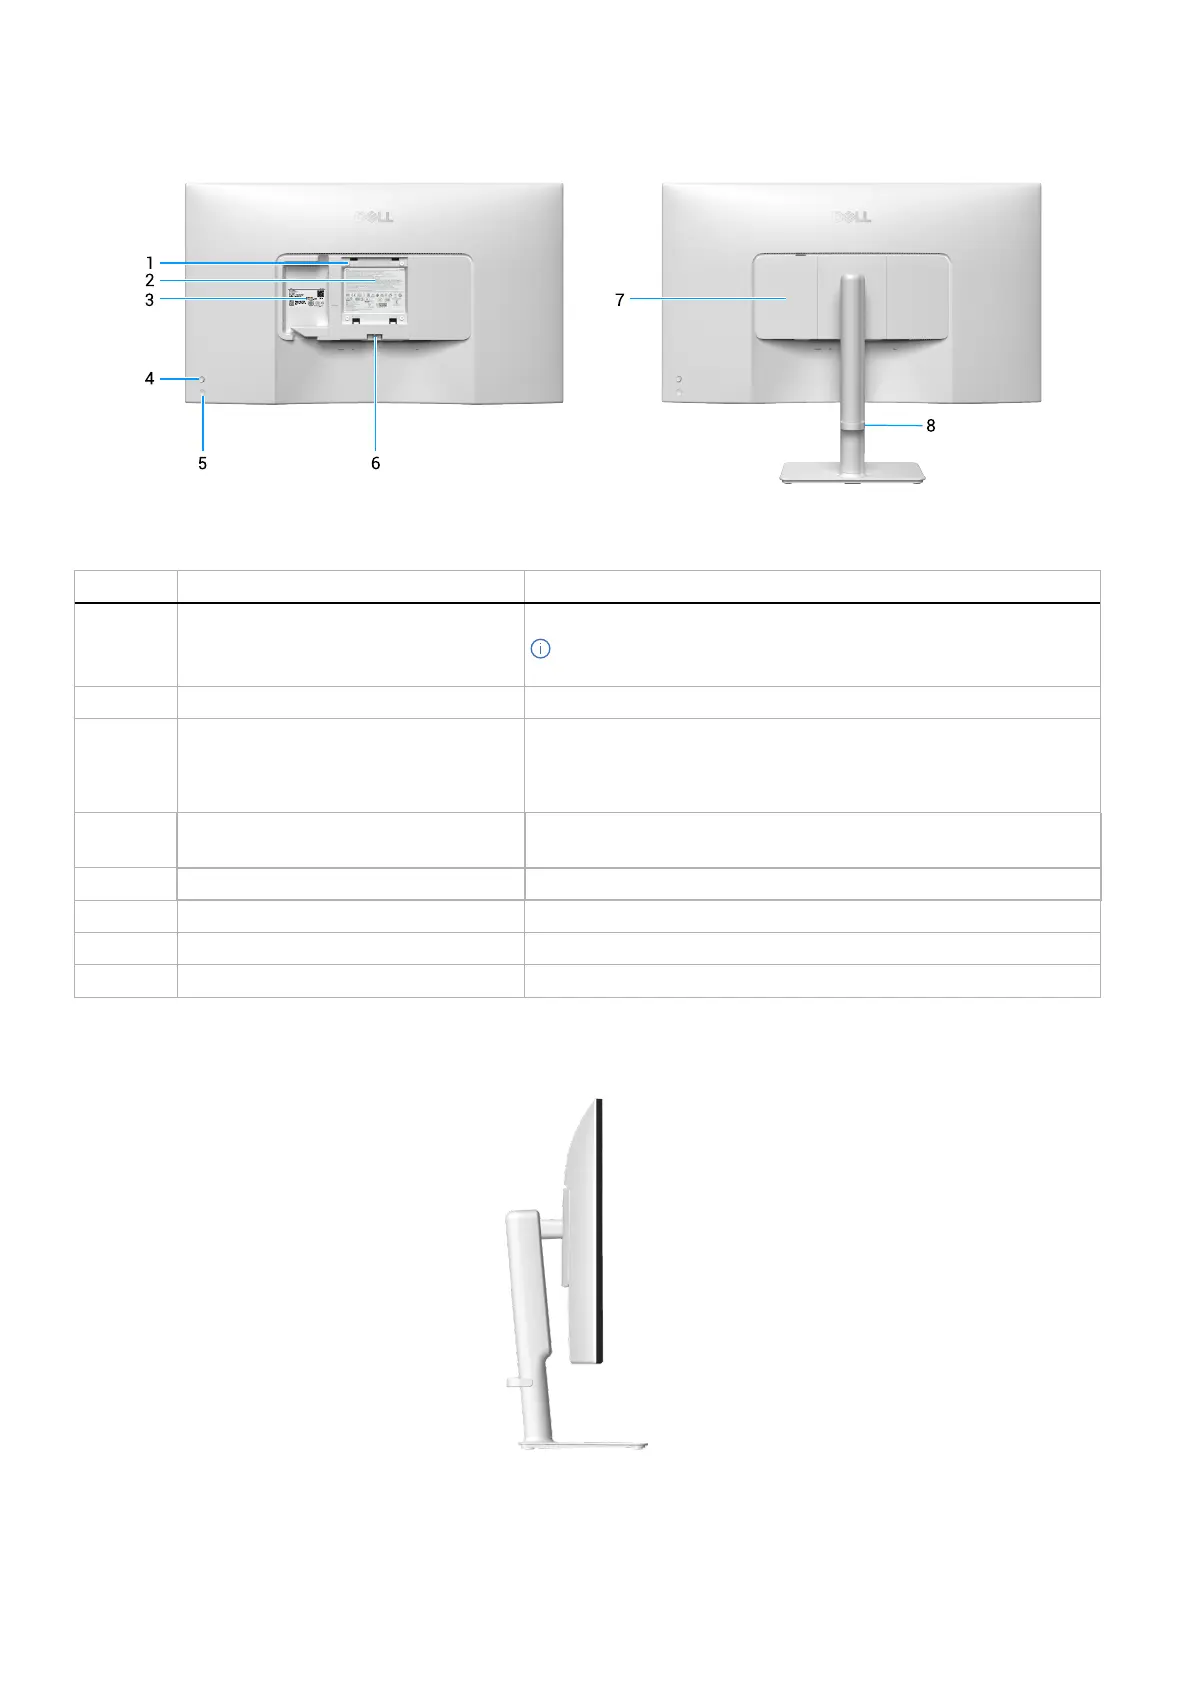
Back view
Figure 2. Back view of the monitor
Table 2. Back view descriptions.
No. Description Use
1
VESA mounting holes (100 mm x 100 mm
- behind attached VESA cover)
Wall mount the monitor using VESA-compatible wall mount kit.
NOTE: Wall-mount kit is not shipped with your monitor and is sold
separately.
2
Regulatory information label Lists the regulatory approvals.
3
Regulatory label (including MyDell QR
code, serial number, and Service Tag label)
See this label if you need to contact Dell for technical support. The
Service Tag is a unique alphanumeric identifier that enables Dell service
technicians to identify the hardware components in your monitor and
access warranty information.
4
Joystick Use it to control the On-Screen Display (OSD) menu. For more
Information, see Operating the monitor in the User's Guide of S3225QS.
5
Power button To turn the monitor on or off.
6
Stand release button Releases the stand from the monitor.
7
Side I/O cover Use to cover side I/O.
8
Cable management guide Use to organize cables by routing them through the slot.
Side view
Figure 3. Side view of the monitor