Steps
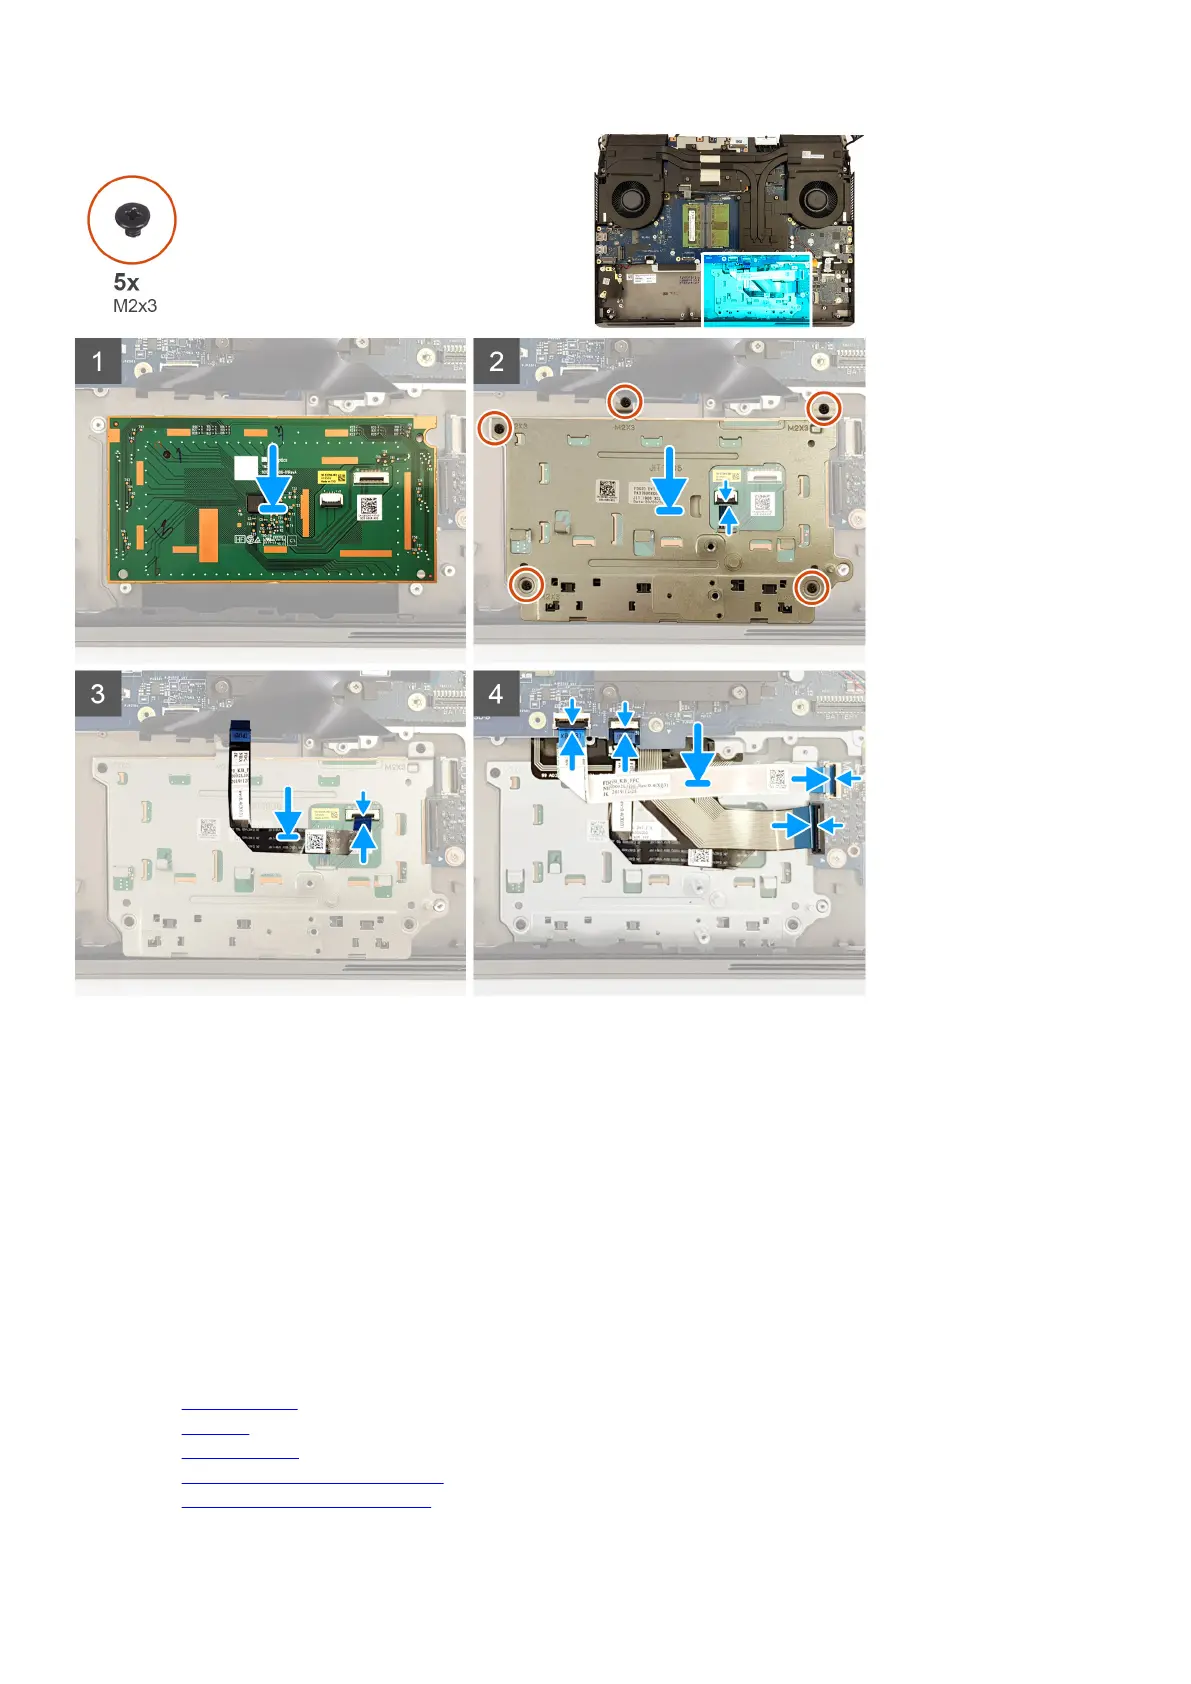
1. Place the touchpad into the slot on the palm-rest assembly. Ensure to align the touchpad using the alignment pins on the palm-
rest assembly.
2. Place the touchpad bracket into the slot on the palm-rest assembly.
3. Replace the five screws (M2x3) that secure the touchpad bracket to the palm-rest assembly.
4. Connect the touchpad-button cable to the touchpad and close the latch to secure the cable.
5. Adhere the touchpad cable to the touchpad bracket.
6. Connect the touchpad cable to the touchpad and close the latch to secure the cable.
7. Connect the touchpad cable to the system board and close the latch to secure the cable.
8. Connect the keyboard cable to the audio daughter-board and close the latch to secure the cable.
9. Connect the keyboard-controller cable to the audio daughter-board and close the latch to secure the cable.
10.Connect the keyboard-controller cable to the system board and close the latch to secure the cable.
Next steps
1. Install the
computer base.
2. Install the speakers.
3. Install the rear-I/O cover.
4. Install the solid-state drive interposer board, if applicable.
5. Install the solid-state drive in M.2 slot four, if applicable.
52
 Loading...