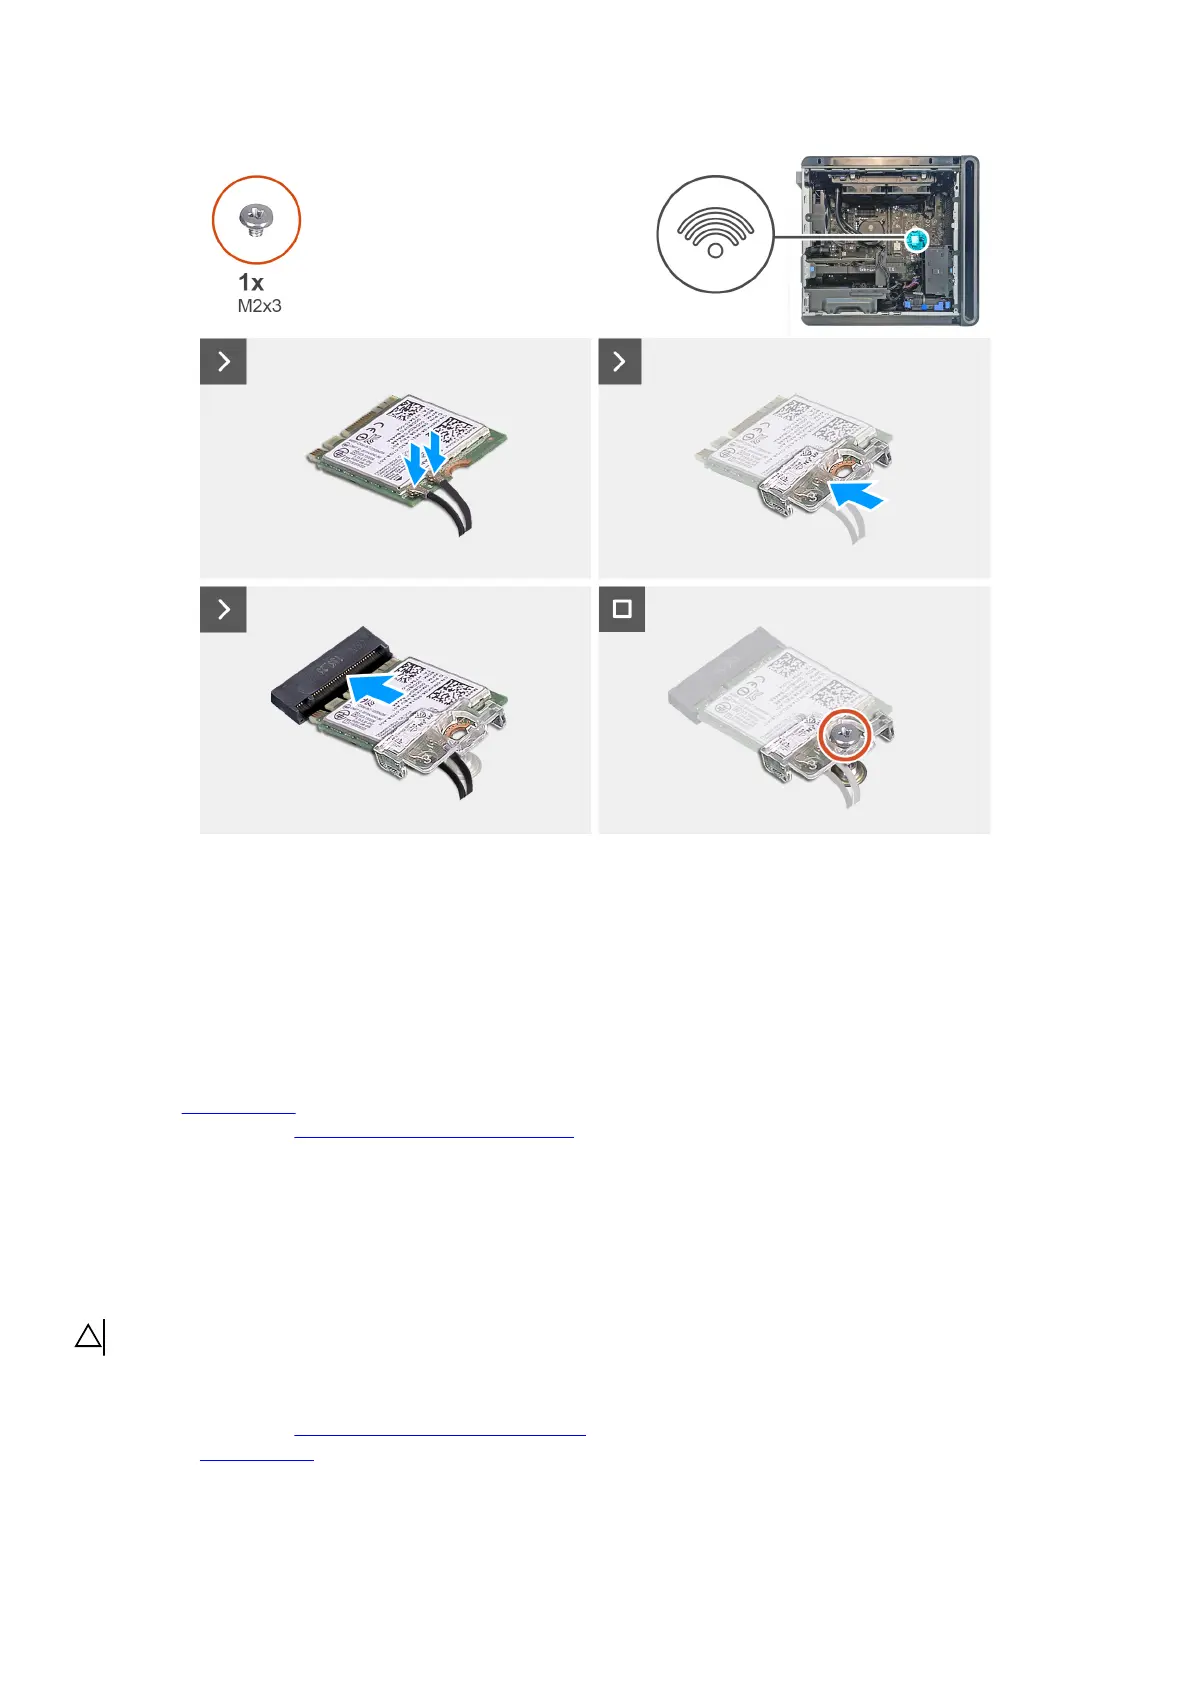
EasyManuals Logo

Dell Alienware Aurora R16 User Manual

Dell Alienware Aurora R16
114 pages
To Next Page IconTo Next Page
To Previous Page IconTo Previous Page
Page #62 background imageLoading...
Page #62 background image
Steps
1. Connect the SMA cables to the wireless card.
2. Place the wireless-card bracket on the wireless card.
3. Align the notch on the wireless card with the tab on the wireless-card slot.
4. Slide the wireless card at an angle into the wireless-card slot.
5. Replace the screw (M2x3) that secures the wireless card to the system board.
Next steps
1. Install the
left-side cover.
2. Follow the procedure in After working inside your computer.
Lower front-chassis fan
Removing the lower front-chassis fan
CAUTION: The information in this removal section is intended for authorized service technicians only.
Prerequisites
1. Follow the procedure in Before working inside your computer.
2. Remove the left-side cover.
62

Table of Contents

Questions and Answers:

Question and Answer IconNeed help?

Do you have a question about the Dell Alienware Aurora R16 and is the answer not in the manual?

Dell Alienware Aurora R16 Specifications

General IconGeneral
ChipsetIntel Z790
GPUUp to NVIDIA GeForce RTX 4090
GraphicsNVIDIA GeForce RTX 4090
MemoryUp to 64GB DDR5
StorageUp to 4TB NVMe SSD + 2TB HDD
Operating SystemWindows 11 Home, 64-bit
Front Ports2x USB 3.2 Gen 1 Type-A, 1x USB 3.2 Gen 2 Type-C, 1x Headphone/Microphone combo jack
Rear Ports1x RJ45 Ethernet port
WirelessKiller Wi-Fi 6E AX1675 (2x2), Bluetooth 5.2

Related product manuals