2. Align the rear-chassis fan with the slot on the chassis.
3. Replace the screw (M3x5) that secures the rear-chassis fan to the chassis.
4. Connect the rear-chassis fan cable to the system board.
Next steps
1. Install the
left-side cover.
2. Follow the procedure in After working inside your computer.
Top-chassis fan
Removing the top-chassis fan
Prerequisites
1. Follow the procedure in Before working inside your computer.
2. Remove the
left-side cover.
About this task
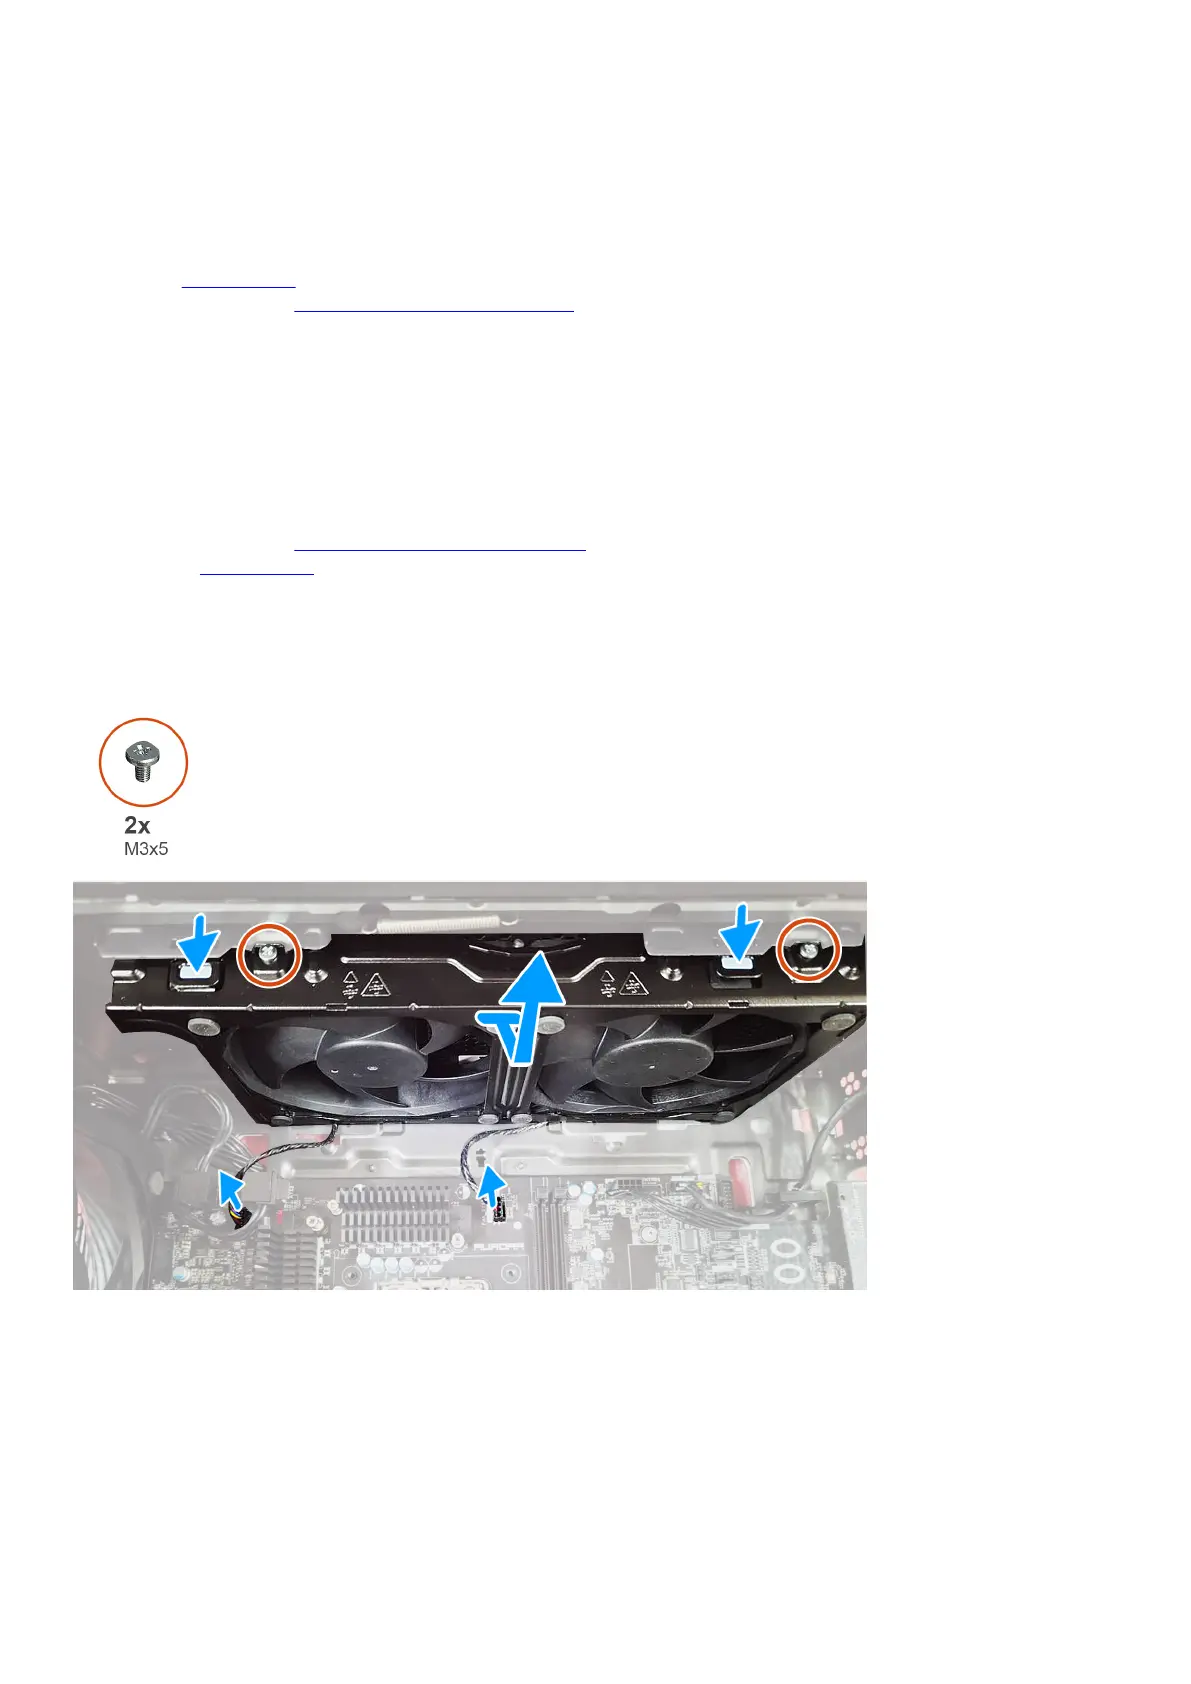
The following images indicate the location of the top-chassis fan and provide a visual representation of the removal procedure.
Steps
1. Lay the computer on the right side.
2. Disconnect the top-chassis fan cables from the system board.
3. Remove the two screws (M3x5) that secures the top-chassis fan to the chassis.
4. Press the releasing clip of the top-chassis fan.
5. Slide and lift the top-chassis fan off the chassis.
68