EasyManuals Logo

Dell Chromebook 3100 2-in-1 Service Manual

Dell Chromebook 3100 2-in-1
97 pages
To Next Page IconTo Next Page
To Previous Page IconTo Previous Page
Page #30 background imageLoading...
Page #30 background image
Next steps
1. Install the battery.
2. Install the base cover.
3. Install the microSD card.
4. Follow the procedure in after working inside your computer.
Input Output board
Removing the Input and output board
Prerequisites
NOTE:
The input and output board depends on the configuration ordered. Not all system configuration come with the
input and output board.
1. Follow the procedure in before working inside your computer.
2. Remove the microSD card.
3. Remove the base cover.
4. Remove the battery.
Steps
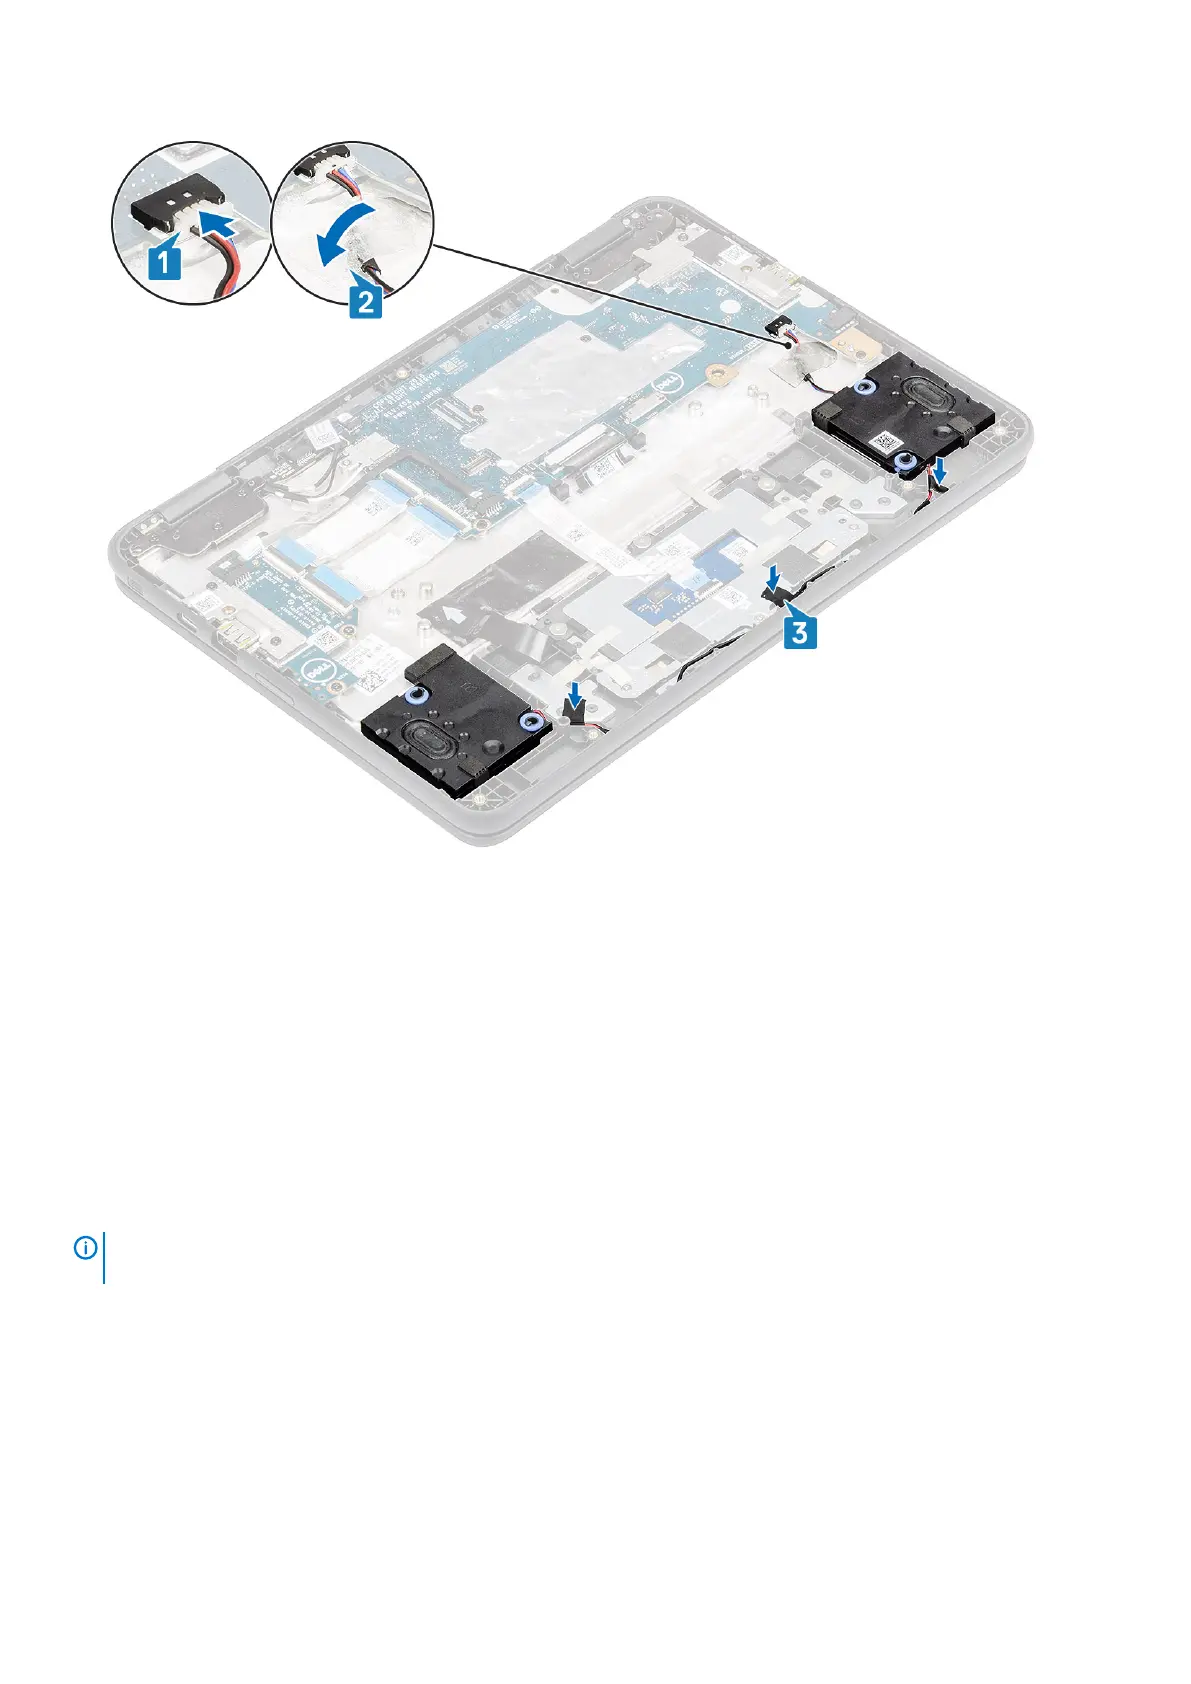
1. Disconnect the Type-C power cable from the connector in the IO board [1].
2. Open the latch and disconnect the 30-pin and 40-pin IO board cable from the connectors in the IO board [2].
30
Removing and Installing

Table of Contents

Other manuals for Dell Chromebook 3100 2-in-1

Questions and Answers:

Question and Answer IconNeed help?

Do you have a question about the Dell Chromebook 3100 2-in-1 and is the answer not in the manual?

Dell Chromebook 3100 2-in-1 Specifications

General IconGeneral
RAM4GB LPDDR4
Storage32GB eMMC
Display11.6-inch HD (1366 x 768) Touchscreen
GraphicsIntel UHD Graphics 600
Operating SystemChrome OS
Battery LifeUp to 10 hours
Camera720p HD Webcam
ColorBlack
ProcessorIntel Celeron N4020
Ports2 x USB-C, 1 x MicroSD card reader, 1 x Headphone/Mic combo jack
WirelessBluetooth 5.0

Related product manuals