EasyManuals Logo

Dell Chromebook 3100 2-in-1 Service Manual

Dell Chromebook 3100 2-in-1
97 pages
To Next Page IconTo Next Page
To Previous Page IconTo Previous Page
Page #51 background imageLoading...
Page #51 background image
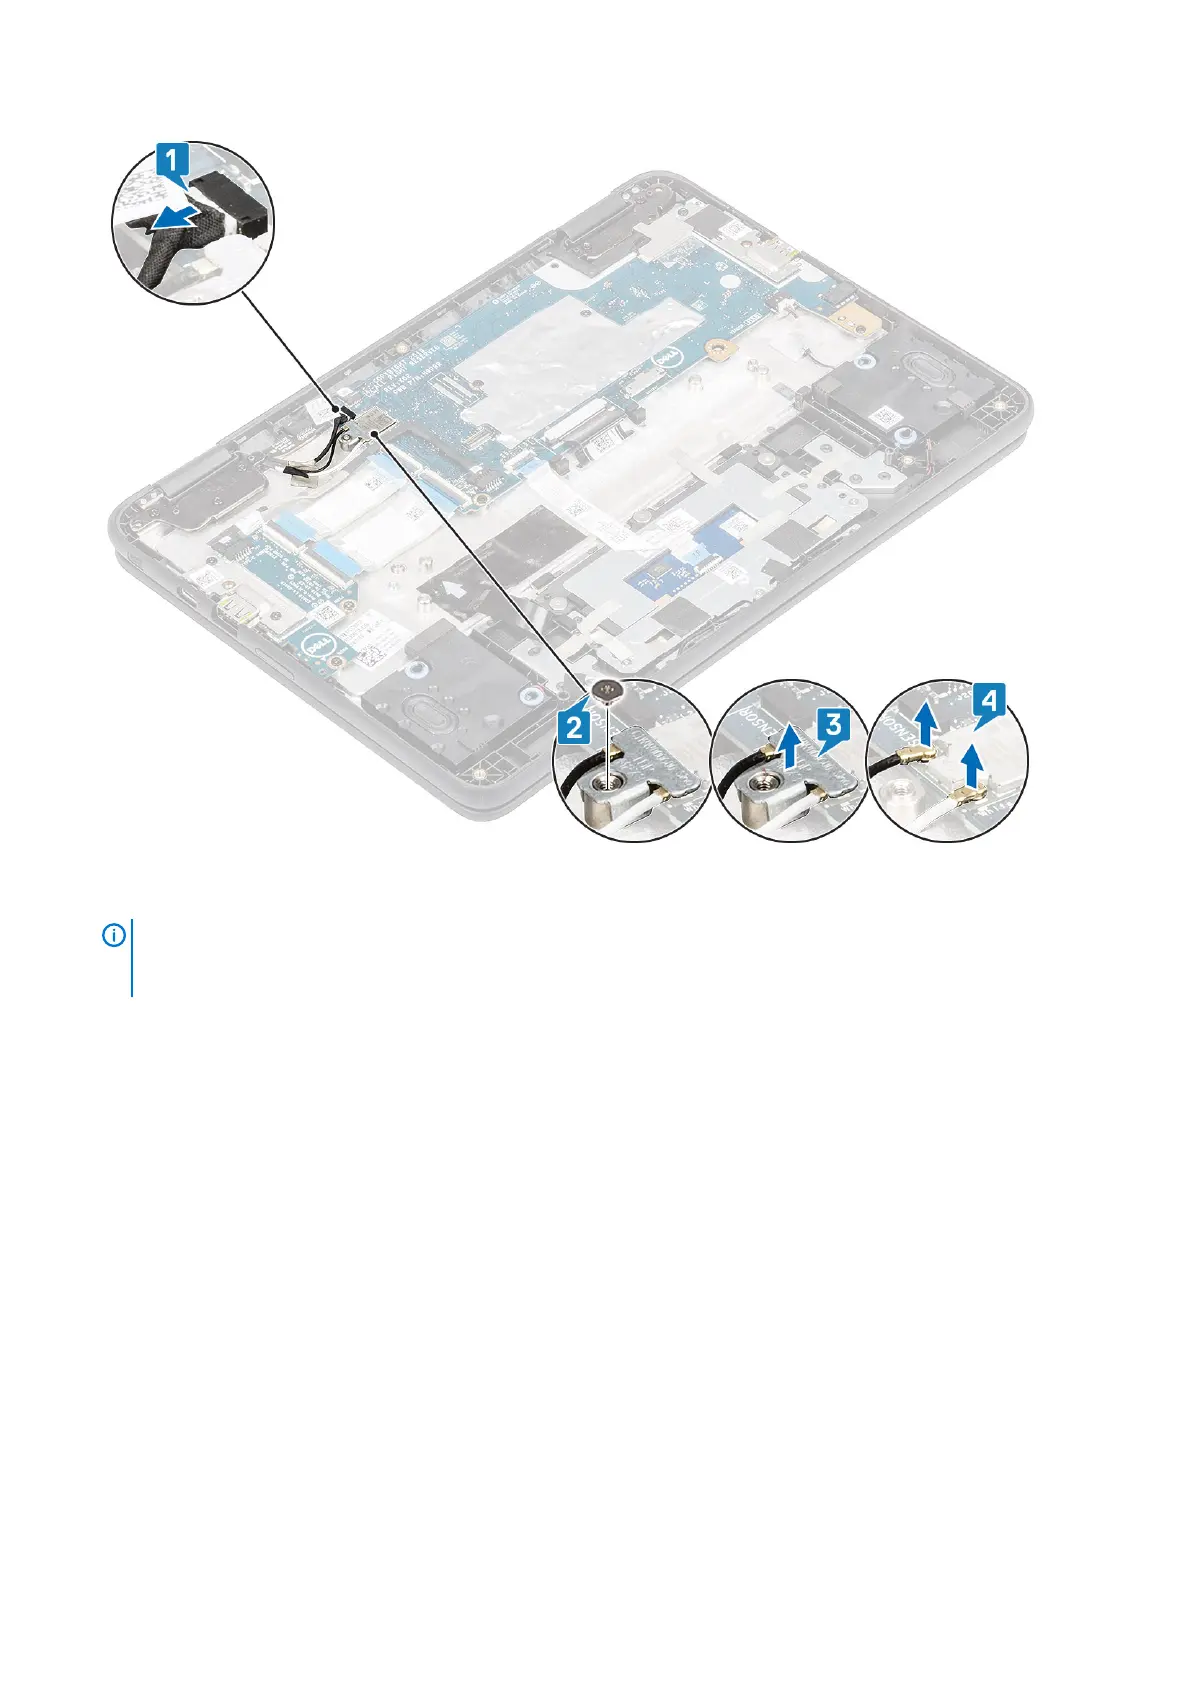
4. Remove the single (M2.0x4.0) screw that secures the display cable bracket to the system board [1]
5. Lift away the display bracket [2].
NOTE:
The screw securing the display cable bracket also secures the left IO bracket to the system board, as a result
removal of the display cable bracket leaves the left IO bracket unsecured. Technicians should therefore, ensure that
the left IO bracket is not moved or lost during any subsequent disassembly processes.
6. Peel back the adhesive tape, open the lock and disconnect the display cable [3], [4].
Removing and Installing
51

Table of Contents

Other manuals for Dell Chromebook 3100 2-in-1

Questions and Answers:

Question and Answer IconNeed help?

Do you have a question about the Dell Chromebook 3100 2-in-1 and is the answer not in the manual?

Dell Chromebook 3100 2-in-1 Specifications

General IconGeneral
RAM4GB LPDDR4
Storage32GB eMMC
Display11.6-inch HD (1366 x 768) Touchscreen
GraphicsIntel UHD Graphics 600
Operating SystemChrome OS
Battery LifeUp to 10 hours
Camera720p HD Webcam
ColorBlack
ProcessorIntel Celeron N4020
Ports2 x USB-C, 1 x MicroSD card reader, 1 x Headphone/Mic combo jack
WirelessBluetooth 5.0

Related product manuals