Table 26. Configuration0-1 (continued)
Card type Slot priority Maximum number of cards
SolarFlare (OCP: 25Gb) Integrated slot 1
Broadcom (OCP: 10Gb) Integrated slot 1
Marvell (OCP: 10Gb) Integrated slot 1
Intel (OCP: 10Gb) Integrated slot 1
Broadcom (OCP: 1Gb) Integrated slot 1
Intel (OCP: 1Gb) Integrated slot 1
Dell External PERC Adapter 1, 2 4
Dell BOSS S1 Module Integrated slot 1
Samsung (PCIe SSD AIC) 1, 2 4
Intel (PCIe SSD) Not supported N/a
Removing the expansion card
Prerequisites
1. Follow the safety guidelines listed in the Safety instructions.
2. Follow the procedure listed in the Before working inside your system.
3. If required, remove the air shroud.
Steps
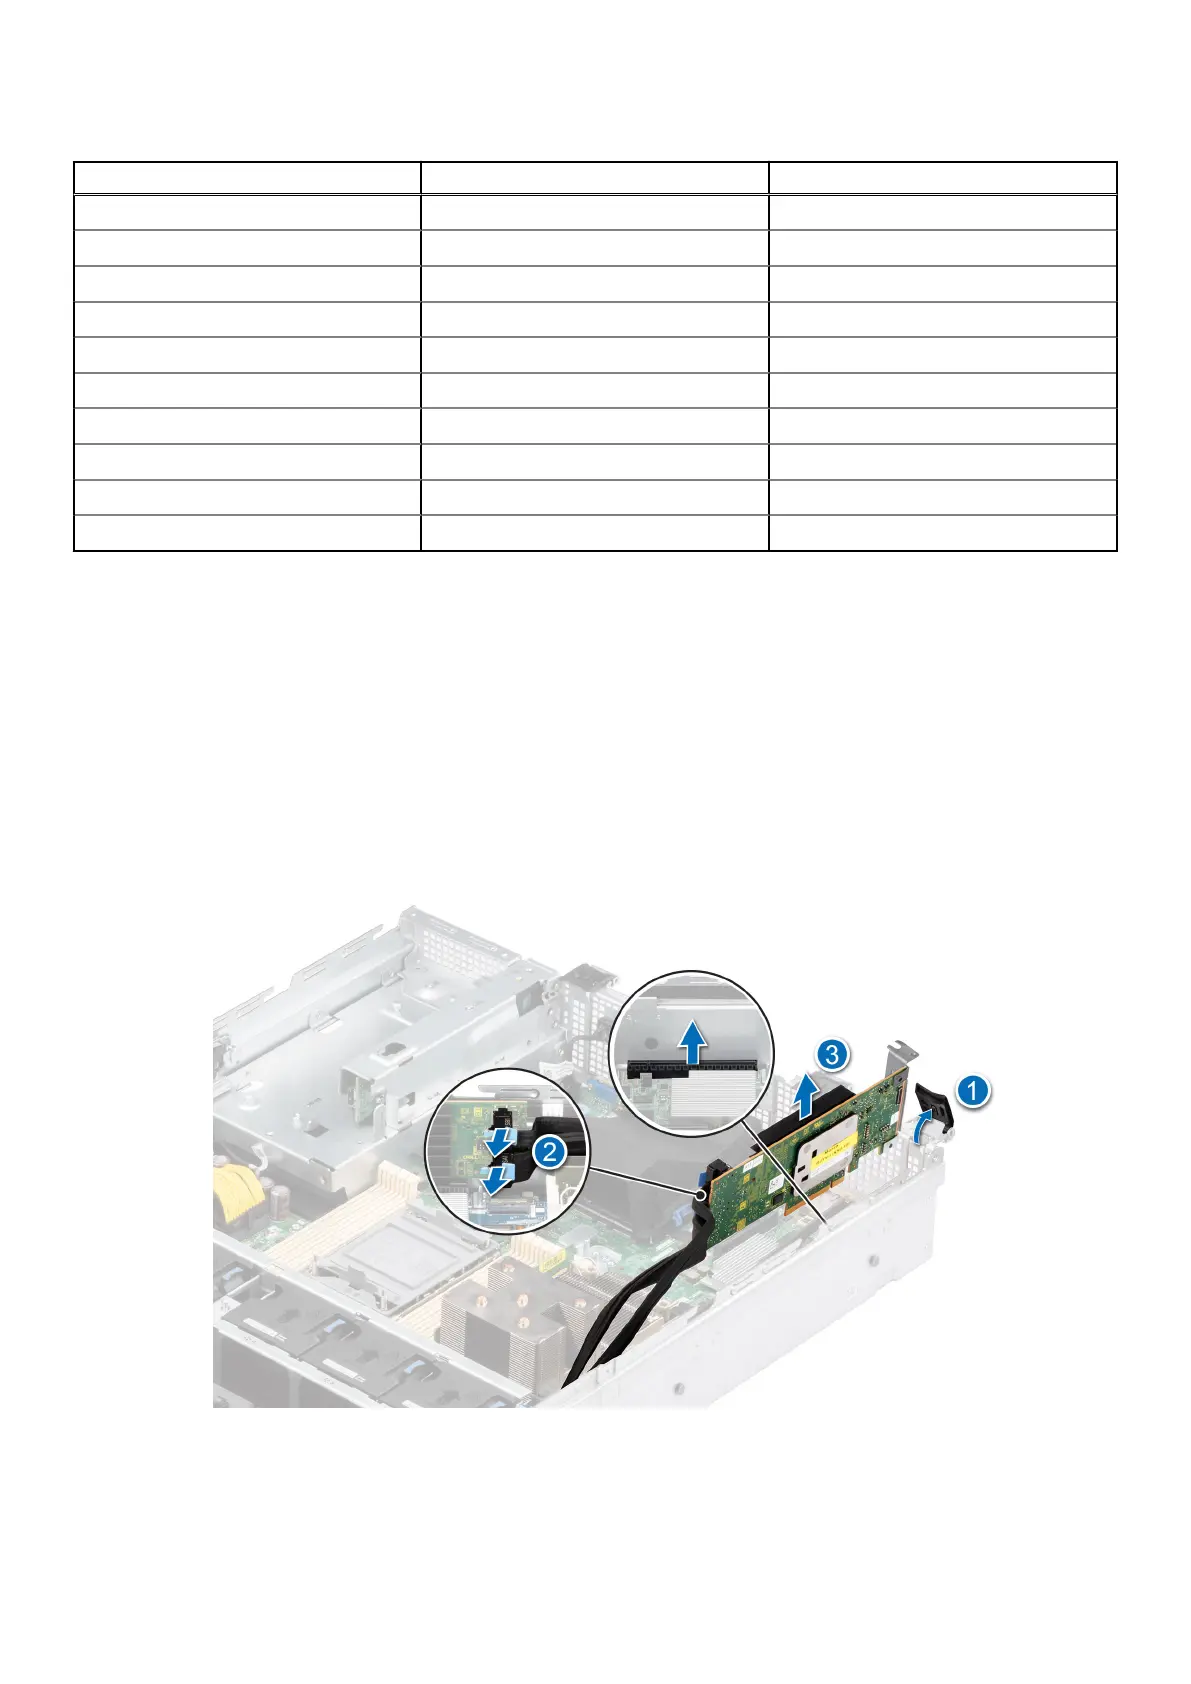
1. Rotate to open the PCIe card holder.
2. Disconnect the cables form the expansion card.
3. By holding the edges lift the expansion card from the PCIe slot on the system board
Figure 68. Removing the expansion card
4. Install the metal filler bracket if not replacing the expansion card.
76
Installing and removing system components

 Loading...


