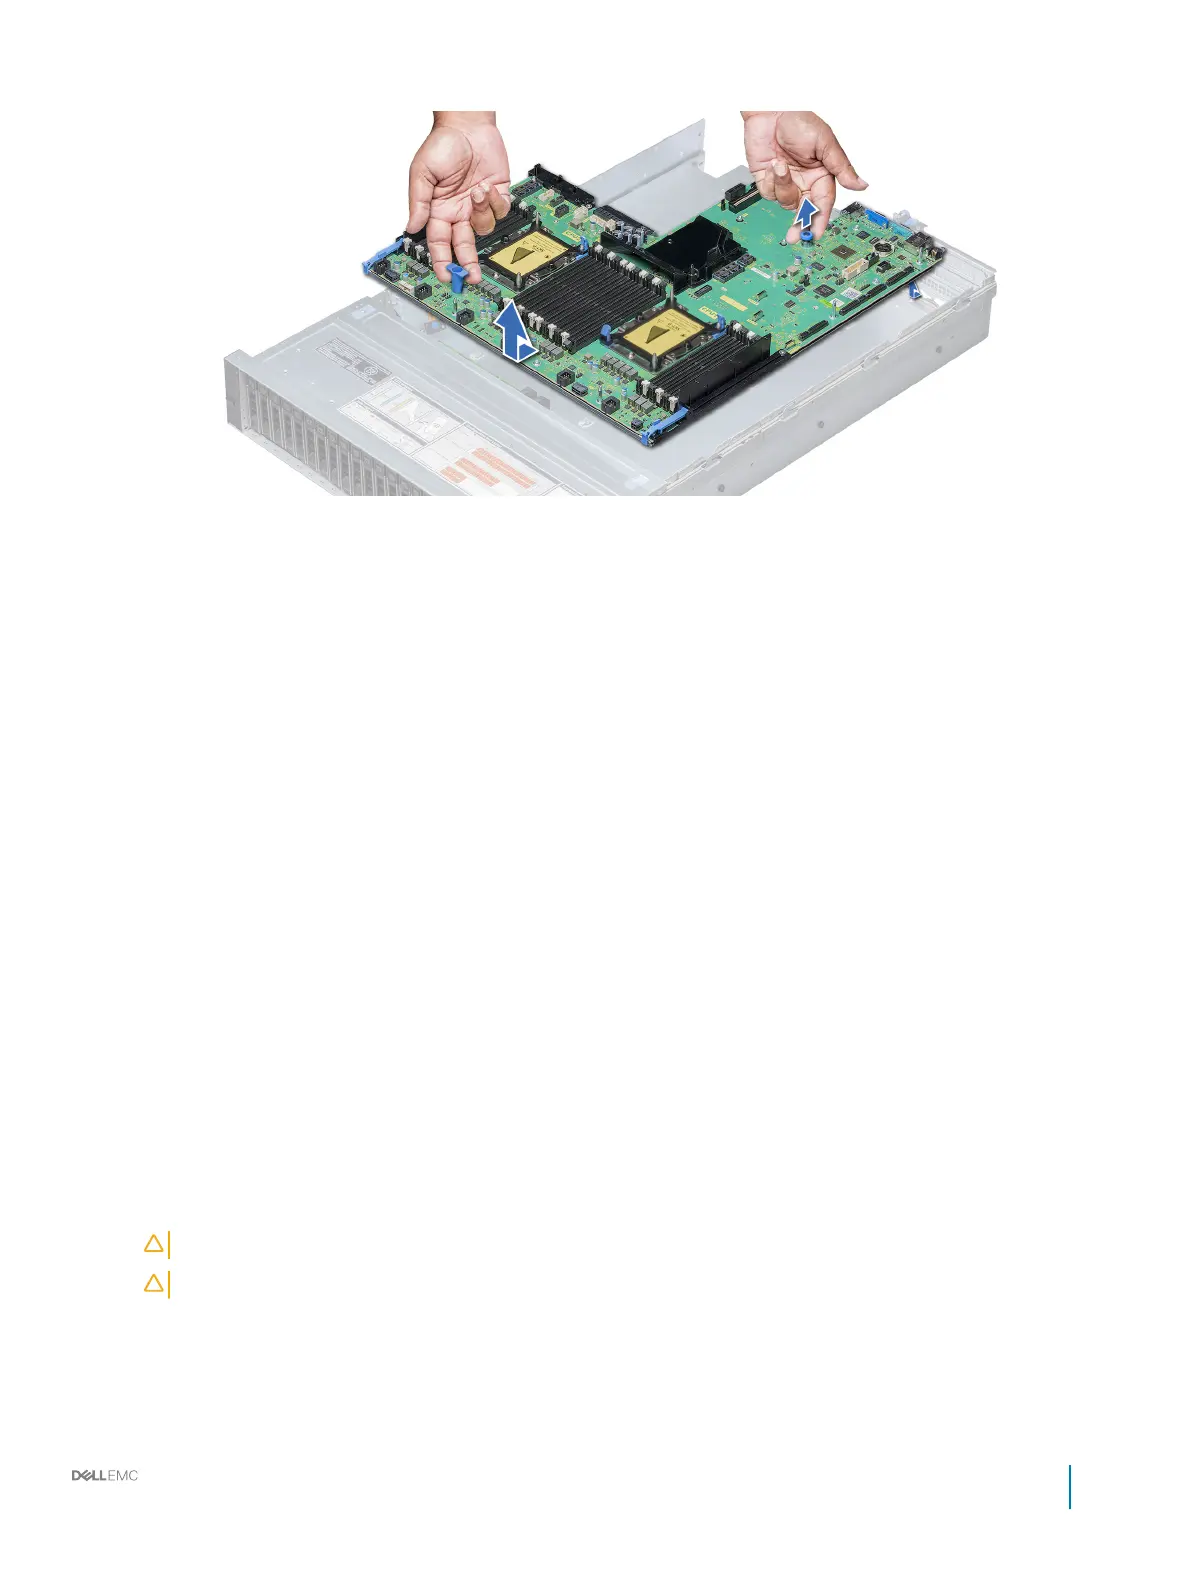
Figure 103. Removing system board
Next steps
Install the system board.
Related links
Removing the air shroud
Removing the cooling fan assembly
Removing a power supply unit
Removing expansion card riser 1
Removing expansion card riser 2
Removing expansion card riser 3
Removing integrated storage controller card
Removing the optional IDSDM/vFlash card
Replacing optional internal USB memory key
Removing USB 3.0 module
Removing a processor and heat sink module
Removing a memory module
Removing the network daughter card
Installing system board
Installing system board
Prerequisites
Follow the safety guidelines listed in Safety instructions.
Steps
1 Unpack the replacement system board assembly.
CAUTION
: Do not lift the system board by holding a memory module, processor, or other components.
CAUTION: Take care not to damage the system identication button while placing the system board into the chassis.
2 Holding the system board holder and blue release pin, push the system board toward the back of the system until the release pin clicks
into place.
Dell EMC PowerEdge R740 Installation and Service Manual
Installing and removing system components
155

 Loading...


