Steps
1 Using a Torx #T30 screwdriver, loosen the screws on the heat sink.
NOTE: Ensure that you loosen one screw before moving on to the next screw.
2 Pushing both retention clips simultaneously, lift the processor and heat sink module (PHM) out of the system.
3 Set the PHM aside with the processor side facing up.
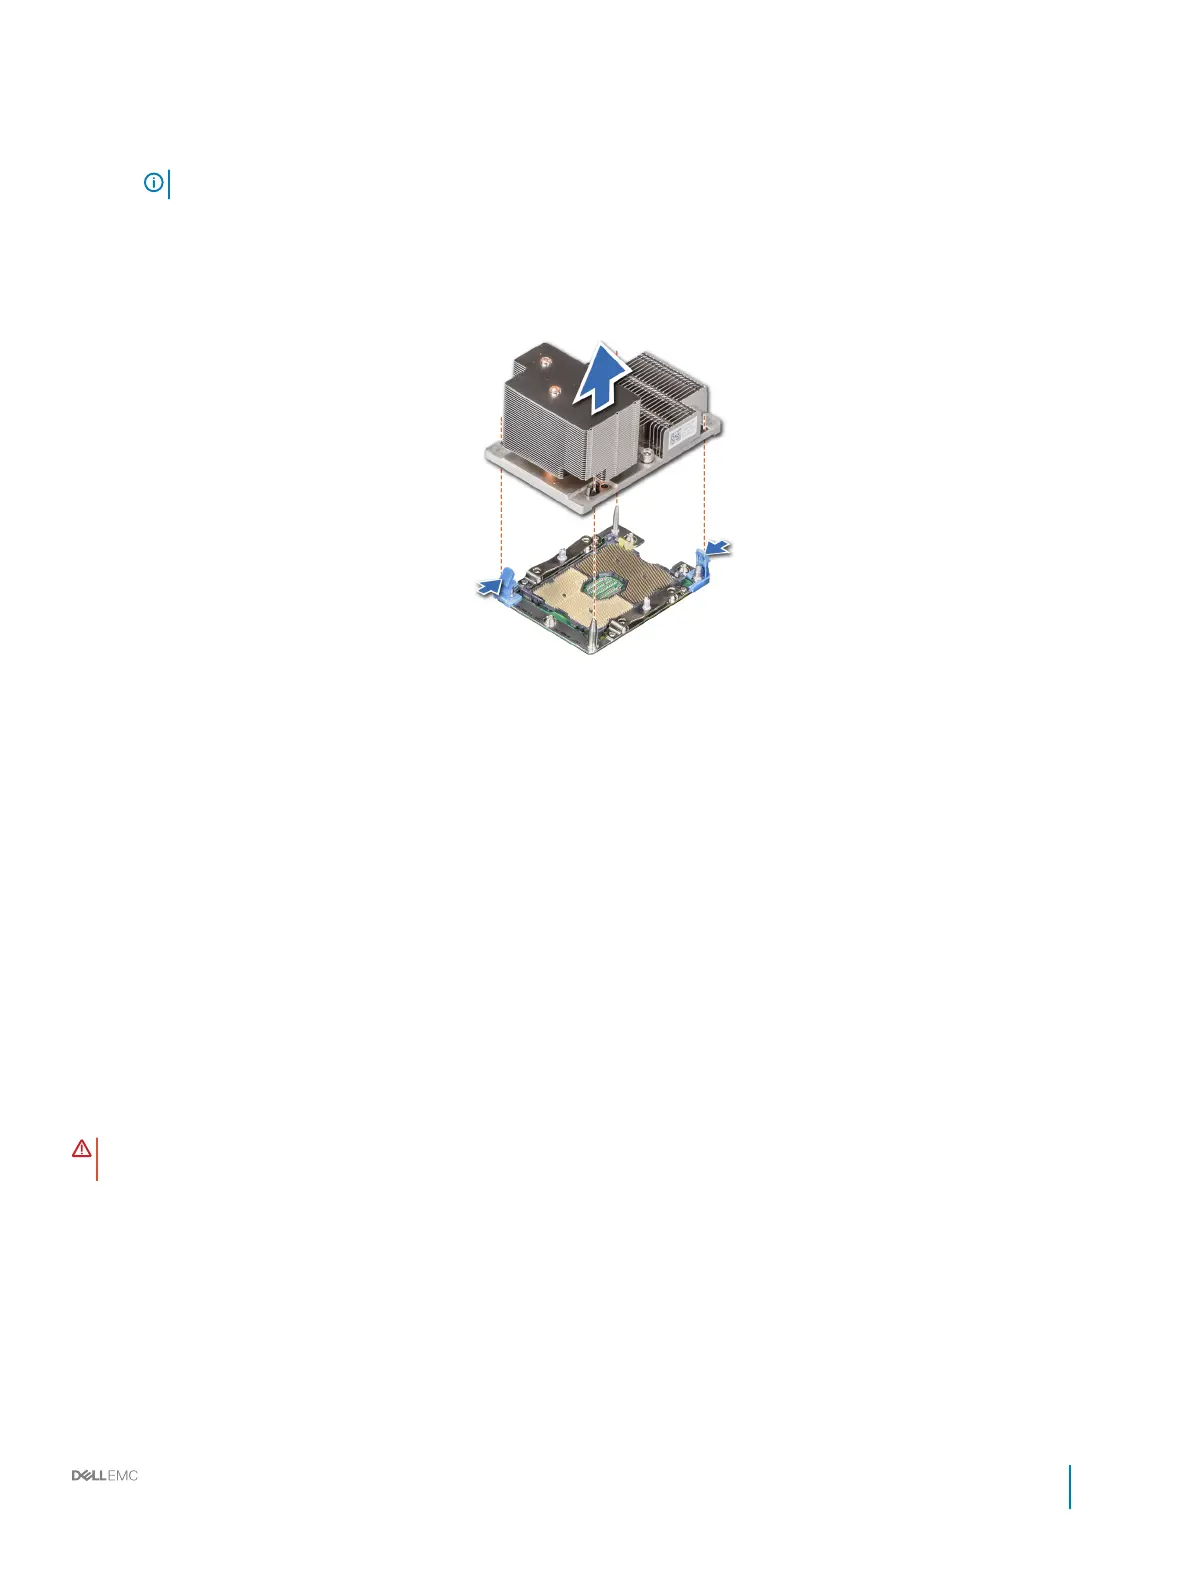
Figure 44. Removing a processor and heat sink module (2U)
Next steps
1 Install the PHM.
Related links
Removing the air shroud
Opening and closing the PCIe card holder latch
Installing a processor and heat sink module
Removing the processor from the processor and heat sink
module
Prerequisites
WARNING
: The heat sink may be hot to touch for some time after the system has been powered down. Allow the heat sink to
cool before removing it.
1 Follow the safety guidelines listed in Safety instructions.
2 Follow the procedure listed in Before working inside your system.
3 Remove the processor and heat sink module.
Steps
1 Place the heat sink with the processor side facing up.
2 Insert a at blade screwdriver into the release slot marked with a yellow label. Twist (do not pry) the screwdriver to break the thermal
paste seal.
3 Push the retaining clips on the processor bracket to unlock the bracket from the heat sink.
Dell EMC PowerEdge R740 Installation and Service Manual
Installing and removing system components
97

 Loading...


