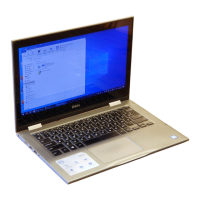
BIOS overview
The BIOS manages data flow between the computer's operating system and attached devices such as hard disk, video adapter,
keyboard, mouse, and printer.
Entering the BIOS setup program
1. Turn on or restart your computer.
2. Press F2 when the Dell logo is displayed on the screen to enter the BIOS setup program.
You can change the user-defined settings in BIOS setup program.
System setup options
NOTE: Depending on your computer and its installed devices, the items listed in this section may or may not appear.
Table 3. System setup options—Main menu
Main
System Time Displays the current time in hh:mm:ss format.
System Date Displays the current date in mm/dd/yyyy format.
BIOS Version Displays the BIOS version.
Product Name Displays the model number of your computer.
Service Tag Displays the service tag of your computer.
Asset Tag Displays the asset tag of your computer.
CPU Type Displays the processor type.
CPU Speed Displays the processor speed.
CPU ID Displays the processor identification code.
CPU Cache
L1 Cache Displays the processor L1 cache size.
L2 Cache Displays the processor L2 cache size.
L3 Cache Displays the processor L3 cache size.
NOTE: This option is displayed only when the processor
supports L3 Cache.
First HDD Displays the type of hard drive installed.
AC Adapter Type Displays the type of AC adapter.
System Memory Displays the size of memory installed.
Memory Speed Displays the speed of memory.
Keyboard Type Displays the type of keyboard.
Table 4. System setup options—Advanced menu
Advanced
PowerNow! Enable Enables or disables the SpeedStep(tm) mode of the
processor. Default: Enabled
Virtualization Allows you to enable or disable the Virtualization technology.
Default: Enabled
84 System setup

 Loading...


