DC-In Port
Removing the DC-in port
1. Follow the procedure in Before working inside your computer.
2. Remove the:
a. base cover
b. battery
c. memory
d. heatsink
e. M2. SSD
f. hard drive
g. fan
h. WLAN card
i. WWAN card
j. display assembly
k. system board
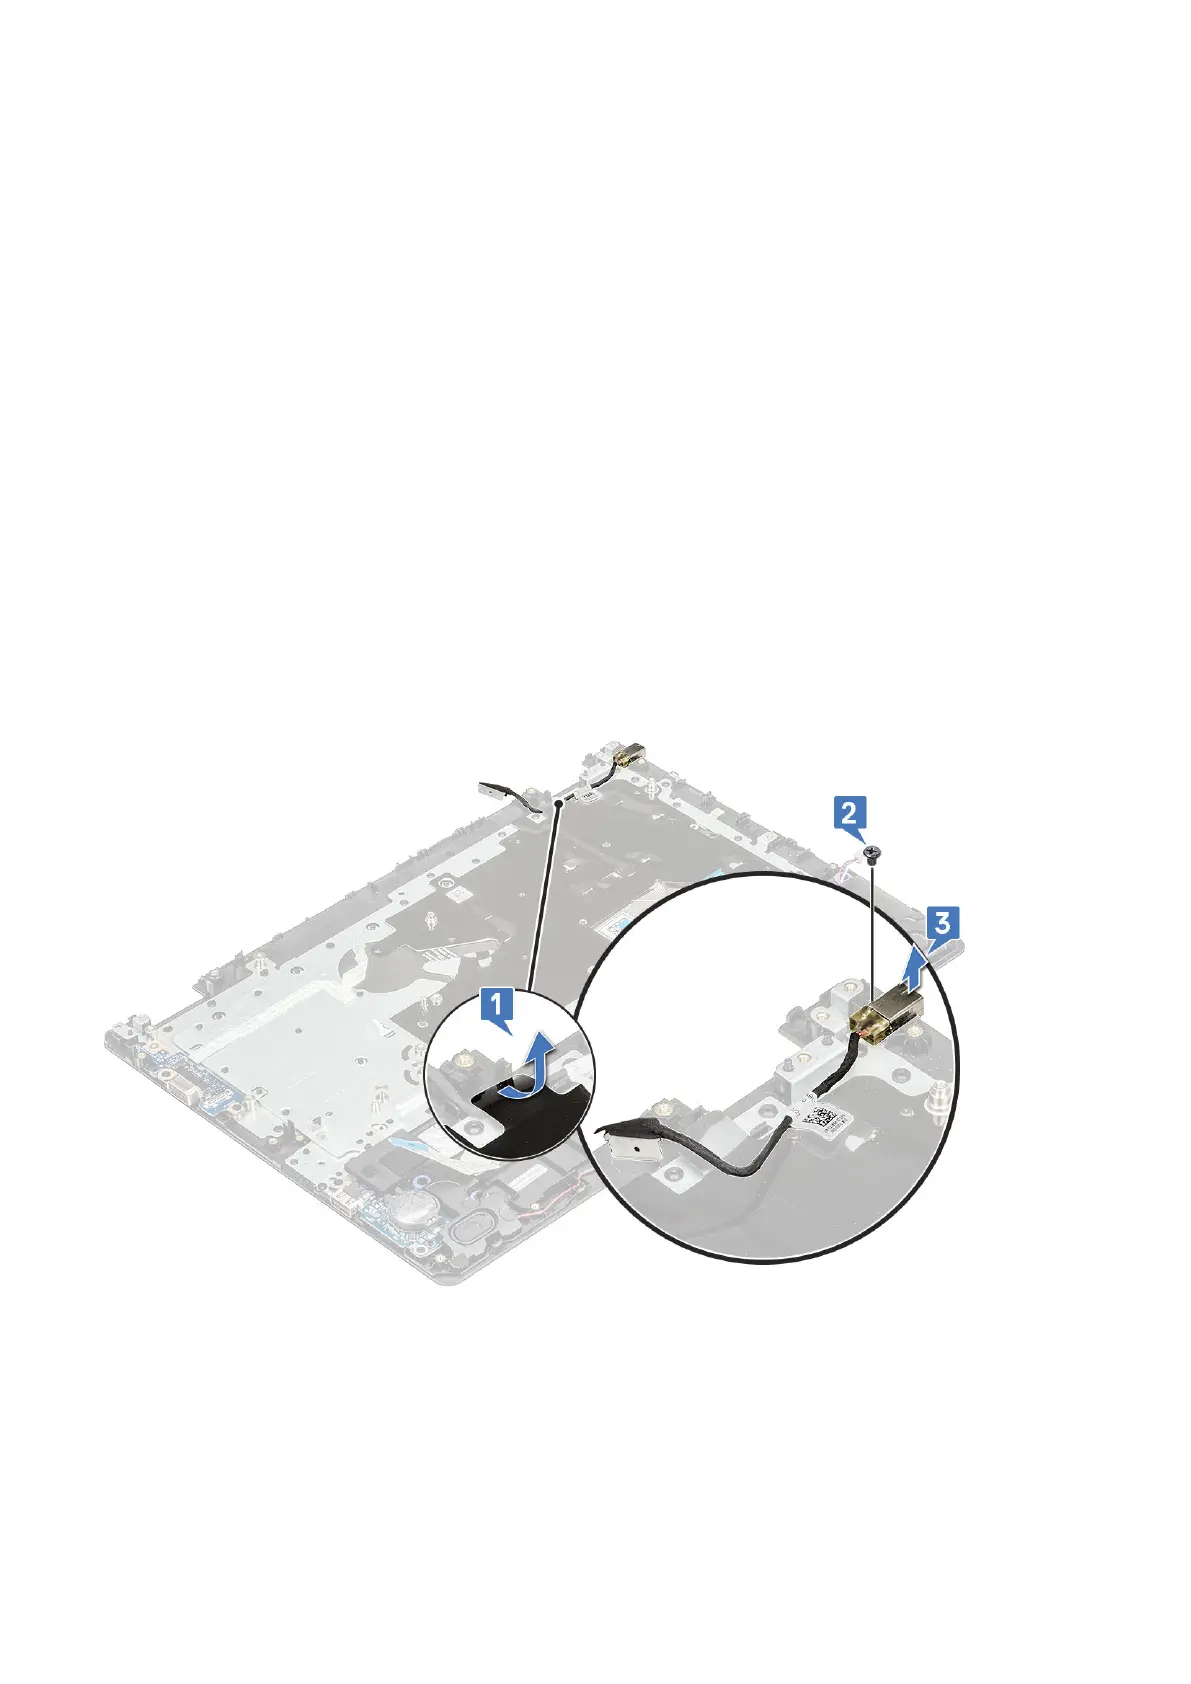
3. To remove the DC-in port:
a. Peel the tape securing the power-adapter cable in place.
b. Unroute the power-adapter cable [1].
c. Remove the M2x3 screw that secures the DC-in port to the palmrest [2].
d. Lift and remove the DC-in port from the system [3].
Installing the DC-in port
1. Place the DC-in port in its place on the palmrest.
2. Replace the M2x3 screw to secure the port to the palmrest.
3. Route the DC-in cable through its routing channel.
4. Secure the DC-in cable with the adhesive tape.
5. Install the:
Disassembly and reassembly
47
 Loading...