Installing the hard drive cable
1. Connect the hard drive cable to the system board and route the cable through the routing channel.
2. Tighten the screws to secure the hard drive cable connector to the computer.
3. Install the:
a. hard drive
b. base cover
c. battery
d. battery cover
4. Follow the procedure in After working inside your computer.
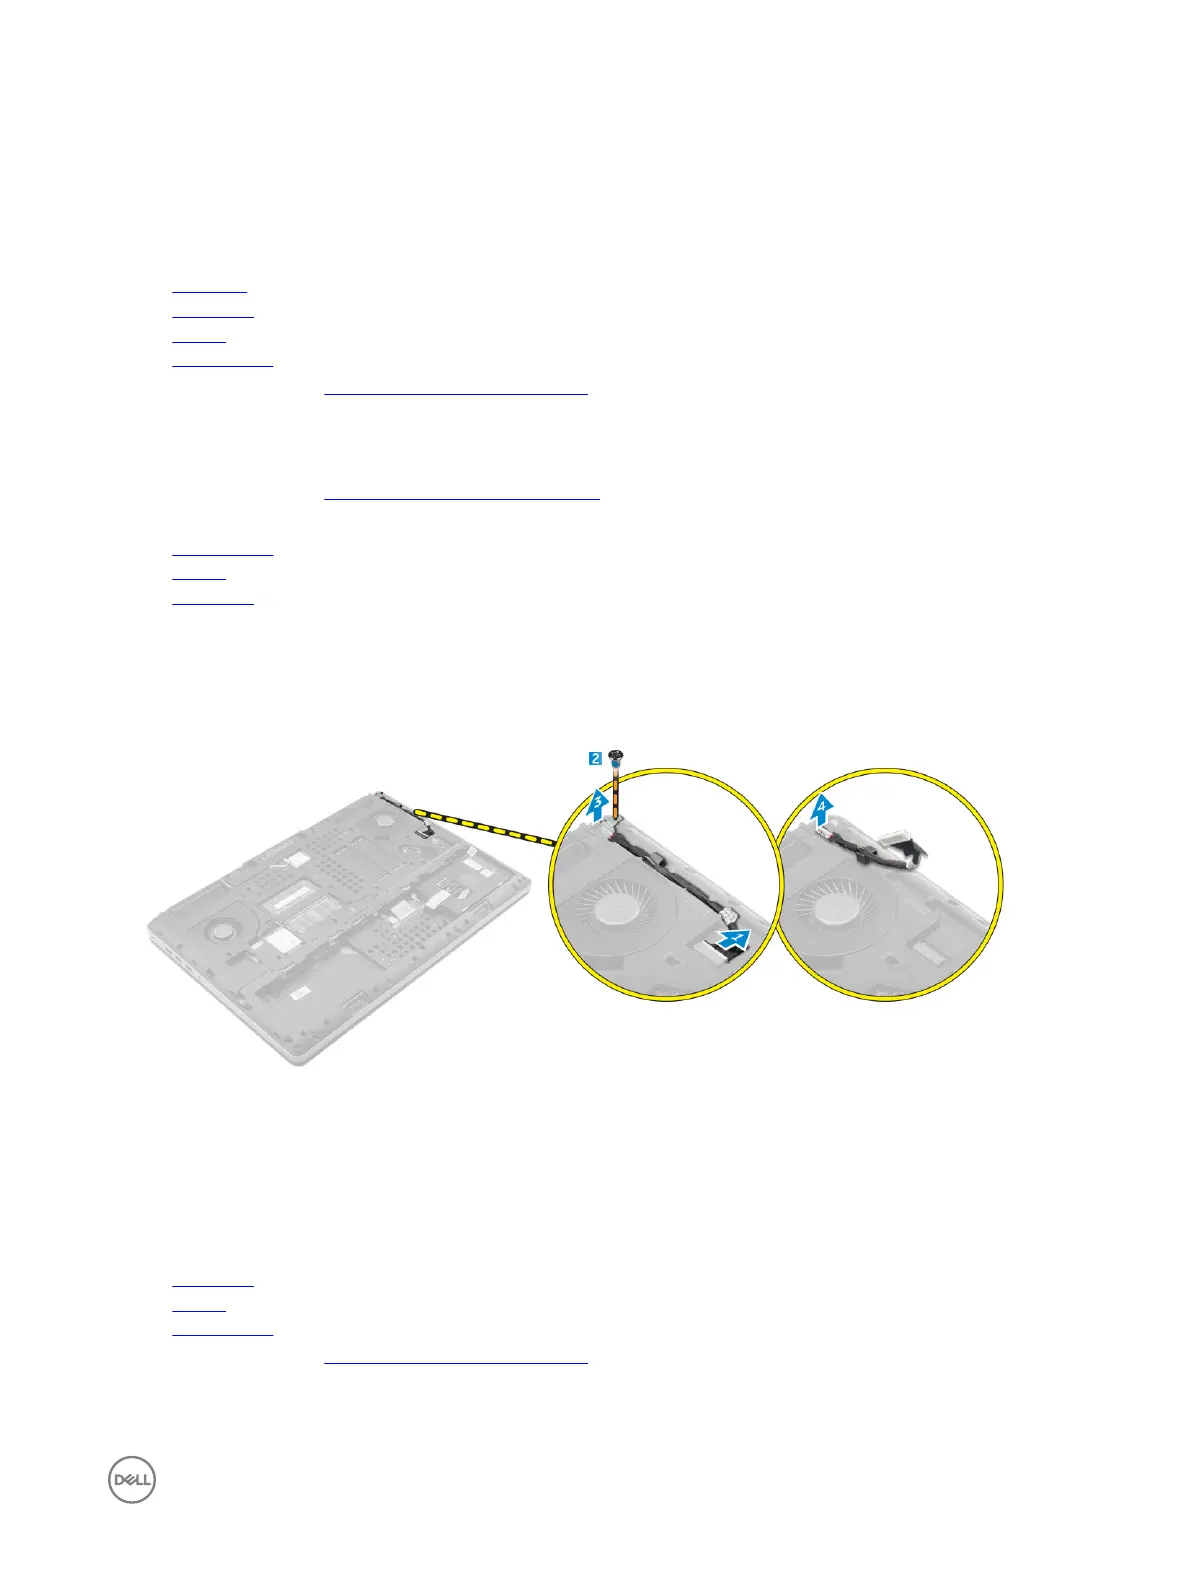
Removing the power connector port
1. Follow the procedure in Before working inside your computer.
2. Remove the:
a. battery cover
b. battery
c. base cover
3. Perform the following steps as shown in the illustration:
a. Disconnect the power connector cable from the computer [1].
b. Remove the screw to remove the bracket from the computer [2].
c. Remove the bracket from the computer [3].
d. Remove the power connector port from the computer [4].
Installing the power connector port
1. Connect the power connector cable to the computer and route the cable through the routing channel.
2. Insert the power connector port in its slot and replace the bracket.
3. Tighten the screw to secure the power connector port to the computer.
4. Install the:
a. base cover
b. battery
c. battery cover
5. Follow the procedure in After working inside your computer.
21