e. keyboard
f. palmrest
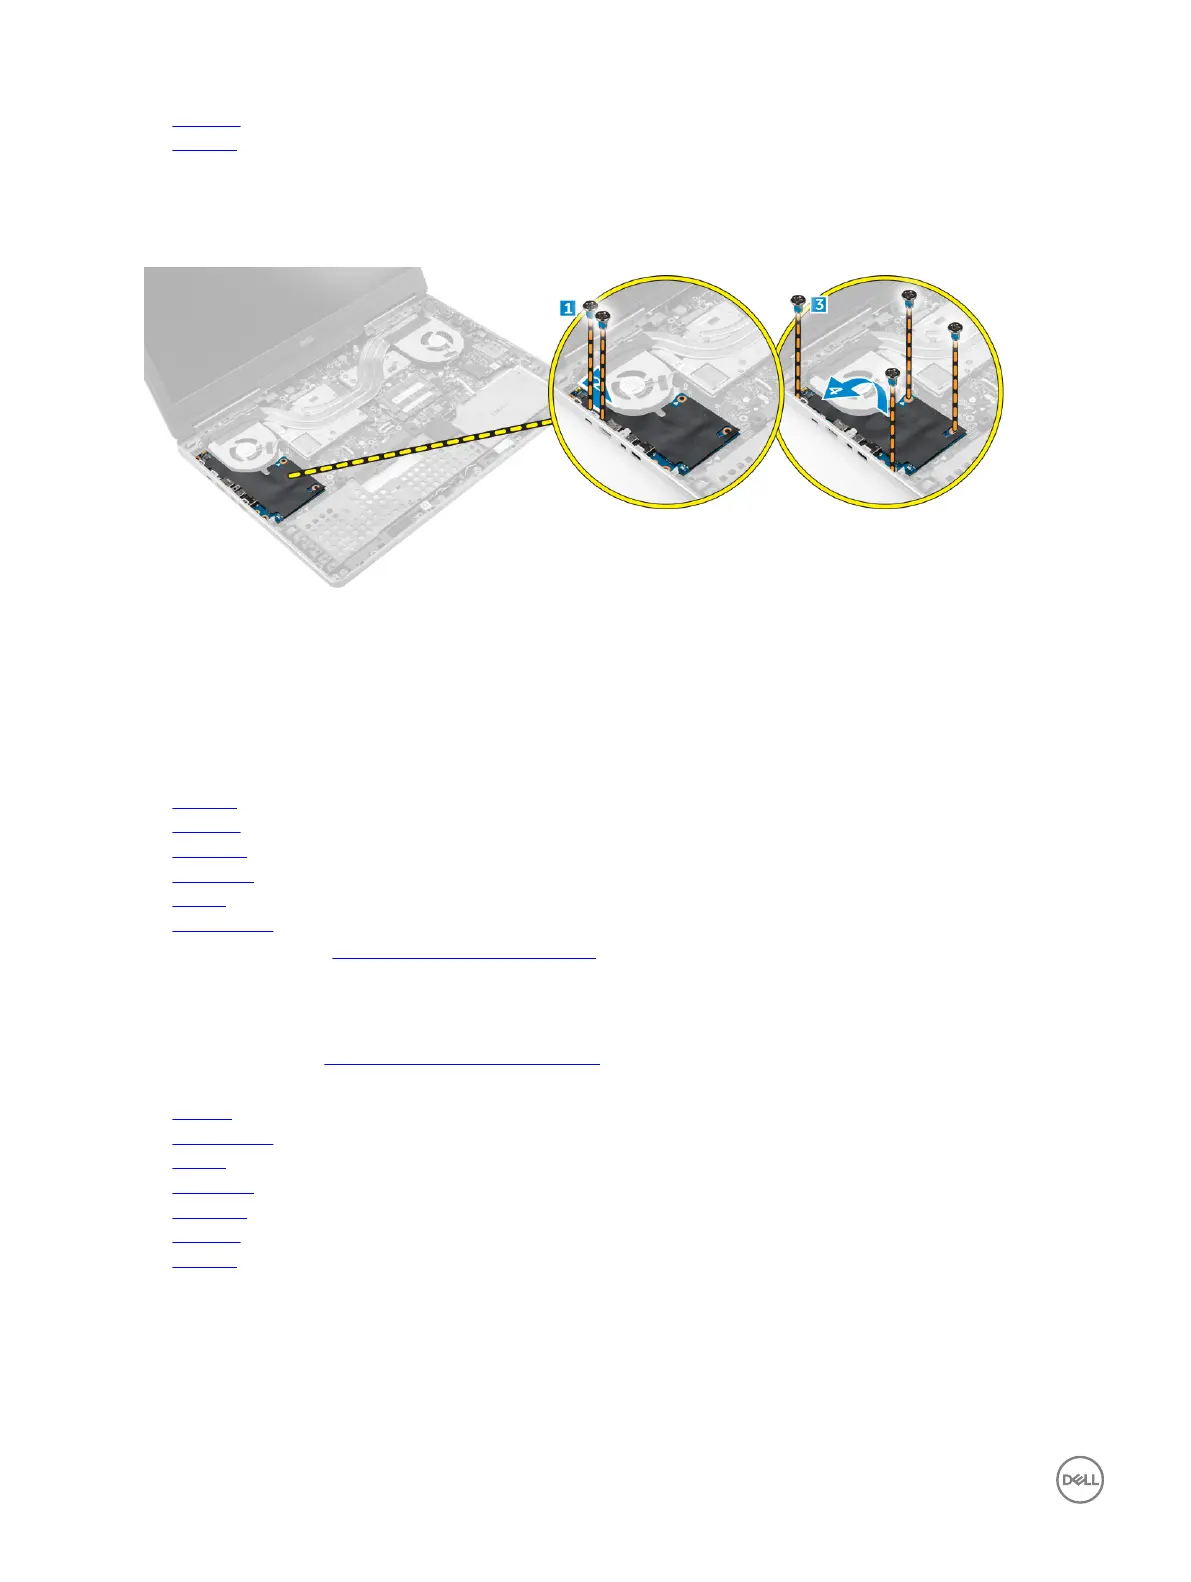
3. Perform the following steps to remove the I/O board:
a. Remove the screws that secure the I/O board to the computer [1, 3].
b. Remove the bracket of the thunderbolt connector [2].
c. Lift the right edge of the I/O board upwards to disengage the connector and remove it from the computer [4].
Installing the I/O board left
1. Connect the I/O board connector and slide the I/O board into its slot in the computer.
2. Install the thunderbolt bracket.
3. Tighten the screws to secure the I/O board to the computer.
4. Install the:
a. palmrest
b. keyboard
c. hard drive
d. base cover
e. battery
f. battery cover
5. Follow the procedures in After working inside your computer.
Removing the Input/Output (I/O) board right
1. Follow the procedure in Before working inside your computer.
2. Remove the:
a. SD card
b. battery cover
c. battery
d. base cover
e. hard drive
f. keyboard
g. palmrest
3. Perform the following steps to remove the I/O board:
a. Disconnect the speaker cable from the I/O board [1].
b. Remove the screws that secure the I/O board to the computer [2].
c. Lift the left edge of the I/O board upwards to disengage the connector and remove it from computer [3].
24