o. I/O board left
p. I/O board right
q. heat sink
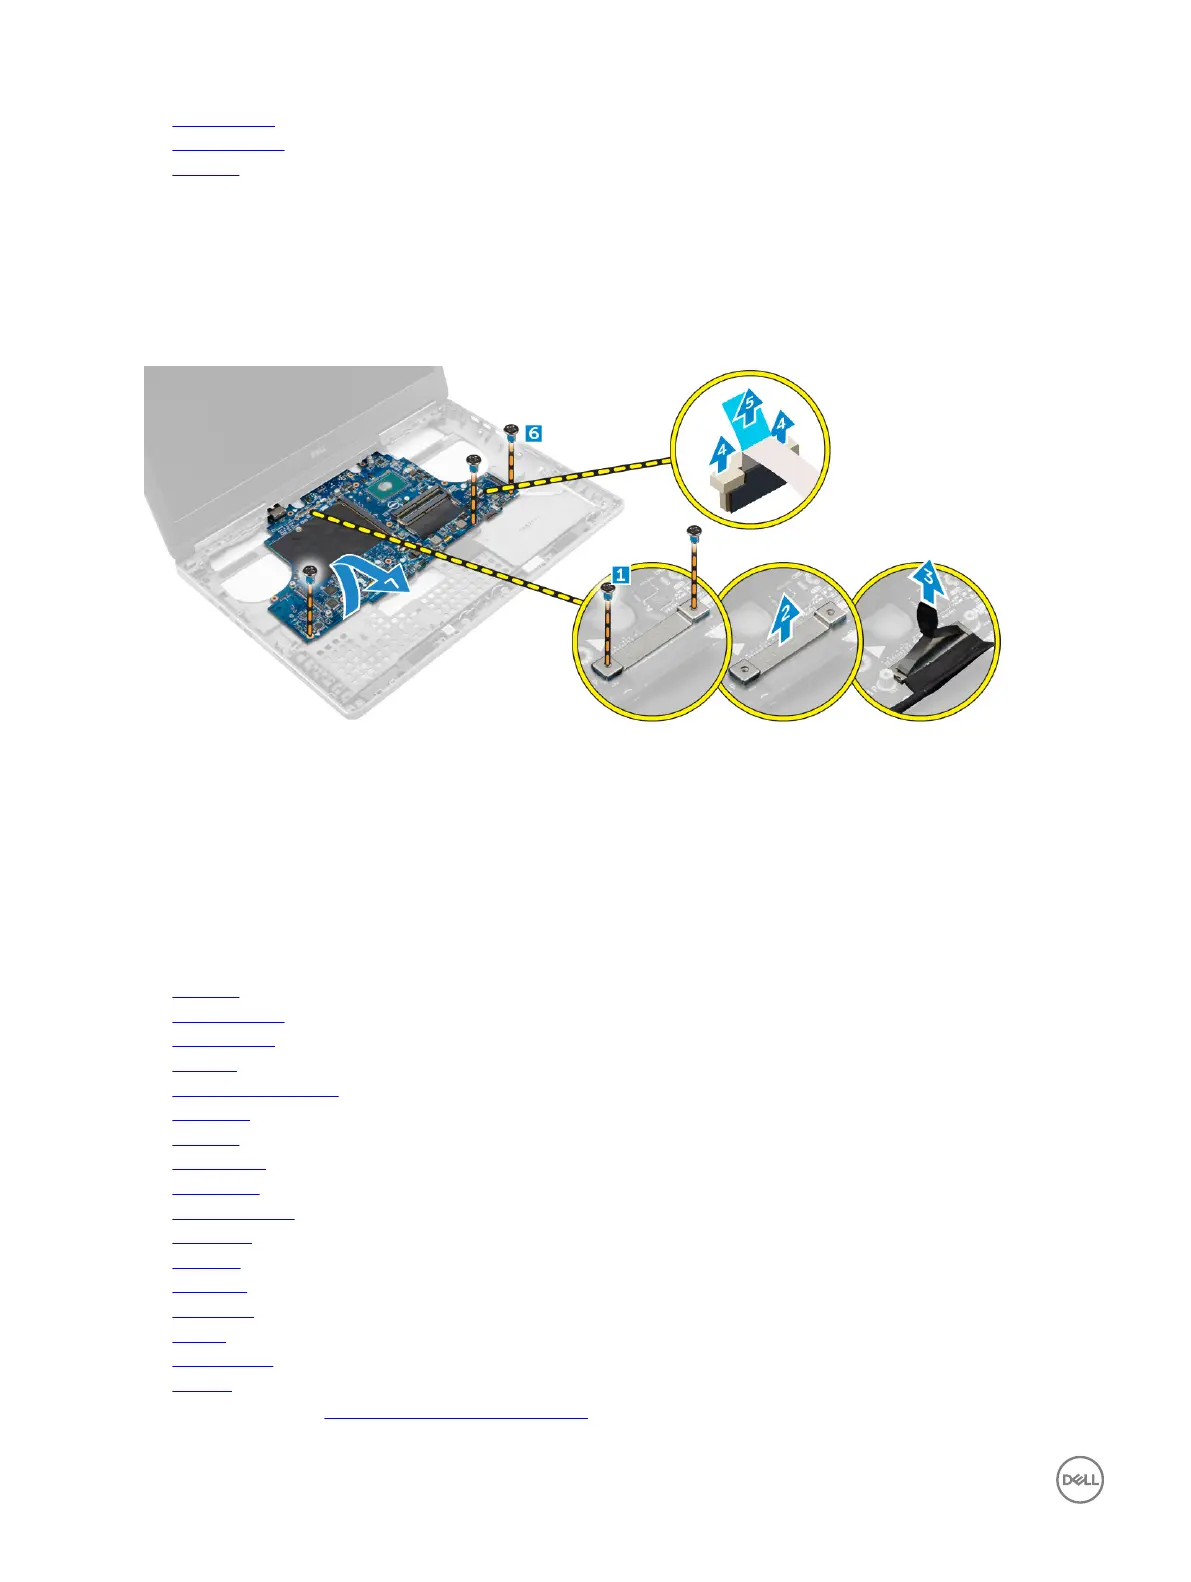
3. Perform the following steps as shown in the illustration:
a. Remove the screws that secure the shield to the system board [1].
b. Lift the shield away from the computer [2].
c. Disconnect the eDP cable [3].
d. Lift the tab and disconnect the power-connector cable [4, 5].
e. Remove the screws that secure the system board to the computer [6].
f. Lift and remove the system board from the computer [7].
Installing the system board
1. Align the system board into its original position on the computer.
2. Tighten the screws to secure the system board to the computer.
3. Connect the following cables:
a. power connector
b. eDP
4. Install the:
a. heat sink
b. I/O board right
c. I/O board left
d. palmrest
e. power-connector port
f. video card
g. M.2 SSD
h. WWAN card
i. WLAN card
j. primary memory
k. HDD cable
l. keyboard
m. hard drive
n. base cover
o. battery
p. battery cover
q. SD card
5. Follow the procedure in After working inside your computer.
32