Steps
1. Place and slide the tabs on the power-supply unit into the latches on the chassis.
2. Align the screw holes on the power-supply unit to the screw holes on the chassis.
3. Replace the three screws (#6-32) that secure the power-supply unit to the chassis.
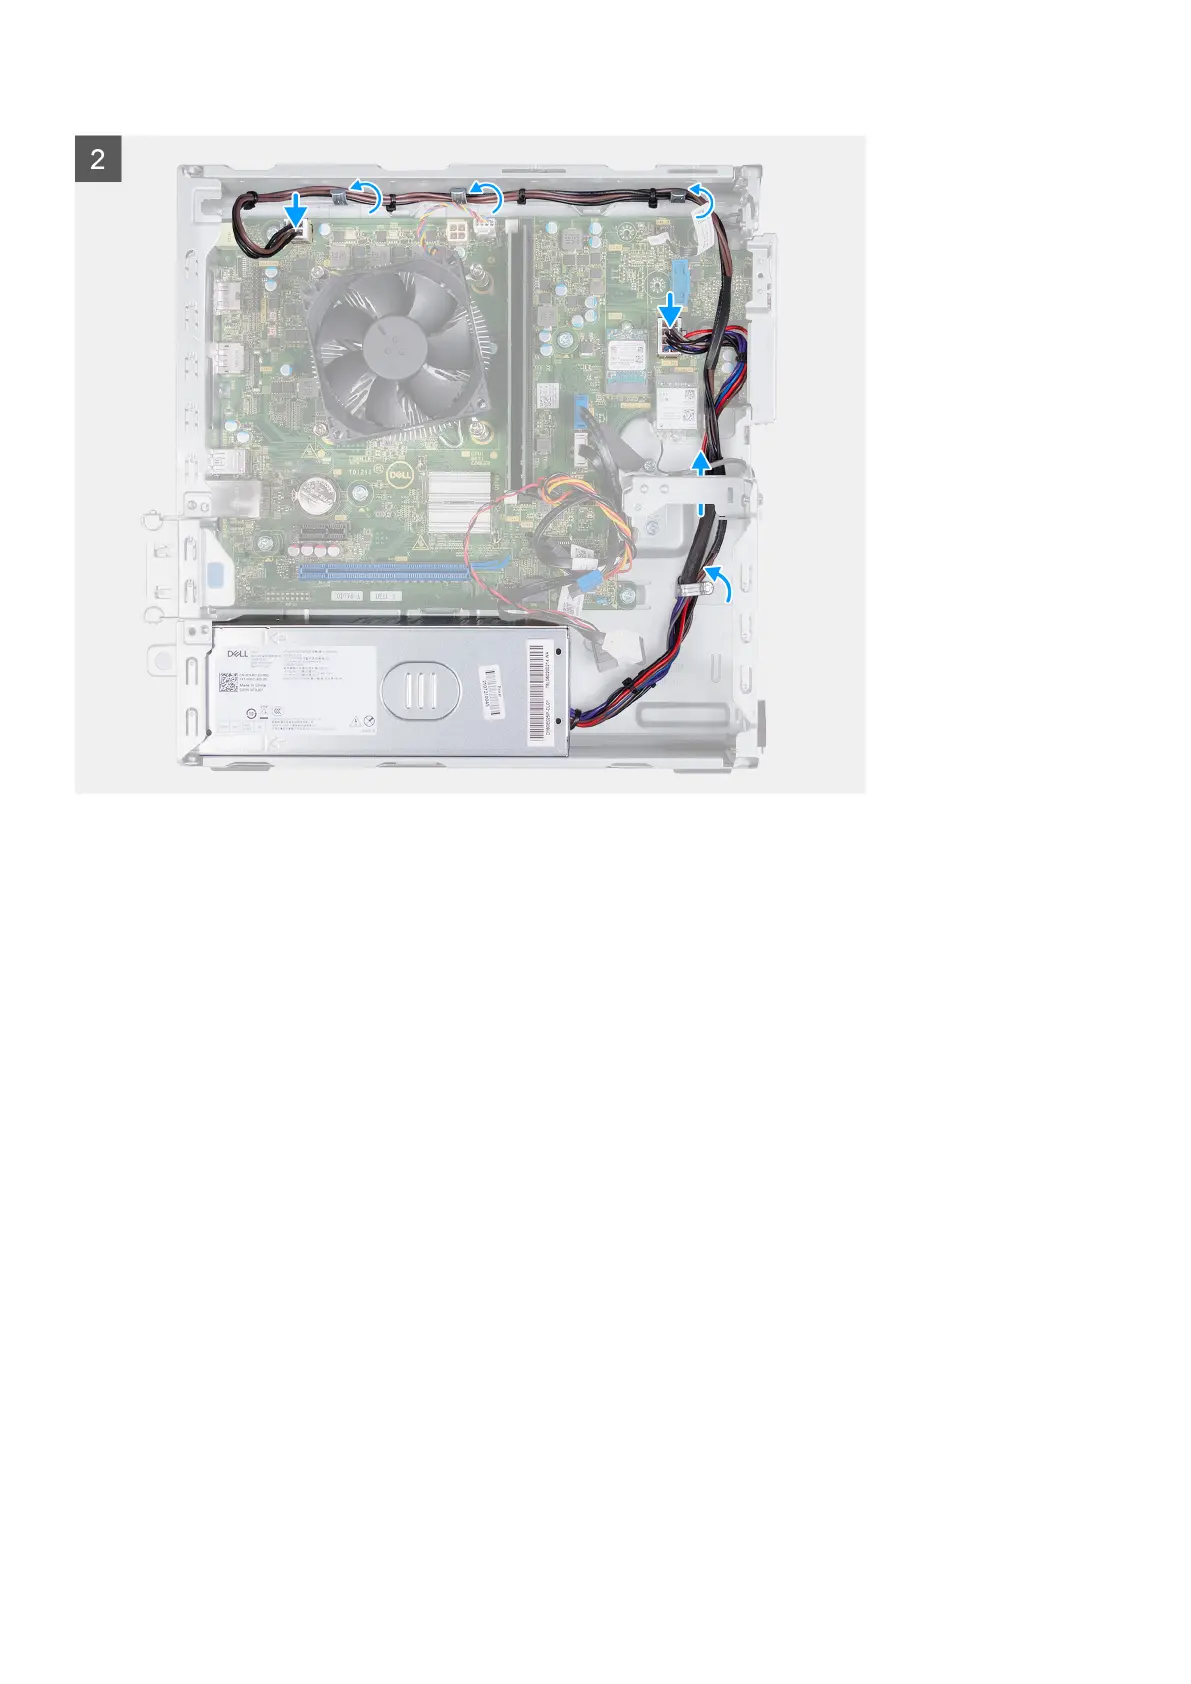
4. Route the power-supply unit cables through the routing guides on the chassis.
5. Connect the system-board power cable to the system board.
6. Connect the processor-power cable to the system board.
Next steps
1. Install the HDD and ODD cage.
2. Install the 3.5-inch hard drive.
3. Install the front cover.
4. Install the left-side cover.
5. Follow the procedure in After working inside your computer.
Fan shroud
Removing the fan shroud
Prerequisites
1. Follow the procedure in Before working inside your computer.
2. Remove the left-side cover.
Removing and installing components
41