ASDA Series Application Note Chapter 4 Application Techniques
March, 2015 4-7
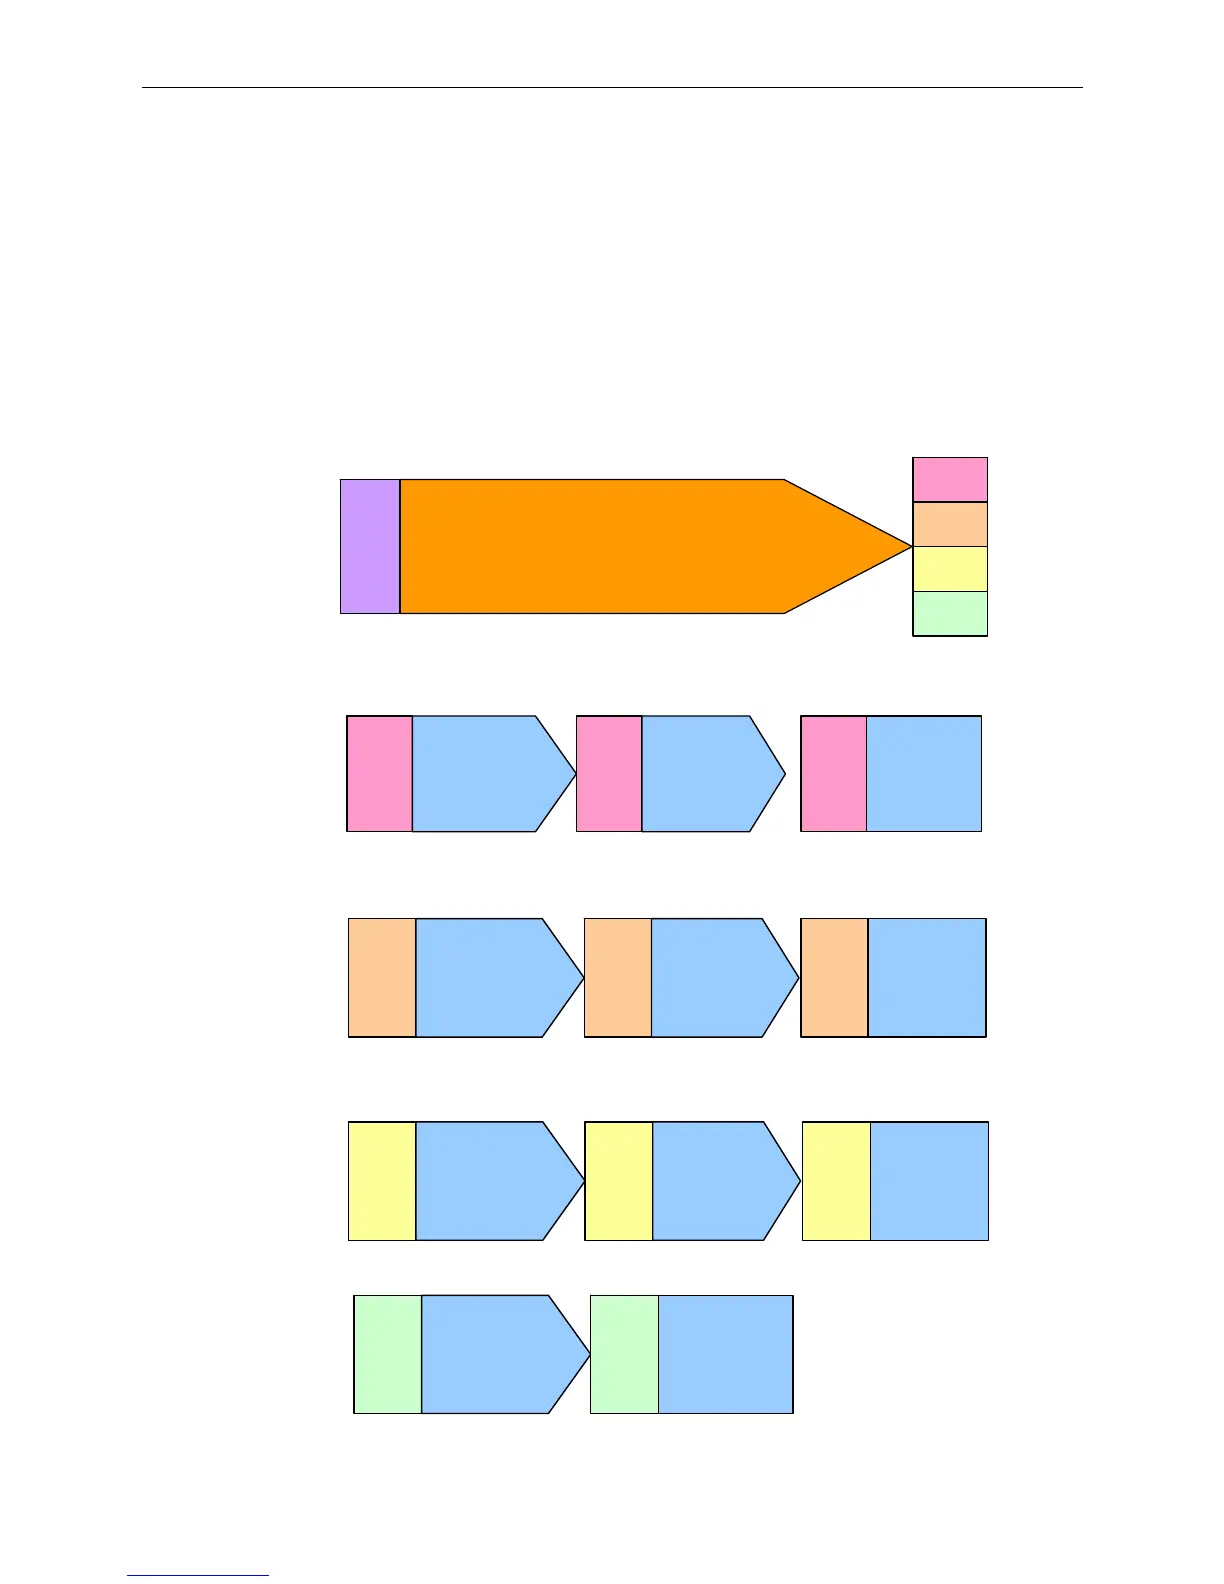
3. Once the compare function is complete, a signal will be outputted and the compare function
will be disabled. Then, PR#45 jumps to different PR so as to setup DO status.
a PR#30 / PR#33 / PR#36 / PR#39: Setup P4-06 so as to change the output status of
DO1 and DO2
b PR#31 / PR#34 / PR#37 / PR#40: Change the jump path of PR#45 so as to fulfill the
condition for the next compare
c PR#32 / PR#35 / PR#38: Jump to execute the next compare
d The second, third and fourth compare function should be identical to the first one.
Specify the compare address to the correct address (PR#16 / PR#20 / PR#24).
This will be
executed
after
compare
function is
complete
Jump
Delay = 0
PR#30 or PR#33 or PR#36 or PR#39
(write by PR#31/PR#34/PR#37/PR#40)
PR#30
PR#33
PR#36
PR#39
Jump to different path when CMP function is complete
PR
#45
(I)
PR
#30
(I)
This will be
executed
after the 1
st
compare
value is
written to
data array.
Write
Delay = 0
P4-06 = 0x1
Setup DO status
Select the jump path
Jump to the second
CMP function
PR
#31
(I)
PR
#32
(I)
Write
Delay = 0
P6-91 = 33
Jump
Delay = 0
PR#14
This will be
executed
after the 2
nd
compare
value is
written to
data array.
PR
#33
(I)
Write
Delay = 0
P4-06 = 0x3
Setup DO status
Select the jump path
Jump to the third
CMP function
PR
#34
(I)
PR
#35
(I)
Write
Delay = 0
P6-91 = 36
Jump
Delay = 0
PR#18
This will be
executed
after the 3
rd
compare
value is
written to
data array.
PR
#36
(I)
Write
Delay = 0
P4-06 = 0x2
Setup DO status
Select the jump path
Jump to the third
CMP function
PR
#37
(I)
PR
#38
(I)
Write
Delay = 0
P6-91 = 39
Jump
Delay = 0
PR#22
This will be
executed
after the 4
th
compare
value is
written to
data array.
PR
#39
(I)
Write
Delay = 0
P4-06 = 0x0
Setup DO status
Select the jump path
PR
#40
(I)
Write
Delay = 0
P6-91 = 30
Figure 4.1.6 PR Illustration for DO Setup

 Loading...