ENGLISH
21
3
Select the play mode.
Example: Stereo
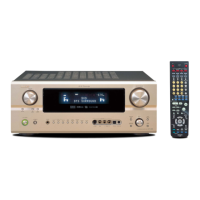
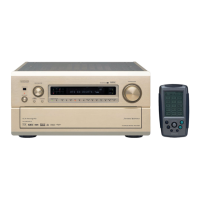
(Main unit) (Remote control unit)
The volume can be adjusted within the range of
–80 to 0 to 18 dB, in steps of 0.5 dB. However,
when the channel level is set as described on page
13 or page 25, if the volume for any channel is set
at +1 dB or greater, the volume cannot be adjusted
up to 18 dB. (In this case the maximum volume
adjustment range is “18 dB — (Maximum value of
channel level)”.)
Input mode when playing DTS sources
• Noise will be output if DTS-compatible CDs or LDs
are played in the “ANALOG” or “PCM” mode.
When playing DTS-compatible sources, be sure to
connect the source component to the digital input
jacks (OPTICAL/COAXIAL) and set the input mode to
“AUTO” or “DTS”.
4
Start playback on the selected component.
• For operating instructions, refer to the
component’s manual.
5
Adjust the volume.
(Main unit) (Remote control unit)
The volume level is
displayed on the
master volume level
display.
Figures of 0.5 dB and
below are rounded
down.
NOTE:
• The digital input indicator will light (green) when
playing CD-ROMs containing data other than
audio signals, but no sound will be heard.
Input mode display
ANALOG DIGITAL
DIGITAL
DIGITAL
DIGITAL
ANALOG
RF
AUTO
PCM
DTS
INPUT MODE
RF
AUTO
PCM
DTS
INPUT MODE
RF
AUTO
PCM
DTS
INPUT MODE
RF
AUTO
PCM
DTS
INPUT MODE
RF
AUTO
PCM
DTS
INPUT MODE
• In the AUTO mode
• In the PCM mode
• In the DTS mode
• When switched to RF in the VDP RF or AUTO
mode
One of these lights,
depending on the input
signal.
Input signal display
PRO LOGIC
LOCK
DIGITAL
INPUTSIGNAL
LOCK
DIGITAL
INPUTSIGNAL
LOCK AL24
DIGITAL
INPUTSIGNAL
• DOLBY DIGITAL
• DTS
• PCM
One of these lights,
depending on the input
signal.
The AL24 indicator lights when the PURE DIRECT,
DIRECT or STEREO mode is selected in the digital
input mode.
The LOCK LED lights when digital signals are being
input properly. If the LED does not light, check
whether the digital input component setup (page
15) and connections are correct and whether the
component’s power is turned on.
• In the ANALOG mode
SURR.
PARAMETER
TONE
CONTROL
CH. VOL.
[1] Adjusting the sound quality (tone)
The tone control function will not work in the
Direct or Home THX Cinema mode.
After starting playback
1
Press the MODE SELECT button
and select TONE.
The mode switches as follows
each time the MODE SELECT
button is pressed:
(Main unit)
2
Select BASS/TREBLE with the
FUNCTION knob.
(Main unit)
3
Adjust as desired with the
CONTROL knob.
• To increase the bass or treble:
Turn the control clockwise.
(The bass or treble sound can
be increased to up to +12 dB
in steps of 2 dB.)
• To decrease the bass or treble:
Turn the control counter clockwise. (The bass
or treble sound can be decreased to up to –12
dB in steps of 2 dB.)
(Main unit)
4
If you do not want the bass and
treble to be adjusted, turn on the
tone defeat mode.
The signals do not pass
through the bass and treble
adjustment circuits, providing
higher quality sound.
[2] Listening over headphones
Plug the headphones’ plug into the jack.
Connect the headphones to the PHONES jack.
The pre-out output (including the speaker
output) is automatically turned off when
headphones are connected.
NOTE:
To prevent hearing loss, do not raise the volume
level excessively when using headphones.
[3] Turning the sound
off temporarily
(muting)
1
1
Use this to turn off the audio
output temporarily.
Press the MUTE button.
Cancelling MUTING mode.
Press the MUTE button
again.
(Remote
control unit)
[4]
Combining the
currently playing
sound with the
desired image
Cancelling simulcast playback.
• Select “SOURCE” using the video select
button.
• Switch the program source to the component
connected to the video input.
1
Simulcast playback
Use this switch to monitor a
video source other than the
audio source.
Press the remote control unit’s
VIDEO SELECT button until the
desired image appears.
(Remote
control unit)
 Loading...