ENGLISH
fa
•
To
proceed
to
"Step
5"
without checking the analysis result. use
b..
"i7
to
select
"Store<"
while "Parameter Check<"
is
displayed.
• Values that
are
different from the actual distance may be set for speakers with built-in filters
(subwoofers. etc). This is because filters
add
electrical delay
to
the signal that should
be
compensated.
•
'v
"".'f~
'XT
iWu"";""if."v'
.....
:ii/!:.
I
I
,.
The
included setup microphone
is
not • Connect the included
setup
1'1
i c
Or"·
SF-:
t'~one
I connected. microphone to
<SETUP
MIC>.
:.
Not
all
speakers could be detected. •
Check
the speaker connections.
I I
•
Too
much noise
in
the room for • Either turn off any deVice generating
Ai'le.
i
ent
t·~o
i
se
accurate measurements
to
be made. noise or move
it
away.
•
Try
again when the surroundings are
quieter.
• Speaker or subwoofer sound is too • Check the speaker installation and the
low for accurate measurements
to
be direction
in
which the speakers are
made. facing.
• Adjust the subvvoofer's volume.
I
I
I. Displayed
speaker
could
not be
• Check
the connections of
the
C.:aut i
on:
SF'
t'~one
detected. displayed speaker.
t
·
The
front L
and
front R speakers
The
messages alternate
were not properly detected.
· Only one channel of the surround
I
I
speakers was detected.
FF.:
· Sound
was output from the
R
channel when only one surround
back
speaker was connected.
·
The
surround
back
speaker was
detected. but the surrounds were
not detected.
I I
:.
Displayed speaker connected with
•
Check
the polarities of the displayed
C.:iut
j
on:
F'h.::ise
the polarities reversed.
speaker.
t
The
messages alternate
•
For
some speakers, this error
message may be displayed even if the
speaker
is
properly connected. If the
I
I
connection
is
correct. use the
/:;.
or
"i7
SBL
bunons to display
"Skip<"
and then
press
<l.
g;}[:~
Select"
Retry" to make the measurements again.
-N.na
Be
sure to turn the power off before crrecking speaker connections.
)
)
( Step 4 : Check
f.JTo
proceed to "Step
5;
Store"
During display of crossover frequency result
or
analysis results item. press
ENTER.
•
"Store<"
is
displayerj
When analysis
is
complete. "Parameter Check<"
is
displayed.
Press
<l
and check the analysis results for the
follOWing
four items.
(1)
Make your selectiOn using
b..
"i7
and press
<l
.
• Presence
and
size
of speaker
"SpConfi(j. Check<"
• Distance of speaker from listening position
"Distance Check<"
• Speaker channel level
"Ch Level Check<"
• Crossover Frequency
"Crossover Check<"
:l' Use
/:;.
or
"i7
to change which speaker is displayed.
uTo
switch to another analysis result item
Press
ENTER.
This returns
you
to analysis results items.
so
repeat operation
CD.
( Step 5 : Store
Ttle auto setup measurement results are stored
in
Hle
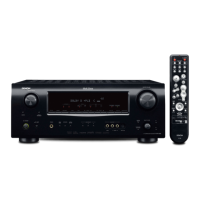
AVR-1609.
(T'
Press
<l
while
"Store<"
is
displayed
• "Storing" blinks
on
the display panel while the results
are
being stored.
• When storing
is
complete. "Completed"
is
displayed followed by "Disconnect
Mic".
@ Disconnect the setup microphone from the
AVR-1609.
u
To
cancel storing
Use
/:;.
or
"i7
to
display "Cancel<" while
"Store<"
is
displayed and press
<l.
• All the measured auto setup data
Will
be erased .
•
~[.ii.
Do
not tum the power off while the settings
are
being stored.
20
 Loading...