14
DCD-CX3
トラバースユニットの交換方法
注意 : 光ピックアップは、人体に帯電した静電気等で静
電破壊することがあります。光ピックアップ周辺
を修理する際は、必要な静電対策を行ってくださ
い。
(組み立てるときは、逆の順序でおこなってください。)
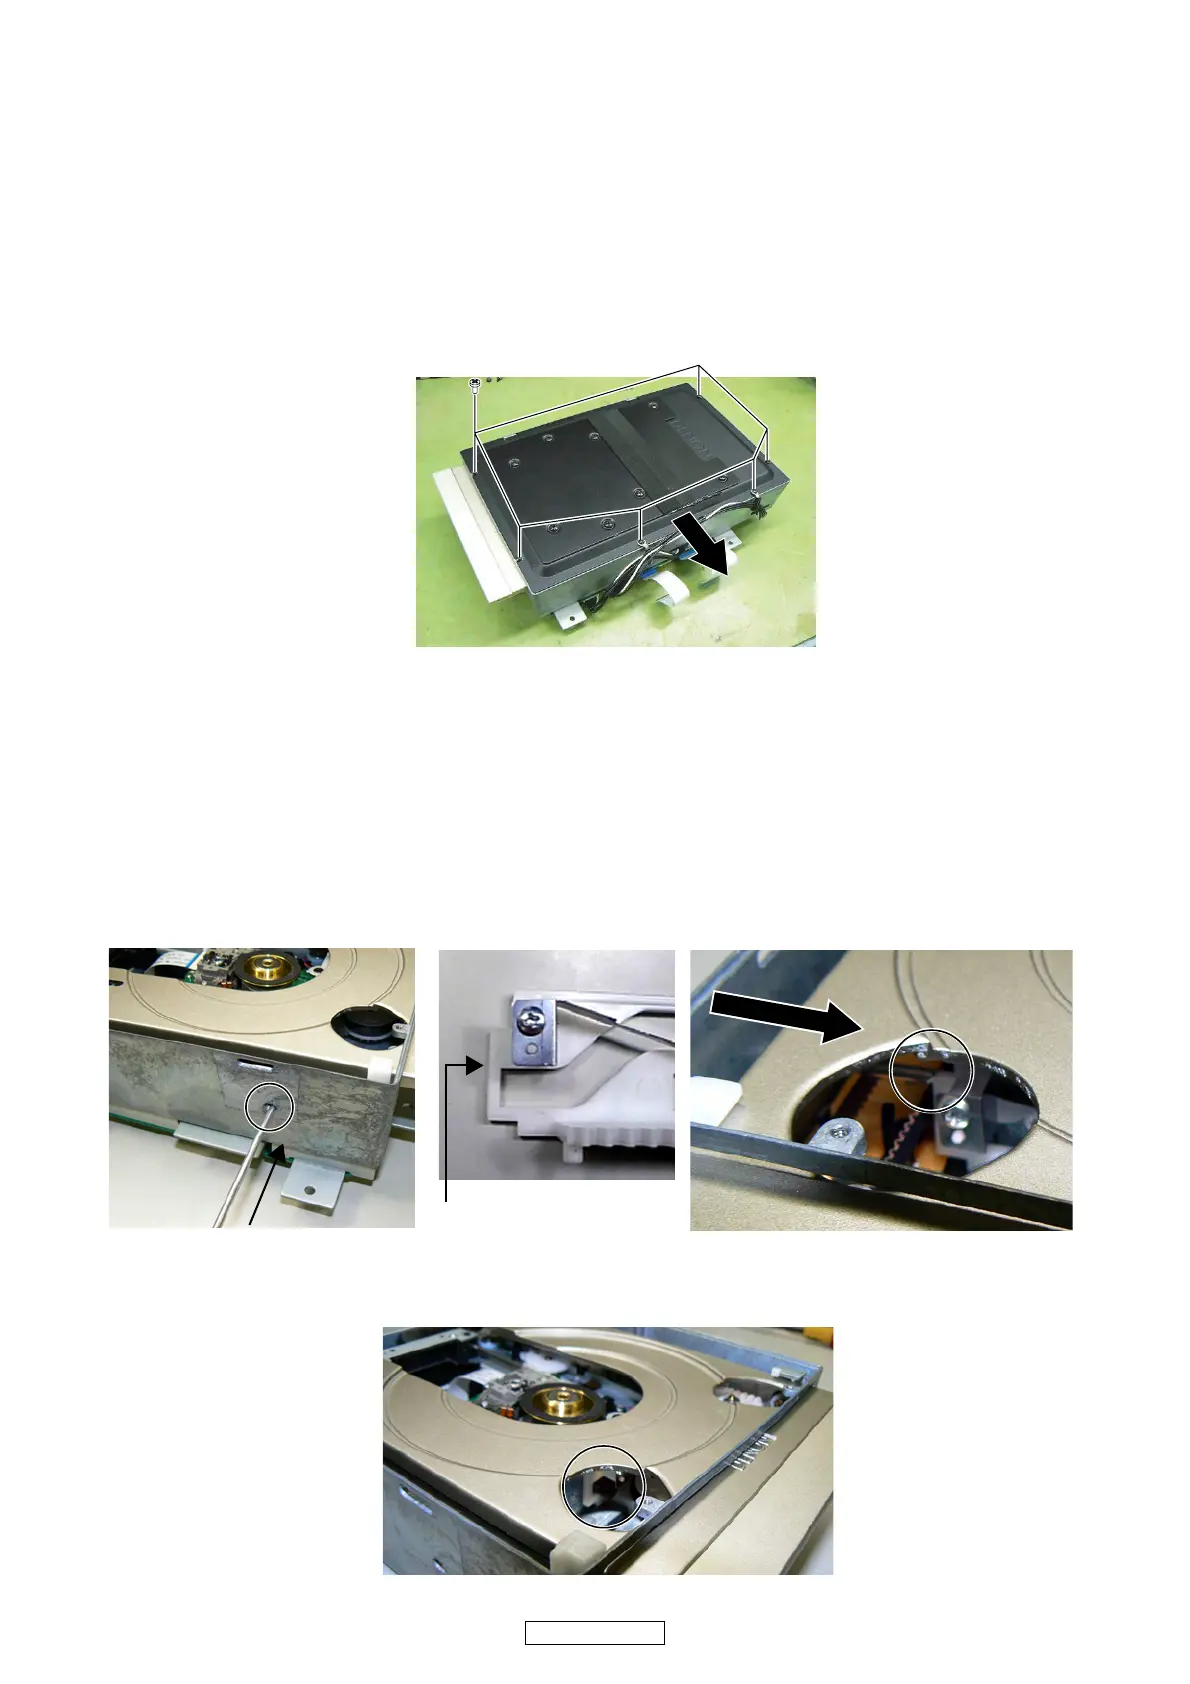
1. Topplate のはずしかた
(1) トッププレートを取り付けているネジ 6 本をはずします。
(2) トッププレートを矢印の方向にとりはずします。
2. トレイのはずしかた
(1) メカ本体左側に設けられた小判孔より Φ2.5 のステン
レス製 ( もしくは同等の硬さのもの ) の棒を差し込み
ます。
(2) トレイ左側にに設けられた孔より、SLIDECAM の側
面を捉えたことを確認し、SLIDECAM 側面をゆっく
り確実に押し込みます。この時、棒はスプリング取
り付け用突起を押さないようにします。(スプリング
が変形する可能性が高いため)
(3) トレイ左側に設けられた孔より、メカフレームの突
起部が写真に示す位置になっていることを確認しま
す。
HOW TO REPLACE TRAVERSE UNIT
Caution: The optical pickup can be damaged easily
by static electricity charged on human
body. Take necessary anti-static measures
when repairing around the optical pickup.
(Follow the procedure below in reverse order when
reassembling.)
1. Top plate disassembly
(1) Remove 6 screws, then detach Top Plate.
2. Tray disassembly
(1) Insert the stick made from the stainless steel of Φ 2.5
(or thing of equivalent hardness) from the hole of the
Mecha Unit left side.
(2) Check that the stick has touched the side of SLIDE
CAM, from the hole at the left on the Tray. And push in
SLAIDE CAM slowly securely. Don't push the projec-
tion which has attached Spring at this time. (Spring
may be warped)
(3) Check that the projection of Mecha Frame becomes
position of the photograph, from the hole at the left on
the Tray.
SLIDE CAM side