17
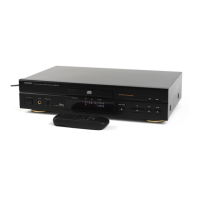
DCD-CX3
SERVICE MODE
1. Initial Setting Mode
(1) Procedure
(a) Initialize the CD player when µcom, peripheral parts of µcom, or Main P.W.B. has been replaced in servicing.
(b) All user setting will be lost and its factory setting will be restored when this initialization is made. Be sure to memorize your setting
for restoring again after the initialization.
(c) Carry out the following to restore factory setting mode.
When the set is stopped, press the and buttons on the main unit's control panel simultaneously to display
"INITIAL" on the FL tube, then keep pressing the two buttons until "INITIAL" turns off.
2. Test mode
(1) Entering the test mode
To enter the test mode, press the and buttons simultaneously while in the heat run mode.
Basically, the test mode should be set in the stop mode after the disc is loaded in the heat run mode.
(The heat run mode is entered by pressing the and buttons simultaneously to turn on the AC power.
When the heat run mode is set, the PLAY and PAUSE indicators light.)
Press and buttons simultaneously
Power turns on
Press and buttons simultaneously button
Test mode Excuting Heatrun
FL tube display when test mode entered
The discs playable in the Heart Run Mode are the discs shown on the table.
(2) Selecting the mode and deciding
The following modes are available.
Press the or button to select each mode and press the button to set that mode.
Press the button to return to the mode originally set when the test mode was entered.
(1) FL tube lighting mode : T0
(2) Tray open/close mode : T1
(3) Laser on/off (CD/DVD) mode : T2
(4) Servo adjustment value display mode : T3
(5) Trace mode (error rate display) : T7
(6) Servo properties measurement mode : TA
(7) Accumulated laser on time display mode : TB
(8) Monitor terminal setting mode : TD
(9) SACD watermark signal quality checking mode : TE
(10) Self test mode : TF
FLDisplay(Thedisplaypartof8digits)
12345678
Tes tMode
DVD-Audio DVD-Video Video CD CD CD-R CD-RW
DVD-R
DVD+R
DVD-RW
DVD+RW
SUPER
AUDIO CD
Recordable
Mark
(logo)
Playable
discs
サービスモードについて
1. 初期設定モード
(1) 手順
(a) サービスにて、マイコンやマイコン周辺部分やメイン基板を交換した場合は、CD プレーヤーの初期化をおこなってください。
(b) 初期化をおこなうとお客様が設定した内容が工場出荷状態に戻りますので、あらかじめ設定内容を控えておき初期化後に再設
定してください。
(c) セットの初期化を下記の手順でおこない、工場出荷モードに設定します。
セットが停止している時に、本体操作部の と ボタンを同時押しすると、FL 管に "INITIAL" が表示され、さらに
消えるまで同時押しを続けます。
2. テストモード
(1) テストモードの設定
テストモードの設定はヒートランモード時に と ボタンの同時押しでおこないます。
基本的にヒートランモード時にディスクローディング後の停止状態でテストモードに設定します。
( ヒートランモードの設定は と ボタンを同時押ししながらセットの電源を入れます。
ヒートランモードになると PLAY インジケータと PAUSE インジケータが点灯します。)
+ ボタンの同時押し
電源ON
+ ボタンの同時押し ボタン
テストモード ヒートラン実行
テストモード設定時の FL 管表示
ヒートランモード時は、下記ディスクの再生が可能になります。
(2) モードの選択と確定
モードには、次のモードがあります。
または ボタンで各モードを選択し、 ボタンで確定します。
ボタンでテストモード投入時の状態に戻ります。
(1)FL 管点灯モード : T0
(2) トレイ OPEN/CLOSE モード : T1
(3) レーザー ON/OFF(CD/DVD) モード : T2
(4) サーボ調整値表示モード : T3
(5) トレースモード ( エラーレート表示 ) : T7
(6) サーボ特性測定モード : TA
(7) レーザー ON 累積時間表示モード : TB
(8) モニタ端子設定モード : TD
(9)SACD ウォーターマーク信号品質確認モード : TE
(10)自己診断モード : TF
FL 管の表示 (8 桁の表示部 )
12345678
Tes tMode
DVD-Audio DVD-Video Video CD CD CD-R CD-RW
DVD-R
DVD+R
DVD-RW
DVD+RW
SUPER
AUDIO CD
Recordable
マーク
(ロゴ)
再生できる
デ
ィスク