6159924330 - 08/2020 - 27 -
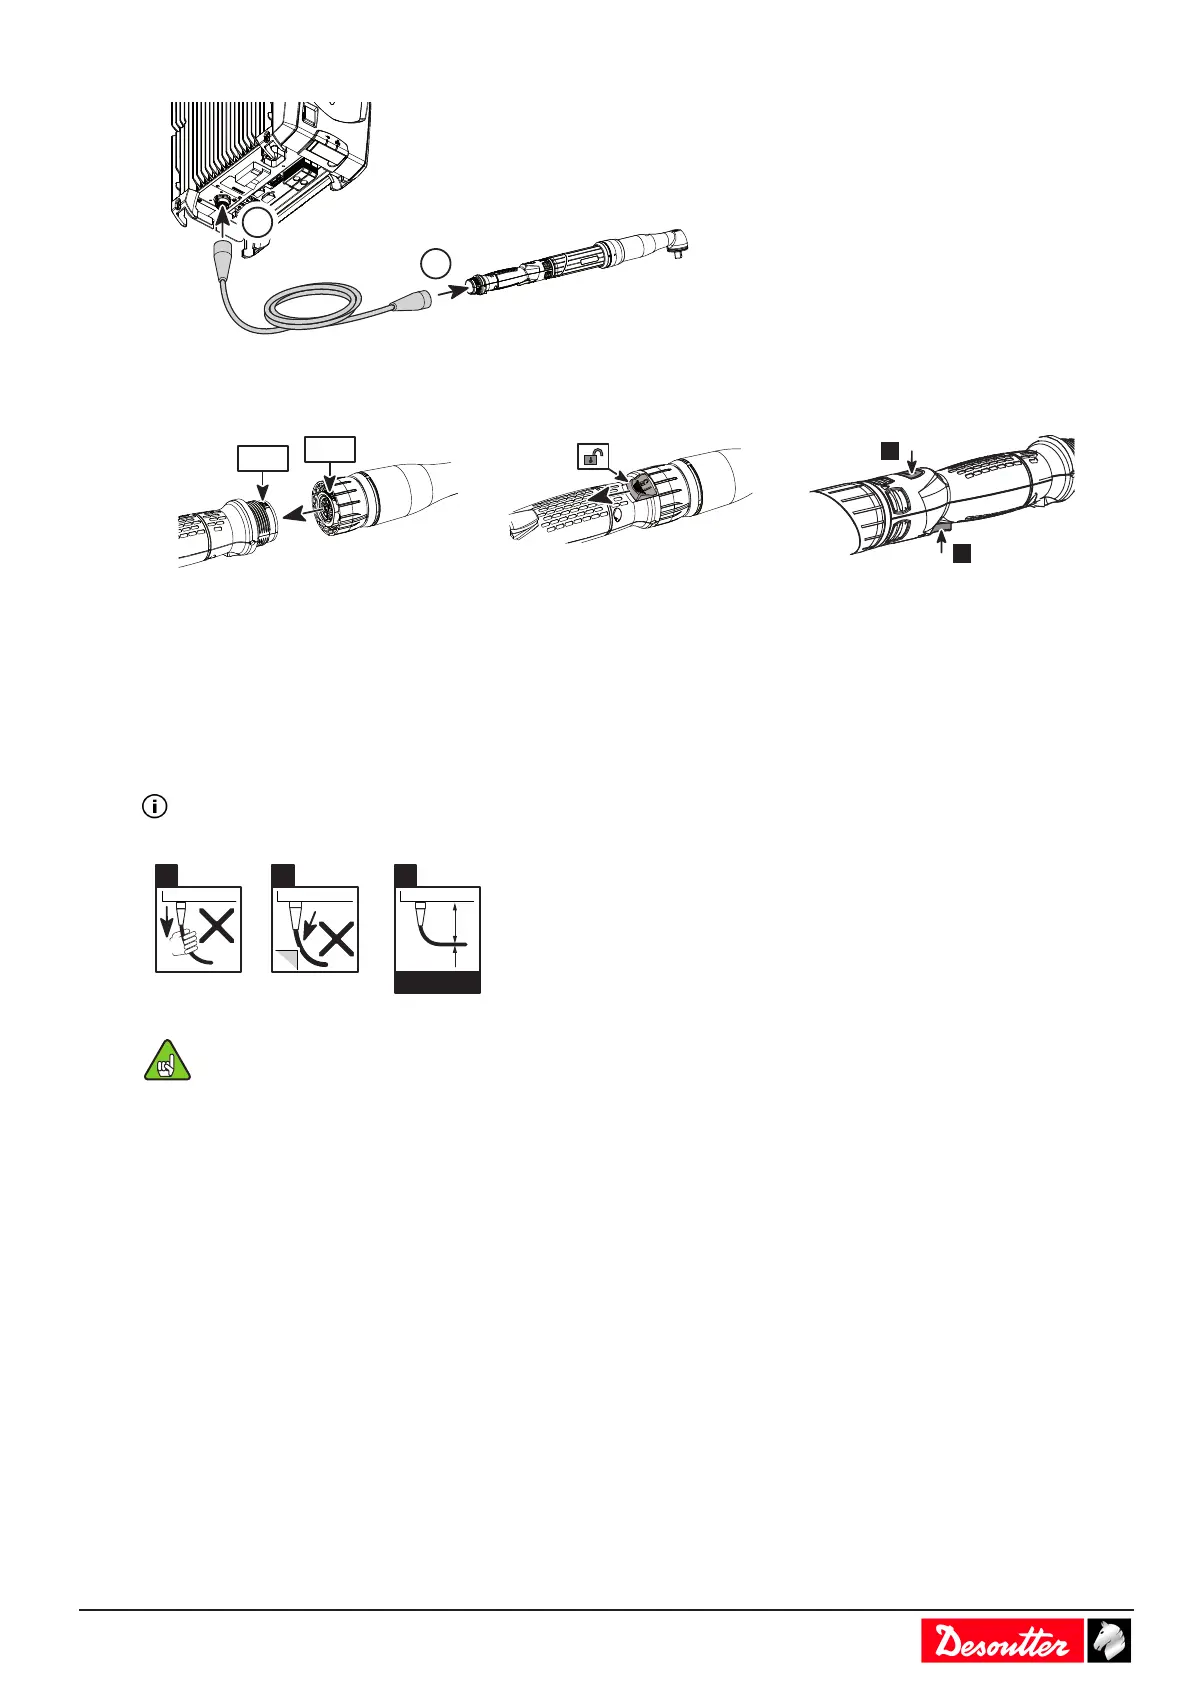
1. Connect the cable to the tool.
Plug the cable with help of TOP indication.
Tighten the nut. No need to tighten it too much.
The locking system will prevent any loosening.
To enable the loosening of the cable, actuate the locking trigger at the bottom of the handle.
2. Connect the cable to the controller.
Read before installing tool cables
Do not connect several extension cables together. Preferably use the longest length of extension cable and the
shortest length of tool cable.
Although our tool cables are designed to work under drastic conditions, we recommend that you check the fol-
lowing points for longer service life:
a - Any direct pull on the cable should be avoided.
b - Friction with the outer sheath should be restricted.
c - Bending radii should not be lower than 10 times the cable diameter.
Instructions for cables of fixtured tools
The cable shall not apply any traction to the tool. Any traction force on the cable (even low intensity depending on
the cable orientation) can generate a torque signal on the transducer.
Check the cables are long enough or clamp the tool cable on the mounting plate as shown below.

 Loading...