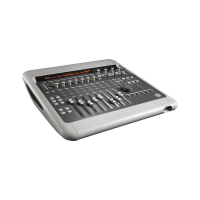
003 & 003 Rack Getting Started Guide88
To display the controls for a Dynamics plug-in:
1 Press the Dynamics switch to put 003 in
Channel View.
2 Press a lit Channel Select switch.
Controls for the first Dynamics plug-in on that
track are assigned to the rotary encoders and dis-
played in the LCD. Switched controls (such as
Master Bypass or Phase Invert) are controlled by
Channel Select switches.
3 To display additional pages of plug-in controls
(if any), press the Left and Right Page switches.
To cycle through all the Dynamics plug-ins on a
channel:
1 Press the Dynamics switch to put 003 in
Channel View.
2 Hold the Dynamics switch and repeatedly
press the track’s Channel Select switch.
If a plug-in window is open on-screen, it will up-
date to reflect the plug-in selected on the 003.
Insert Workflows in Channel View
When the Insert switch is enabled (lit), 003
identifies channels with any kind of insert as-
signed to them (software plug-ins or hardware
I/O inserts) by illuminating their Channel Select
switches. If no inserts are present for the current
bank of channels, no Channel Select switches
will be lit.
In this view, you can display inserts or plug-in
controls, bypass plug-ins, and assign inserts in
Assign mode.
To display the inserts on a track:
1 Press the Insert switch (Channel View section)
to put 003 in Channel View.
2 Press a lit Channel Select switch.
The names of all inserts on that track are dis-
played in the LCD. (While the names of hard-
ware I/O inserts are displayed, they have no ed-
itable parameters, so the Channel Select
switches and the rotary encoders have no effect
on them.)
To display the controls for a plug-in:
1 Press the Insert switch (Channel View section)
to put 003 in Channel View.
2 Press a lit Channel Select switch to display the
inserts for the corresponding track.
3 Press the Channel Select switch under a
plug-in name.
003 displays the plug-in controls across all chan-
nel strips. Controls are assigned to the rotary en-
coders. Switched controls (such as Master Bypass
or Phase Invert) are controlled by Channel Se-
lect switches.
4 To display additional pages of plug-in controls
(if any), press the Left and Right Page switches.
To cycle through all the inserts on a channel:
Hold the Insert switch and repeatedly press
the track’s Channel Select switch.
To bypass a single plug-in:
1 Press the Insert switch (Channel View section)
to put 003 in Channel View.
2 Press a lit Channel Select switch to display the
inserts for the corresponding track.
The Left or Right Page switch flashes when
an additional page is available.
For information on assigning inserts in As-
sign mode, see “Assigning Pro Tools Paths
(Input, Output, Sends, Inserts)” on page 92.
The Left or Right Page switch flashes when
an additional page is available.

 Loading...